
- Published on
Deploy a PHP application on EC2 with Github and AWS CodePipeline
- Authors

- Name
- Gbenga Oni
- @gbxnga
Learn Hand-On AWS Cloud EngineeringHERE
CodePipeline is a continuous delivery service that enables you to model, visualize, and automate the steps required to release your application and software.
CodePipeline automates the build, test and deploy phases of your application release process in the event that there is a code change, based on the release model you have earlier specified. It also integrates well with third-party services like Github.
In this article, we will create a simple PHP application, then we will push it to a Github repository and we will let CodePipeline handle the automatic delivery and deployment of the application to an EC2 instance.
Lets set the ball rolling.

Create a Simple PHP Application
Let's create a PHP application with this structure:
php-aws-codepipeline
├── index.php
├── vendor
├── package.json
├── .gitignore
├── scripts
│   └── favicon.ico
│   └── index.html
│   └── manifest.json
└── appscep.yaml
create a folder php-aws-codepipeline then create an index.php file.
The index.php file will have one job: display the current date and time in words. We will use the popular carbon package, an API extension for DateTime. We will need composer to install the package, so lets initialize composer:
composer require nesbot/carbon
This will install carbon, and also create acomposer.json file and vendor folder in our project directory.
Now that the carbon package is installed, lets edit the index.php file to display the current date and time. It should look something like this:
<?php
require 'vendor/autoload.php';

use Carbon\Carbon;

$date = Carbon::now();

echo $date->toDayDateTimeString();
Our simple PHP application is now ready.
But we need to indicate deployment specifications. We will do this by creating a appspec.yml file in the root folder. The appspec.yml is used by CodeDeploy to determine:
- What it should install onto your instances from your application revision in Amazon S3 or GitHub.
- Which lifecycle event hooks to run in response to deployment lifecycle events.
The Lifecycle event hooks run in this order:
ApplicationStop -> BeforeInstall -> AfterInstall -> ApplicationStart
version: 0.0
os: linux
files:
  - source: /
    destination: /var/www/html
    overwrite: true
hooks:
  BeforeInstall:
    - location: scripts/install_dependencies.sh
      timeout: 300
      runas: root
  AfterInstall:
    - location: scripts/install_composer_dependencies.sh
      timeout: 300
      runas: root
    - location: scripts/start_server.sh
      timeout: 30
      runas: root
  ApplicationStop:
    - location: scripts/stop_server.sh
      timeout: 30
      runas: root
Create a scripts folder where we will define our bash scripts to be executed at different stages of the lifecycle.
The first hook CodeDeploy will apply is the ApplicationStop hook and we have specified the bash script to be executed at that stage, the scripts/stop_server.sh file, which stops the Apache server currently running on the EC2 instance.
Create a stop_server.sh file in the scripts folder:
#!/bin/bash
service httpd stop
After the ApplicationStop hook is executed, CodeDeploy moves to the next stage, the BeforeInstall stage. we will install the Apache server in this stage. This ensures that Apache is installed if we are deploying on a new instance that happens not to have it installed.
Create a install_dependencies.sh file in the scripts folder:
#!/bin/bash
if ! [ -x "$(command -v httpd)" ]; then yum install -y httpd24 >&2;   exit 1; fi # install apache if not already installed
In the AfterInstall stage, we will define two bash scripts:
The install_composer_dependencies.sh script that first installs composer and then uses composer to install all dependencies specified in the composer.json file, since we don’t deploy the vendor folder on git repositories.
#!/bin/bash
cd /var/www/html
yum install wget -y
wget https://getcomposer.org/composer.phar
php composer.phar install
The start_server.sh script which starts the Apache server on our EC2 instance:
#!/bin/bash
service httpd start
Push PHP Application to Github
Our PHP application is now ready to be deployed to a Github repository.
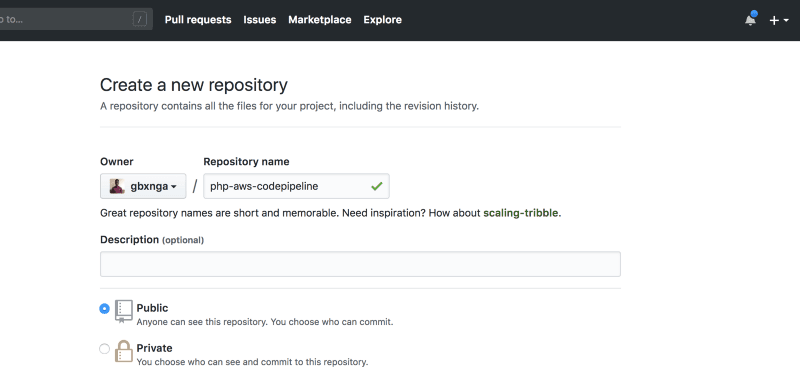
Create a new repository in your Github account:
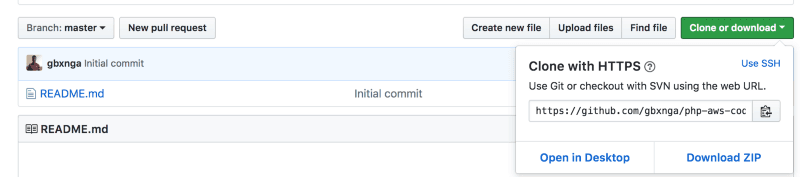
Copy the web url of the newly created repository:
We are going to initialize our local php-aws-codepipeline application as a git repository, then we will configure our newly created Github repository as its remote repository.
First create a .gitignore file in the root of your php-aws-codepipeline app and add /vendor to its first line. This will ensure we don’t push our vendor files to the Github repository.
Navigate to the php-aws-codepipeline in your command line and initialize it as a local repo:
git init
Add the files in the local repository and stage them for commit:
git add .
Commit the tracked changes and prepare them to be pushed to the Github repo:
git commit -m "First commit"
Set the remote URL of our local repository to that of our Github repo:
git remote add origin YOUR GITHUB REPO URL
Pull changes from remote :
git pull --rebase YOUR GITHUB REPO URL
Push update to Github repository:
git push --set-upstream origin master
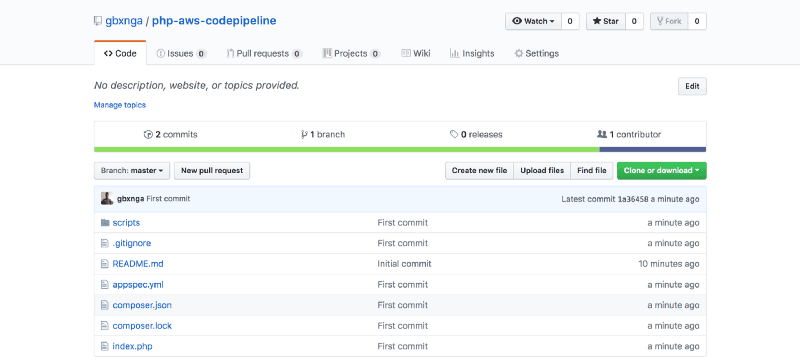
Your Github repo should look something like this. Make sure you did not push the vendor folder as its bad practice to do so.
Setting Up EC2
Navigate to your AWS console in your browser and click on the Launch Instance button on the EC2 service dashboard.

Select the Amazon Linux AMI 2018 and choose the t2.micro instance type, which is Free-Tier compatible.
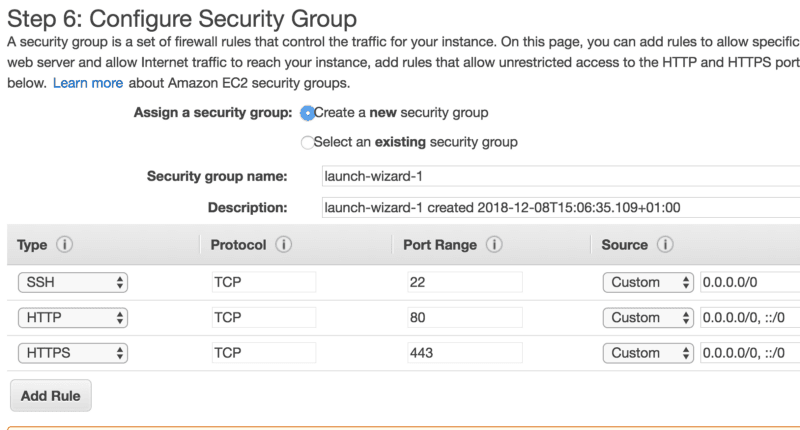
Skip through the 3rd, 4th and 5th steps without changing any of the default parameters. We will add a Security Group to allow SSH, HTTP and HTTPS connections to the EC2 instance.
Once that’s done, click on the Review and Launch button.
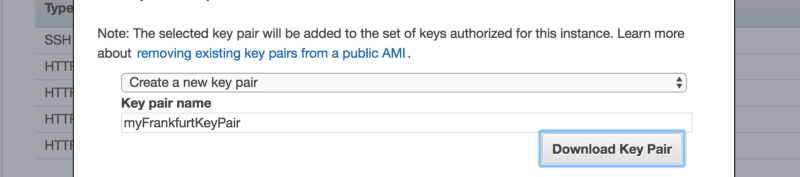
Now Launch the instance. You will be prompted to select or create a new key pair. Select “Create a new key pair” and name it myFrankfurtKeyPair.(I’m deploying the application in Frankfurt. You can choose to use another region) Once this is done, download the key pair which will be used to SSH into our instance.
Click on Launch Instances and wait for the instance to launch then click the View Instances button on the bottom right.

Lets add a tag to our instance. This will be used to identify it when configuring CodeDeploy.
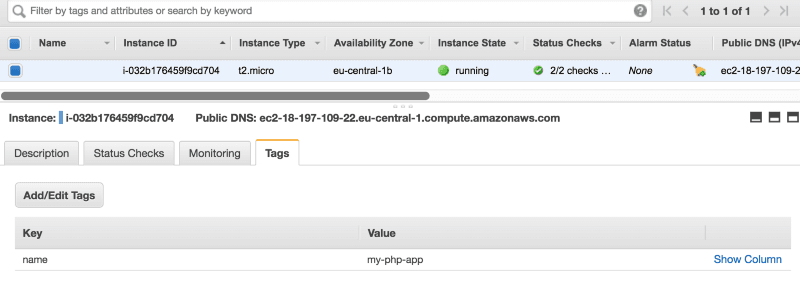
Select the instance from the checkbox on the left, then click on the Tags tab. Click Add/Edit Tags. Give it a key name and value my-php-app.
Create S3 Access Role for EC2 Instance
We need to create and attach a role to our instance that grants it access to S3 because the deployment files to be deployed exist there.
Navigate to IAM in Services. Click Roles then Create Role.
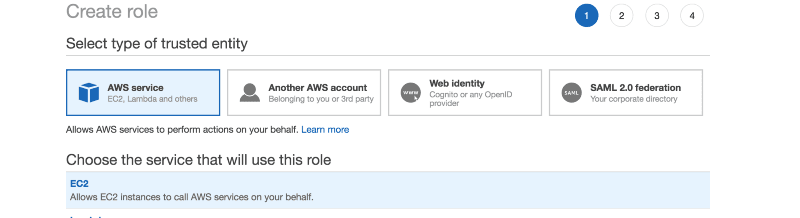
Select EC2 and click next.

Search for “s3" then select AmazonS3FullAccess.
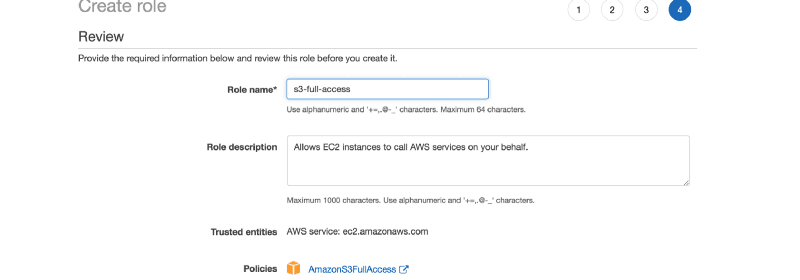
Proceed to Create role. Give it the name s3-full-access, then Click Create Role.
Now that the s3-full-access role is created, go back to the EC2 dashboard
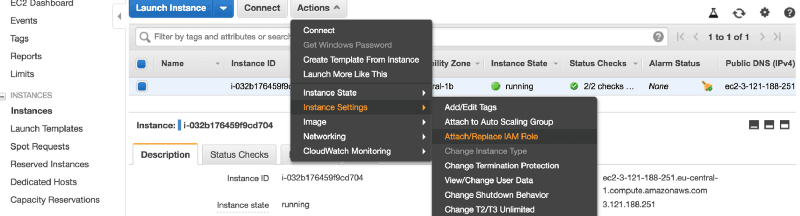
Select the instance, Click on Actions > Instance Settings > Attach/Replace IAM Role:
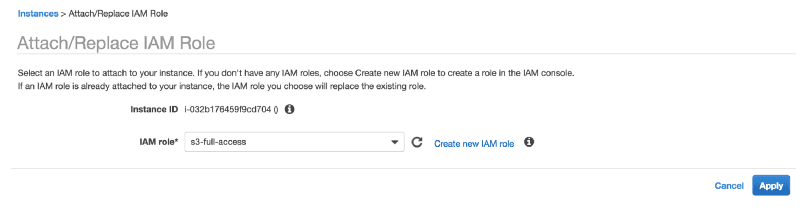
Select s3-full-access and click Apply.
We have now successfully granted the instance access to S3.
Install CodeDeploy Agent on EC2
We need to install CodeDeploy agent on our newly deployed instance though SSH.
The AWS CodeDeploy agent is a software package that, when installed and configured on an instance, enables that instance to be used in AWS CodeDeploy deployments.
Grab the IP address of the instance, then navigate, in your command prompt, to the location the myFrankfurtKeyPair.pem file was downloaded.
Note: This SSH connection guide is for MAC users. If you are using a windows PC follow this guide on Connecting to Your Linux Instance from Windows Using PuTTY.
Establish a connection to it:
ssh ec2-user@IP_ADDRESS_OF_THE_INSTANCE -i myFrankfurtKeyPair.pem
If all goes well, you should be prompted with the question Are you sure you want to continue connecting (yes/no)? , type yes and hit enter.
If you get any unprotected private key file warning, run the command:
chmod 400 myFrankfurtKeyPair.pem
Then try again.
Now that we’ve established a connection to our instance, lets run the script to update the instance, install Apache and PHP7.2, and also install CodeDeploy agent:
sudo su
sudo yum update -y

sudo yum install httpd -y
yum install php72 php72-mysqlnd php72-imap php72-pecl-memcache php72-pecl-apcu php72-gd php72-mbstring -y

sudo yum install ruby -y
sudo yum install wget -y
cd /home/ec2-user
wget https://aws-codedeploy-eu-central-1.s3.amazonaws.com/latest/install
chmod +x ./install
sudo ./install auto
sudo service codedeploy-agent status
service httpd start
chkconfig httpd on
After running the **sudo service codedeploy-agent status** command, you should get the response:
The AWS CodeDeploy agent is running as PID FOUR_DIGIT_NUMBER
Setting Up CodeDeploy
We need to create a service role for CodeDeploy.
In AWS, service roles are used to grant permissions to an AWS service so it can access AWS resources. The policies that you attach to the service role determine which AWS resources the service can access and what it can do with those resources.
Go to IAM dashboard through the Services menu.
Click on Roles and then Create Role. Select CodeDeploy and pick a use case. Select the first one(CodeDeploy) in this case.
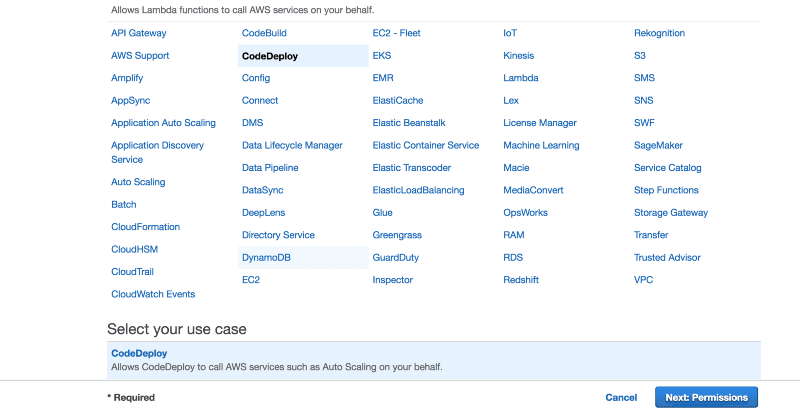
Click on Next Permissions. Skip through to the Review Stage. Give it the name code-deploy-service-role.
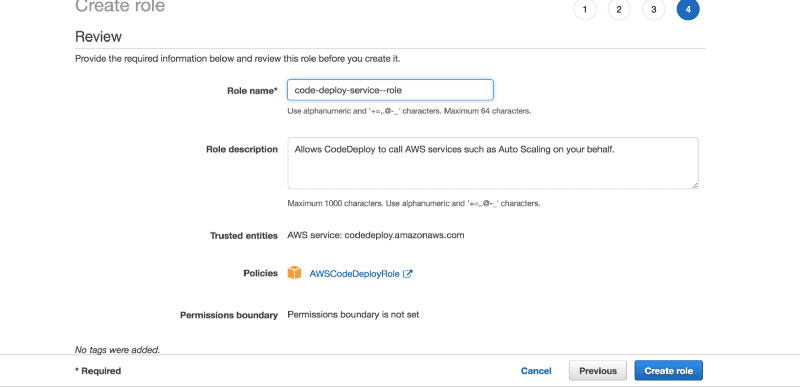
Once that’s done, click on Create role.
We have now created a service role that will be used to configure CodeDeploy for the app.
Click on Services and Select CodeDeploy:
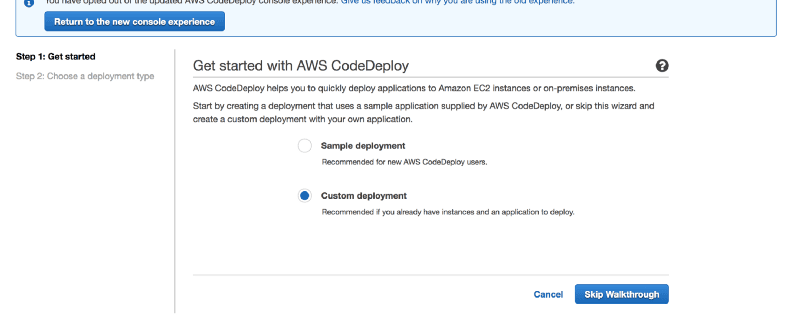
Click on Get Started and Select Custom Deployment. Skip Walkthrough.
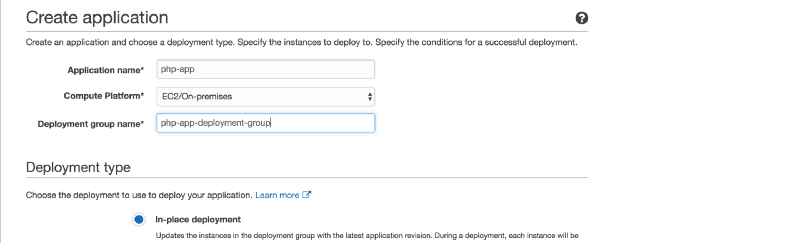
Name the Application php-app, and give it the deployment group name php-app-deployment-group
Scroll down to Environment Configuration and click on the Amazon EC2 instances tab. Select or type in the key name and value my-php-app. It should show the number 1, indicating there is an instance with the tag key name and value my-php-app.

Ignore every other parameter and scroll down to the very bottom, where we will assign the service role we initially created to CodeDeploy.
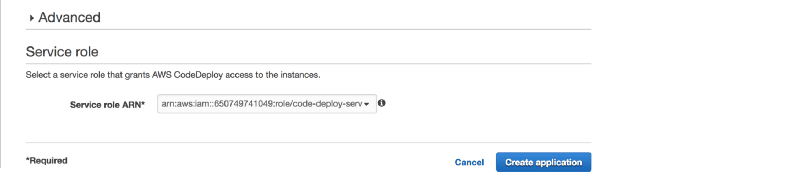
Select the code-deploy-service-role we created earlier, then click Create application.
You should get a Congratulations! The application php-app has been created. message.
Setting Up CodePipeline
Navigate to the CodePipeline Service.
If you are yet to use CodePipeline in your current region, you will see the splash screen. Click on the Get Started button.
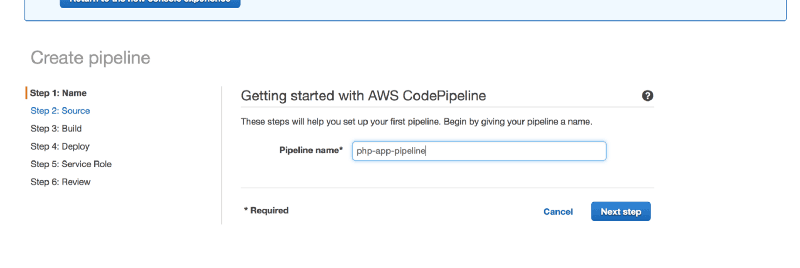
Provide a Pipeline name. I have chosen to name this php-app-pipeline. Click Next Step.
Select Github as Source Provider, then click Connect Github. You will be taken to a Github application authorization page. Grant CodePipeline access to you Github repositories.
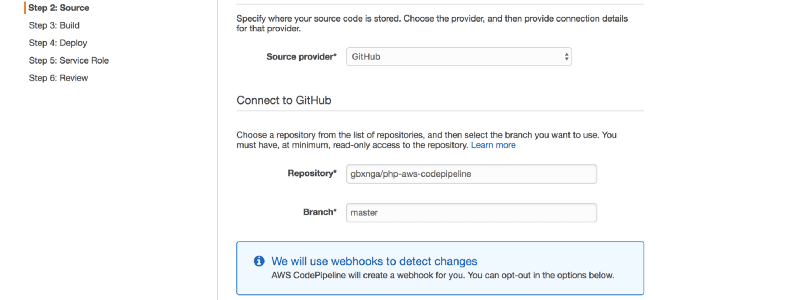
Select the php-aws-codepipeline repository you created initially and also branch master.
Click Next to Step 3 and select No build, then click Next Step.
In Step 4, Select AWS CodeDeploy as deployment provider.

Select the php-app and the php-app-deployment-group we created earlier. Click on Next Step.
You will be asked to select a service role for CodePipeline. Click on Create role. You will be taken to a new tab. Select Create a new IAM Role, leave the default role name or pick one that suits you. Click Allow.
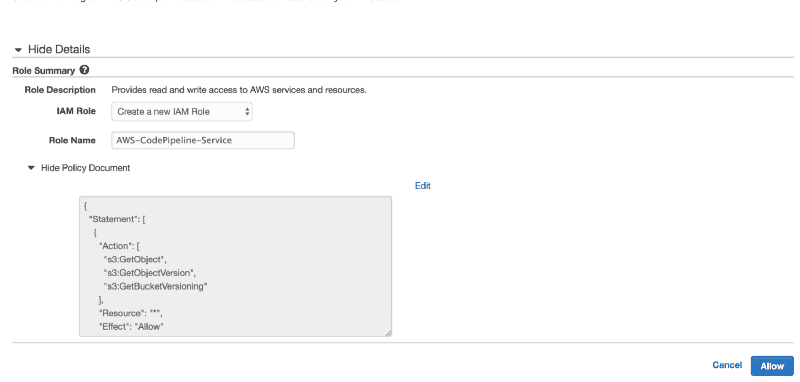
You will now be taken back to the previous tab. Click Next and then Create Pipeline.
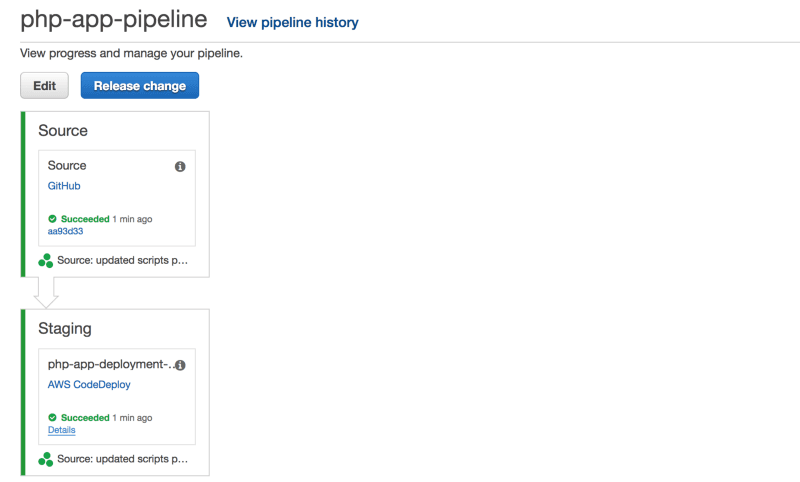
CodePipeline automatically deploys the last commit to the specified branch in your Github repository.
Subsequent commits to the master branch of the repository will now be automatically picked up and deployed to the EC2 instance.
Conclusion
In this article, we created a simple PHP application and a Github repository which it was pushed to. We also created a CodeDeploy application to automate the deployment of the PHP app to an EC2 instance. Lastly, we set up CodePipeline to manage the continuous deployment of the application.