
- Published on
Infrastructure as Code: Provision an EC2 Instance with AWS Cloudformation
- Authors

- Name
- Gbenga Oni
- @gbxnga
Learn Hand-On AWS Cloud EngineeringHERE
In this tutorial, you will learn about AWS Cloudformation and how it can be used to create and provision cloud infrastructure resources in AWS. By the end of the tutorial, you will be able to provision an EC2 instance on AWS with a simple text file.
Infrastructure-as-Code entails the provisioning and management of cloud resources and infrastructure through formatted, machine-readable files — The management of virtualization through automation.
Defining infrastructure as code ensures that code defined is reusable, track-able(think version control) and can be easily updated and refined.
AWS Cloudformation was initially defined in just JSON formatted document, but later on, in 2016, support for YAML format was introduced. You can also design resources visually with AWS Cloudformation designer.
It should be noted that AWS Cloudformation is available at no extra charge, that is, its usage is completely free. Although, you may be charged for the infrastructure and resources you provision with it.
Needed for this Tutorial:
1- An AWS Account ([create an AWS account](https://aws.amazon.com/free/)).

2- You have signed up for Cloudformation

3- You’re familiar with **YAML** (Sorry, we will be using YAML instead of JSON)
Create a Cloudformation Template
Let’s create a YAML formatted Cloudformation template:
Resources:
  Ec2Instance:
    Type: AWS::EC2::Instance
    Properties:
      InstanceType: t2.micro
      ImageId: ami-063dd30adbb186909 # Amazon Linux AMI in N.California
      Tags:
        - Key: Name
          Value: My EC2 Instance
        - Key: Type
          Value: Worker Instance
AWS Cloudformation has different sections, one of which is the Resources section where resources entities are defined.
The YAML code above describes an EC2 Instance resource. The name ‘EC2Instance’ is called the Logical ID of the resource. We also define its Type — An AWS Resource type and its Properties.
Under Properties, we specified the properties peculiar to EC2:
Instance type: An EC2 instance type(t2.micro, t2.small, c3.large, c3.xlarge etc). We have chosen t2.micro in this case.
Image ID: The ID of the AMI. An AMI ID is required to launch an instance and must be specified at this point or in a launch template.
Tags: These are the tags which will be applied to the provisioned EC2 resource.
Upload Cloudformation Template
Navigate to the Cloudformation section on your AWS console
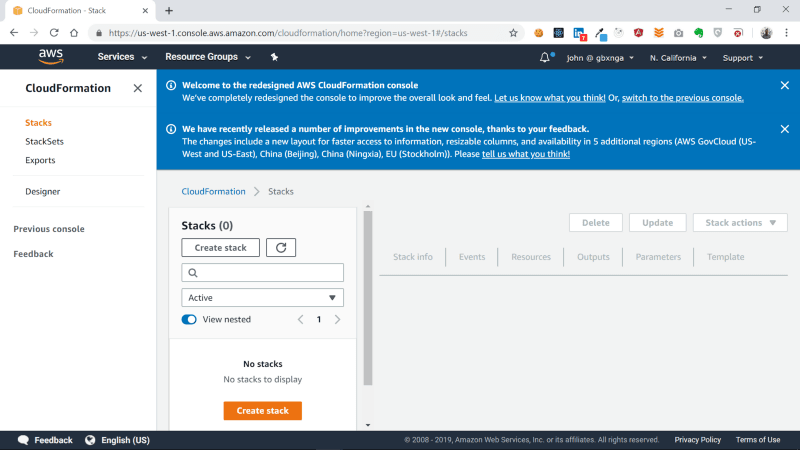
I’m using cloudformation in the North California region. You should see a welcome message if this is the first time you’re using cloudformation in that region.
Click on Create Stack button to begin
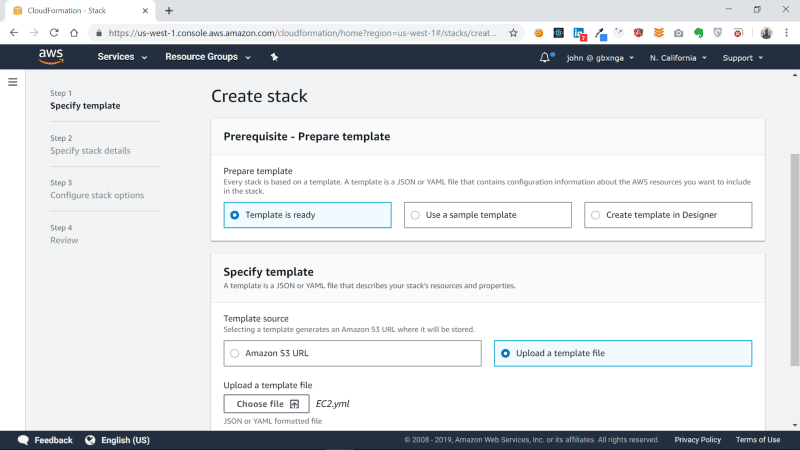
On the Prepare template section, select Template is ready, then choose Upload a template file in the Specify Template section. Click on the Choose file button and select the EC2.yml file you have created, then Click the Next button.
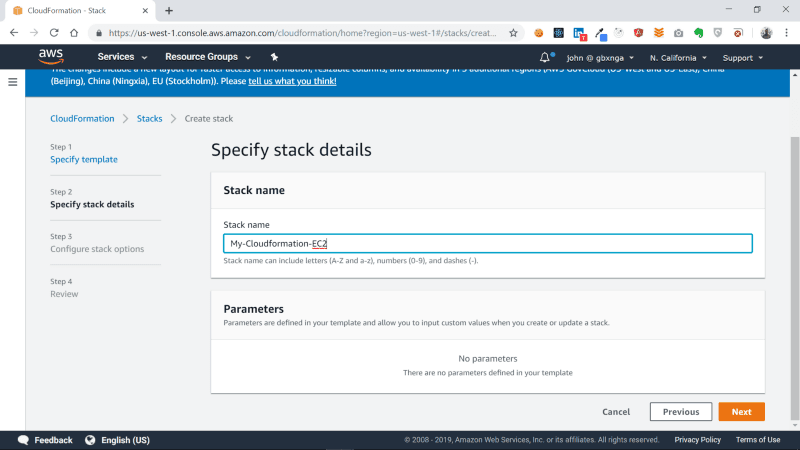
You will be taken to the next section. Here we specify a stack name for our cloudformation template. I’ve named it My-Cloudformation-EC2. Once you are done naming the stack, click on the Next button to proceed.
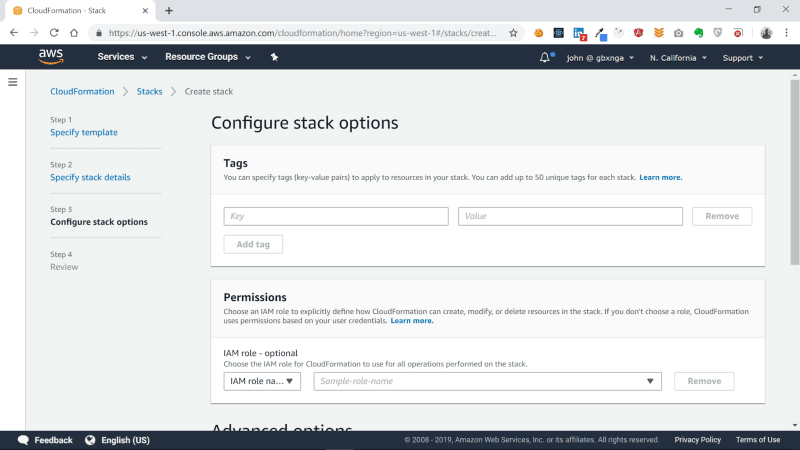
You will be taken to the Configure Stack Options page. The Tags, Permissions and the Advanced Options sections are outside the scope of this tutorial, so leave everything blank, scroll all the way to the bottom and click on the Next button.
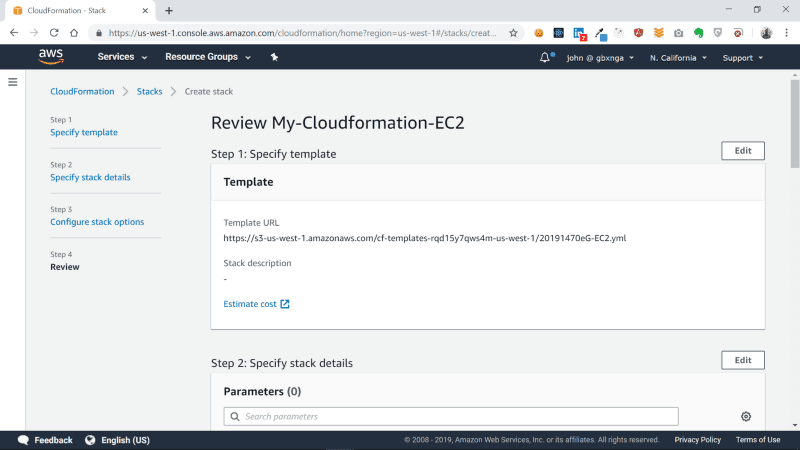
You will be taken to a Review page. Leave all blank and click the Create Stack button at the bottom-right of the page.
Cloudformation will now begin the creation of the resources defined in the template.
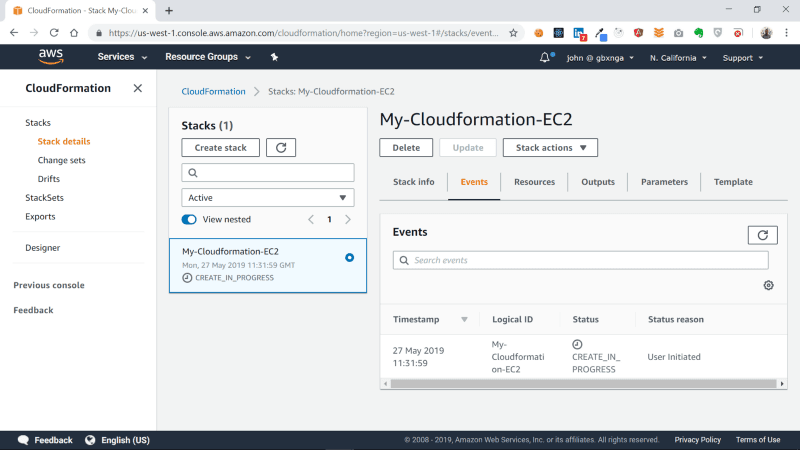
Wait a few minutes for the process to complete.
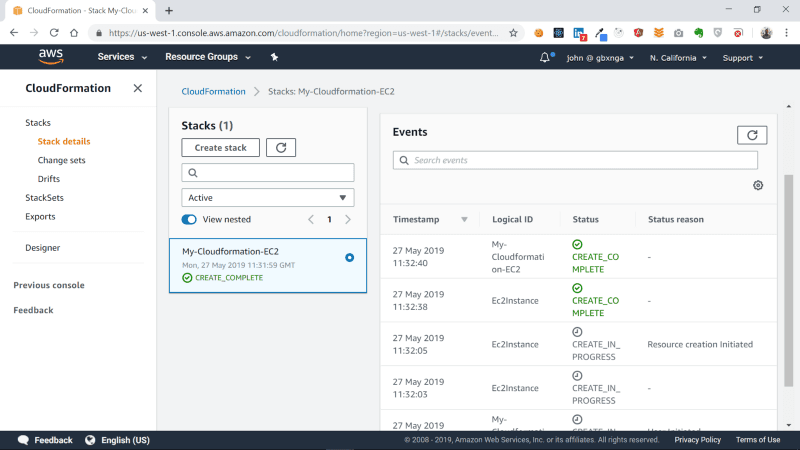
Cloudformation has now successfully created our EC2 instance. Lets navigate to the EC2 section to see the provisioned instance.
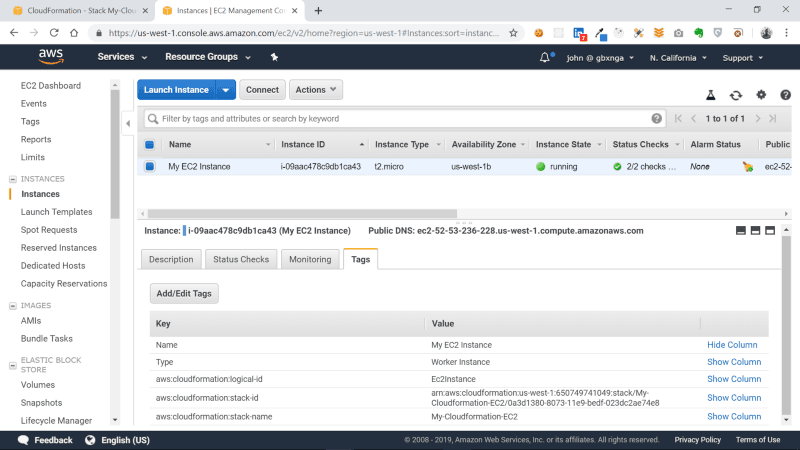
You can see the tags specified in the template in the Tags section of the EC2 instance.
AWS Cloudformation can be even more powerful than you can imagine. Lets get a little bit adventurous, shall we?
Install Apache on EC2 with User Data and Cloudformation
EC2 User Data is data passed to the instance at launch time. This data performs configurations tasks, runs scripts and commands when an instance is started.
We will pass a shell script that updates the EC2 instance, installs and starts Apache. Lastly, we will use the chkconfig command to ensure that the Apache service is started whenever the instance starts.
The User data is described in the UserData property of the EC2 instance. We use the AWS Cloudformation intrinsic function Fn::Base64 that returns the Base64 representation of an input string to pass our user data.
We also user the **!Sub** intrinsic function which substitutes variables in an input string with the values you specified. The character |, known as the pipe symbol means Literal Style. This allows us to enter texts as we normally would, without resorting to using characters like \n to signify end of line.
Resources:
  Ec2Instance:
    Type: AWS::EC2::Instance
    Properties:
      InstanceType: t2.micro
      ImageId: ami-063dd30adbb186909 # Amazon Linux AMI in N.California
      UserData:
        'Fn::Base64':
          !Sub |
            #!/bin/bash
            yum -y update

            # install apache
            yum install httpd24 -y

            # start server
            service httpd start
            chkconfig httpd on
      Tags:
        - Key: Name
          Value: My EC2 Instance
        - Key: Type
          Value: Server Instance
Now that the new template is ready, Navigate to the Cloudformation section on the console and create a new stack like we did earlier. I’ve named it my-Cloudformation-EC2-userdata
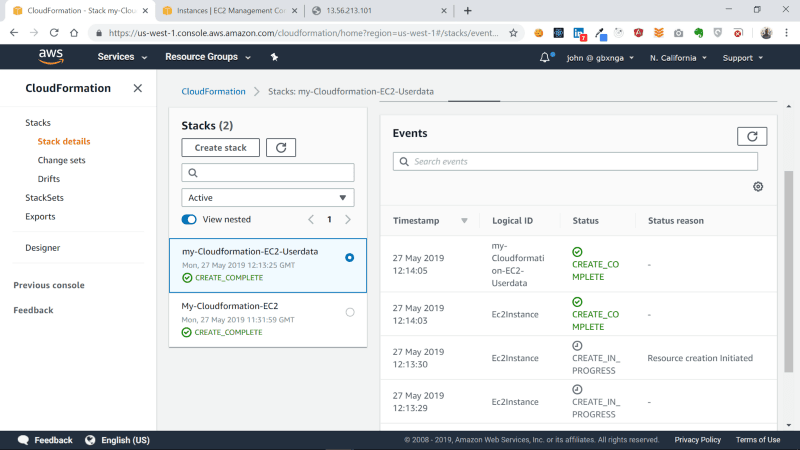
We have now successfully created the second EC2 instance with Cloudformation.
Navigate to the EC2 section on the console. You will see the second instance has now been provisioned:
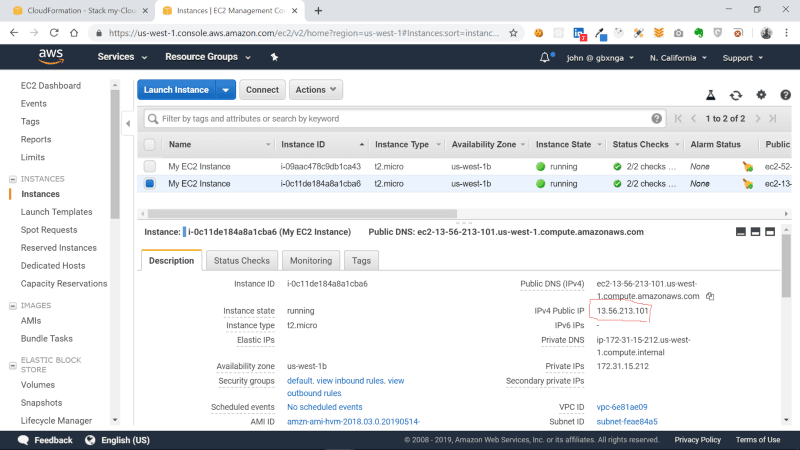
Copy the IP of the instance and paste it in your browser.
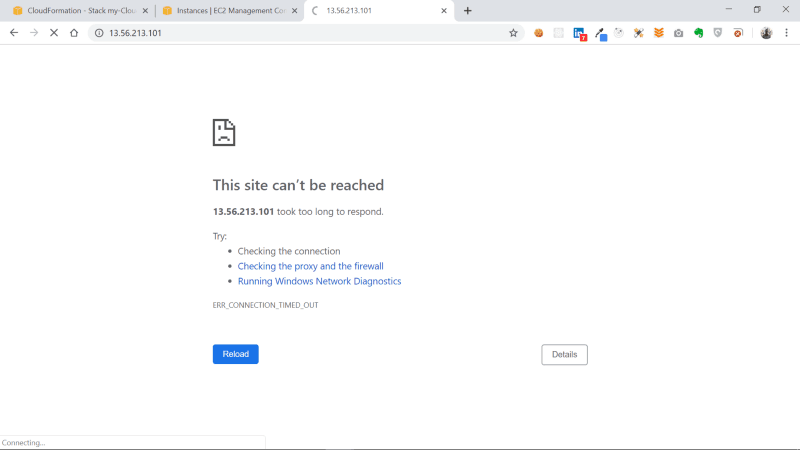
You should certainly get the connection timeout error, which means our browser cannot connect to our EC2 instance. This is because there’s no Security Group attached to the instance we created.
Create a Security Group with Cloudformation
Lets Create a Security Group Resource with Cloudformation:
Resources:
  EC2SecurityGroup:
    Type: AWS::EC2::SecurityGroup
    Properties:
        GroupDescription: Allow http to client host
        SecurityGroupIngress:
        - IpProtocol: tcp
          FromPort: 80
          ToPort: 80
          CidrIp: 0.0.0.0/0
  Ec2Instance:
    Type: AWS::EC2::Instance
    Properties:
      InstanceType: t2.micro
      ImageId: ami-063dd30adbb186909 # Amazon Linux AMI in N.California
      UserData:
        'Fn::Base64':
          !Sub |
            #!/bin/bash
            yum -y update

            # install apache
            yum install httpd24 -y

            # start server
            service httpd start
            chkconfig httpd on
      SecurityGroups:
        - !Ref EC2SecurityGroup
      Tags:
        - Key: Name
          Value: My EC2 Instance
        - Key: Type
          Value: Worker Instance
In the Security Group resource, we define a Type ( AWS::EC2::SecurityGroup) and also Properties. We have also specified Property SecurityGroupIngress of the Security Group resource which allows traffic to and fro Port 80 of the instance. This will allow our browser access the Apache server through the port.
We attach the Security Group to the EC2 instance through its SecurityGroups property with the !Ref intrinsic function that returns the value of the specified parameter or resource, in this case the Security Group Resource.
Update Cloudformation Stack
Lets update the cloudformation stack
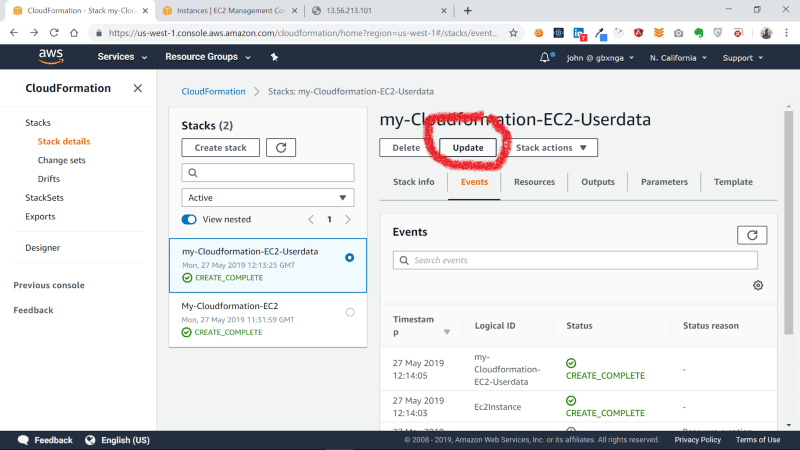
Navigate to the Cloudformation section, select the my-Cloudformation-EC2-userdata stack and click the Update button.
Check Replace current template and Upload a template file options. Chose the update Cloudformation template and click the Next button.
Leave all section in the Configure Stack Options page as is, scroll to the bottom and click the Next button.
You will be taken to the Review Page.
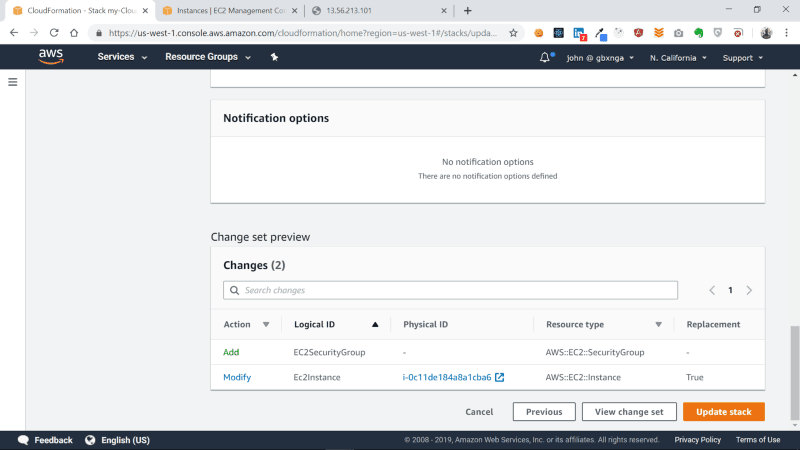
At the bottom of the Review Page, in the Changes section, you will see the resources that will be modified and added due to this update. Cloudformation also tells us in the Replacement column that the EC2Instance will be replaced because a critical property of it — the Security Group — is to be added.
Click on the Update Stack button.
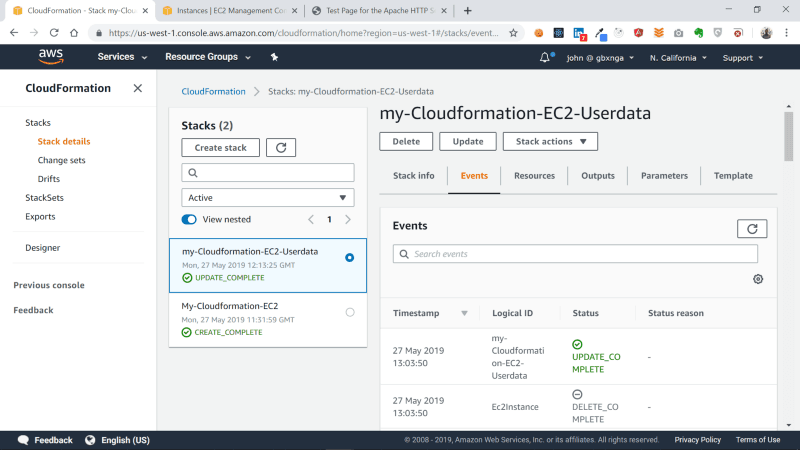
Our stack has now been successfully updated!
Navigate to the EC2 Section on the console to see the newly created instance and the terminated one.
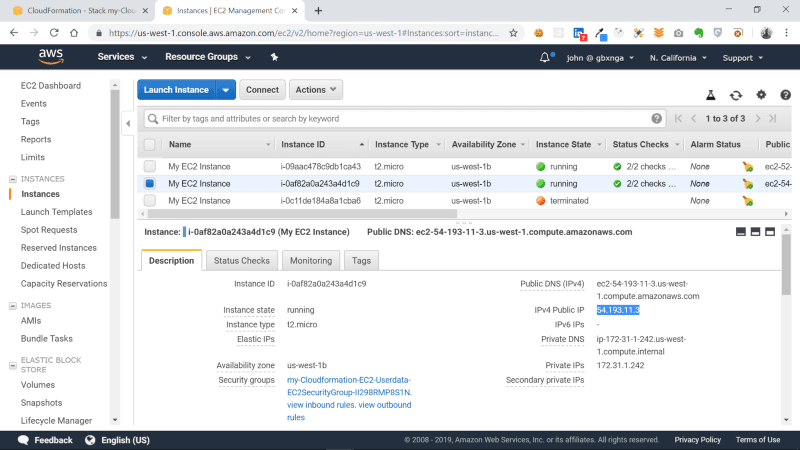
Lets confirm our EC2 instance can now be accessed on Port 80: Select the new instance then copy and paste the IP into your browser tab.
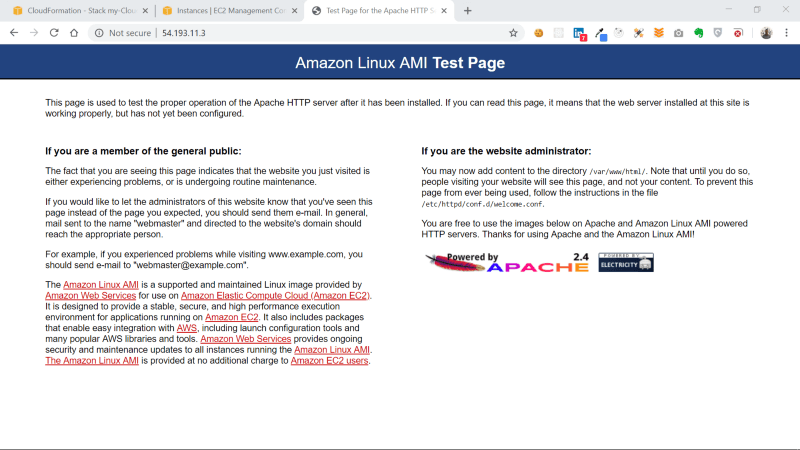
Our EC2 instance with Apache installed can now be accessed on Port 80.
Conclusion
In this tutorial, we went through the basics of AWS Cloudformation and Infrastructure-as-code. We also provisioned an EC2 instance with AWS Cloudformation then installed and configured Apache on it. Lastly, we updated the Cloudformation template to provision a Security Group that allowed traffic into the EC2 instance.