
- Published on
Deploy a Docker-ized Laravel Application to AWS ECS with CodeBuild
- Authors

- Name
- Gbenga Oni
- @gbxnga
Learn Hand-On AWS Cloud EngineeringHERE

Introduction
Containers have gradually become a wide-spread and widely accepted technology. They are a standard unit of software that encapsulates your code, together with the dependencies required to make them function. With containers, you can be certain your system will function in similar manner even in different environments.
A Docker container image is a lightweight, standalone, executable package of software that includes everything needed to run an application: code, runtime, system tools, system libraries and settings.
As cloud services have become an integral part of application deployment, the need to effectively build, deploy and maintain containers in the cloud has become imperative.
There are a number of services designed to help developers achieve this, one of which is AWS Elastic Container Service — A highly available and high performance container orchestration service. It allows you to run, scale and secure docker containers in AWS.
In this tutorial, you will learn how to docker-ize a Laravel application. You will also learn how to deploy the image built to EC2 with AWS Elastic Container Service.
We will use AWS CodeBuild — “a fully managed continuous integration service that compiles source code, runs tests, and produces software packages that are ready to deploy” — to build our container image whichwill be stored on AWS Elastic Container Registry(ECR), an Amazon managed docker container registry — think Docker hub.
Requirements
1. A Windows, Linux or Mac PC with Docker installed

2. An AWS Account

3. Laravel

4. A Github Account
Get Composer
Firstly, we need to download Composer, a PHP package manager. We will use Composer to install Laravel and other dependencies. If you don’t already have it installed, you can download it here.
Install Laravel
Create a fresh Laravel application using composer by running the following command.
composer create-project --prefer-dist laravel/laravel laravel-docker-aws
Docker-ize Laravel
Now that we Laravel installed, lets configure docker.
Create a Dockerfile
Create a Dockerfile in the root of your Laravel application. A Dockerfile is a text document that contains all the commands a user could call on the command line to assemble an image.
FROM php:7.3.2-apache-stretch

LABEL maintainer="Gbenga Oni B." \
      version="1.0"

COPY --chown=www-data:www-data . /srv/app

COPY .docker/vhost.conf /etc/apache2/sites-available/000-default.conf

WORKDIR /srv/app

RUN docker-php-ext-install mbstring pdo pdo_mysql \
    && a2enmod rewrite negotiation \
    && docker-php-ext-install opcache
Create a docker folder
Lets create a folder where all configuration files needed to build our docker image will be placed. Create a folder .docker in Laravel root folder that will contain our Apache config file (vhost.conf). The file will be copied into sites available folder on container at run time.
<VirtualHost *:80>
    DocumentRoot /srv/app/public

    <Directory "/srv/app/public">
        AllowOverride all
        Require all granted
    </Directory>

    ErrorLog ${APACHE_LOG_DIR}/error.log
    CustomLog ${APACHE_LOG_DIR}/access.log combined
</VirtualHost>
The vhost.conf file sets the document root for Apache to /src/app/public, this way, since our Laravel app will be copied to the /srv/app folder, we can access it directly.
Build Laravel Application Image locally
Once you’ve created the Dockerfile and the Apache configuration file in the .docker folder. Our application is now ready to be built.
Navigate to the root folder of the Laravel app in the command line then run
docker build -t laravel-docker-aws .
The docker machine will now build the image. This may take some minutes.
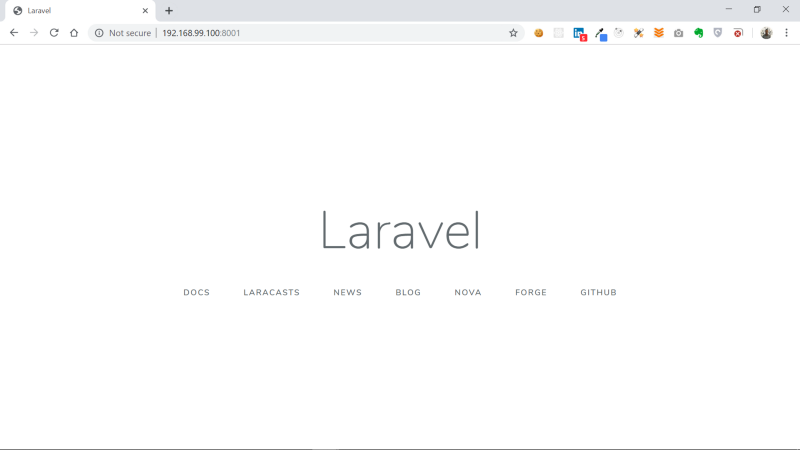
Now that the laravel-docker-aws image has been built, run the image with the following command:
docker run -it -p 8001:80 laravel-docker-aws
The container will now run with accessibility on port 8001:
Setup CodeBuild build spec file
According to AWS CodeBuild documentation, A build spec is a collection of build commands and related settings, in YAML format, that CodeBuild uses to run a build.
The buildspec.yml file must be named as is and should be placed in the root of the project folder. However you can give the buildspec file an alternate name or store it in a different location using the AWS CLI or AWS Cloudformation.
Create a buildspec.yml file and copy the code below into it:
version: 0.2

phases:
  install:
    runtime-versions:
      php: 7.3
  pre_build: # commands to be run before build
    commands:
    - echo Logging in to Amazon ECR....
    - aws --version
    # login to Elastic container registry
    - eval $(aws ecr get-login --region us-east-1 --no-include-email | sed 's|https://||')
    - REPOSITORY_URI=<YOUR ECR REPOSITORY URI HERE>
    - IMAGE_TAG=<YOUR IMAGE TAG HERE>
  build:
    commands:
    - echo Build started on `date`
    - echo installing composer..
    - composer install
    - echo creating .env file..
    - cp .env.example .env
    - echo generating app key
    - php artisan key:generate
    - echo Building the Docker image...
    - docker build -t $REPOSITORY_URI:latest .
    - docker tag $REPOSITORY_URI:latest $REPOSITORY_URI:$IMAGE_TAG
  post_build:
    commands:
      - echo Build completed on `date`
      - echo Pushing the Docker image...
      - docker image ls -a
      - docker push $REPOSITORY_URI:$IMAGE_TAG
The build spec contains: env, version, phases, artifacts, cache etc. We will be using just version and phases.
The version which is required, represents the build spec version. We will use version 2.0 — the recommended version. The phases, also required, describes the command to be executed during the respective build phases.
For a more in-depth understanding of the build spec file, go here to read more.
In the install phase, we specified a php 7.3 runtime version. The runtime-version parameter is required since we will be using the Ubuntu standard image 2.0
In the pre_build phase, we check the aws cli version and also attempt to login to AWS Elastic Container Registry. we also define the registry repository URI and the image tag.
In the build phase, we install composer, create the Laravel environment file and also generate an application key. Finally, we build the docker image and assign it a tag.
Note: make sure you specify the AWS region you’re working in in the pre_build phase command that logs you into AWS ECR:
eval $(aws ecr get-login) --region us-east-1 ....
Lastly, in the post_build phase, we push the docker image to the AWS ECR repository.
Our Laravel Application is now set for deployment.
Create an Elastic Container Registry Repository
Lets create an image registry where we will store the Laravel docker image.
Navigate the ECR dashboard on AWS Console.
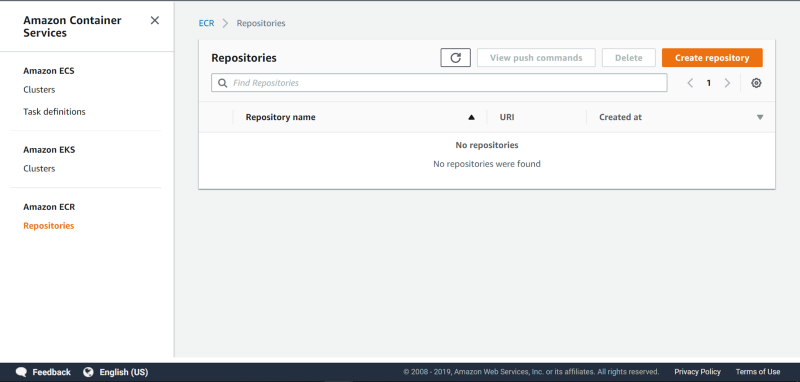
Click on the Create Repository button.
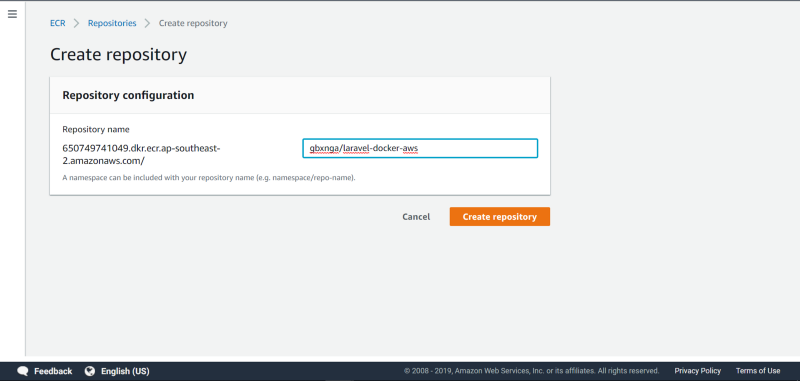
Define the Repository name. I have named mine gbxnga/laravel-docker-aws and click Create Repository.
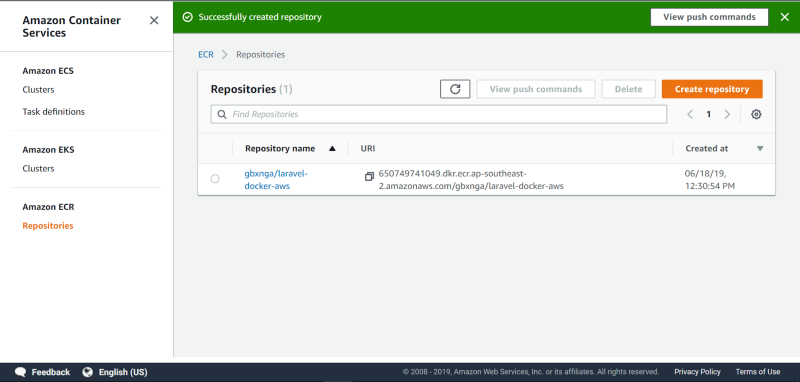
Once that’s done, copy the URI of the repository and paste it in the pre_build phase of the build spec file.
Also Set the IMAGE_TAG = 1.0
pre_build:

commands:

    ...

- REPOSITORY_URI=<AWS_ACCOUNT_ID>.dkr.ecr.ap-southeast-2.amazonaws.com/<YOUR_AWS_IAM_USERNAME>/laravel-docker-aws

    - IMAGE\_TAG=1.0
The ECR repository is now set. Container Images for our Laravel Application can now be stored on it.
Configure AWS CodeBuild
Lets configure CodeBuild on the AWS Console. Login to the AWS Console and navigate to the CodeBuild dashboard.
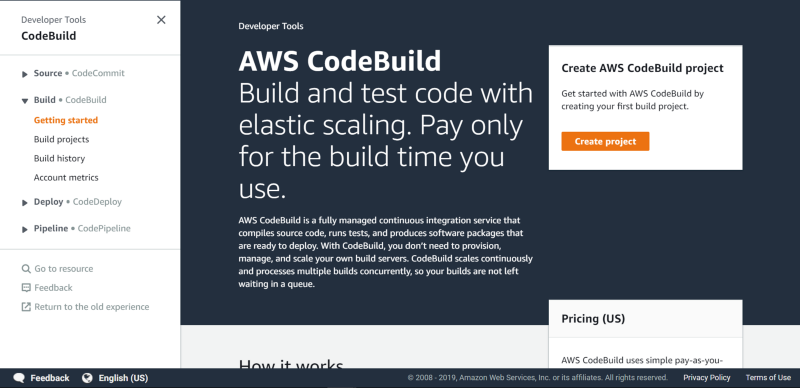
You will probably see the above Get Started screen if you’re using CodeBuild for the first time in the current region.
Create a CodeBuild Project
Click on Create Project to create a build project. You will be taken to a build project creation page.
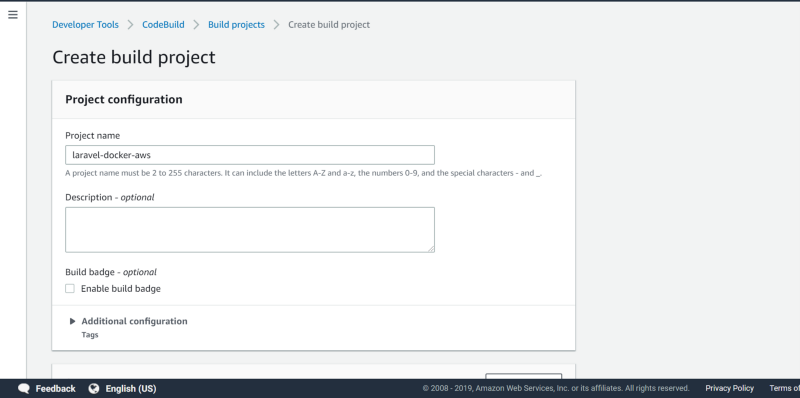
Give the project name. I have in this case named the build project laravel-docker-aws. You can skip the Description box as its optional.
Scroll down to the Source section below. This is where the source provider for the project will be specified.
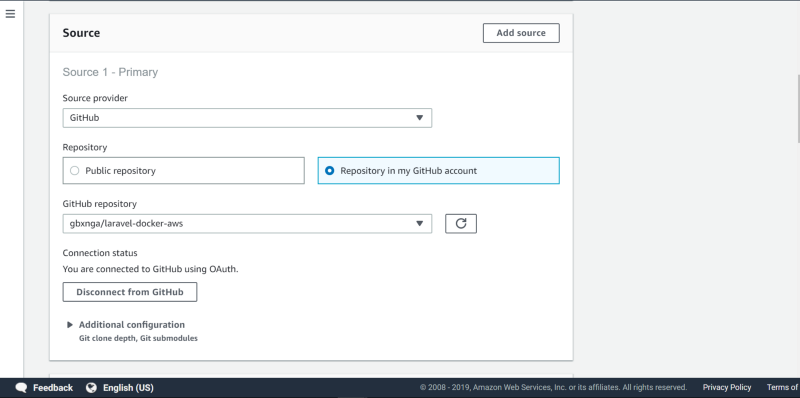
Select Github in this case. Make sure you have pushed the Laravel project containing the dockerfile, docker folder and the build spec file we created.
Click on the OAuth button. You will be asked to authorize AWS CodeBuild with your GitHub account.
Once thats done, check“Repository in my GitHub account”, then select the repository you pushed the Laravel app to.
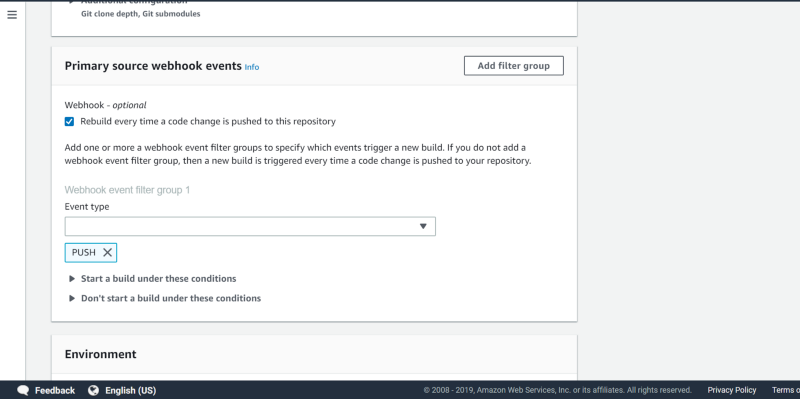
Scroll down to the Primary source webhook events section. Check the rebuild option then select the PUSH Event Type. This tells CodeBuild to rebuild the image every time a PUSH is made to the selected GitHub repository.
Scroll down to the Environment section
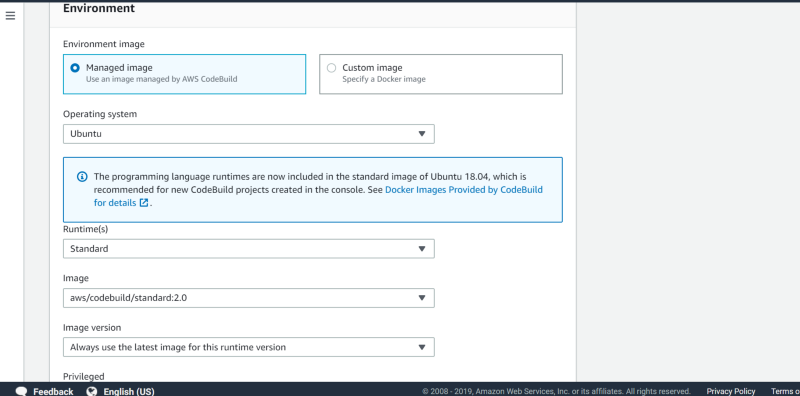
Choose Managed image as Environment Image and also the Ubuntu Operating System. Select the Standard Runtime and the aws/codebuild/standard:2.0 Image. Check the Privileged box and also New Service Role.
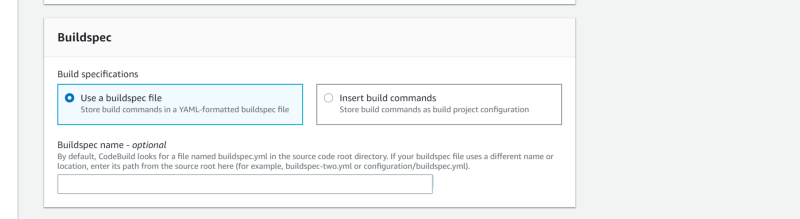
Leave the Buildspec Section as is, but make sure the Use a buildspec file option is checked.
Leave every other section as is, scroll all the way down and click the Create build project button.
The CodeBuild project will now be created.
Create ECR access IAM Policy for CodeBuild
In the post build phase of the build spec file, we attempt to push the docker image to AWS ECR. To successfully achieve this, we need to authorize the necessary action for CodeBuild.
We will do this by creating an IAM Policy that grants full access to the AWS ECR repository we just created, then attach it to the service role that was automatically created for the code build project we just created.
Navigate to IAM on the AWS Console then click on Roles.
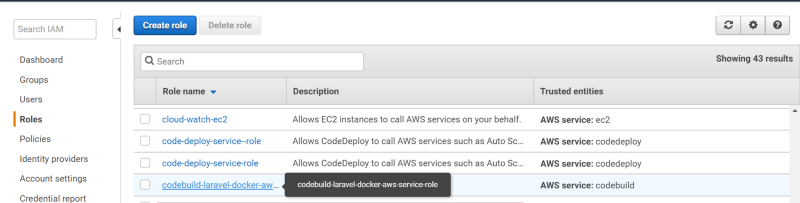
Look/Search for codebuild-laravel-docker-aws-service-role role.
Note that its likely the default name given to the code build project service role may be different. But if you named your build project laravel-docker-aws, the service role name will most likely be the same as the above.
Click on the codebuild-laravel-docker-aws-service-role role.
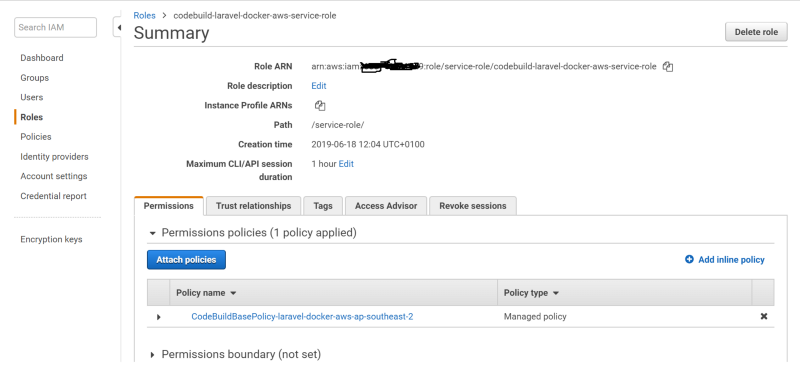
We will attach the Amazon managed AmazonEC2ContainerRegistryPowerUser policy to the service role.
Click on Attach Policies button.
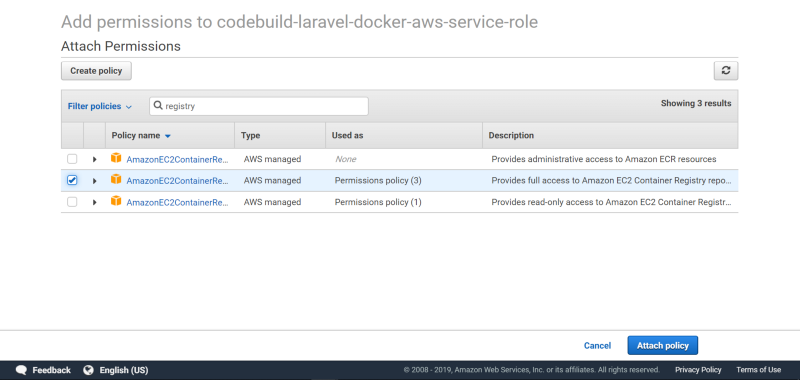
Search for and select the AmazonEC2ContainerRegistryPowerUser policy then click Attach Policy.
The policy will now be attached, granting CodeBuild power user access to the repository.
Build the Laravel Docker Image
Now that we have granted CodeBuild access to ECR, and we have configured our CodeBuild project, let’s initiate a build process for the Laravel docker image.
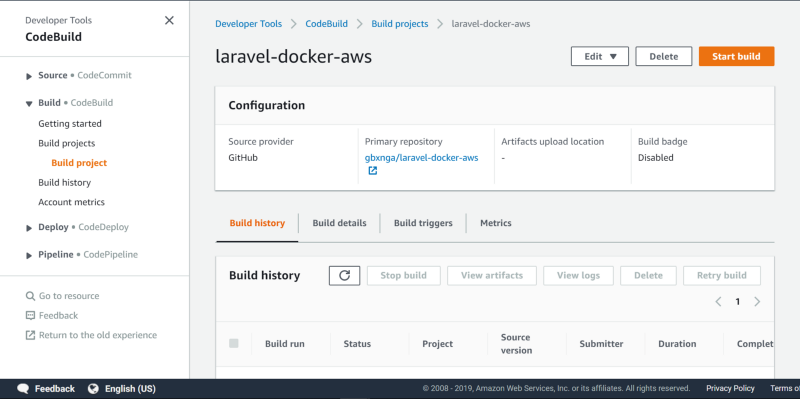
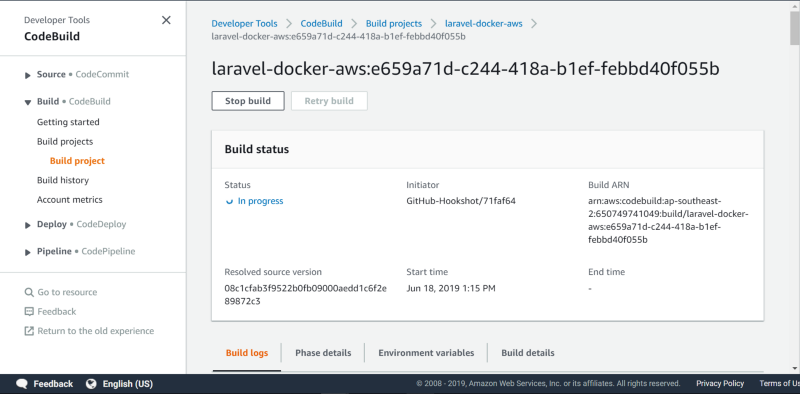
Navigate to the CodeBuild dashboard on AWS console. Click on the laravel-docker-aws CodeBuild project, then click the Start Build button to initiate a build process.
Click on the build project to see more information on whats happening.
Scroll down and Click on tail logs to see the build logs
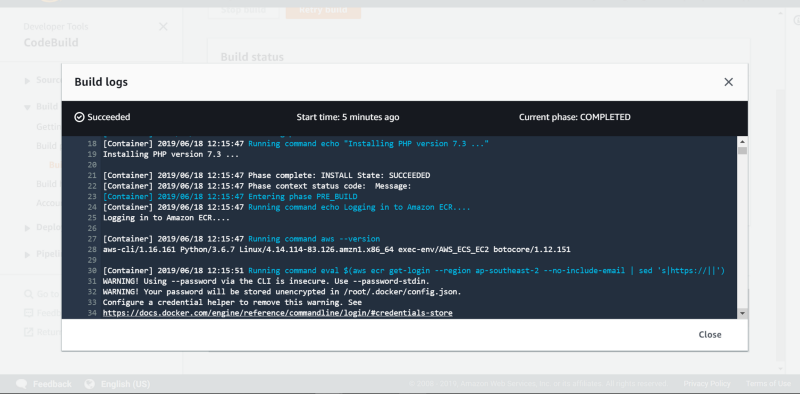
Wait for the build process to complete. It make take a few minutes.
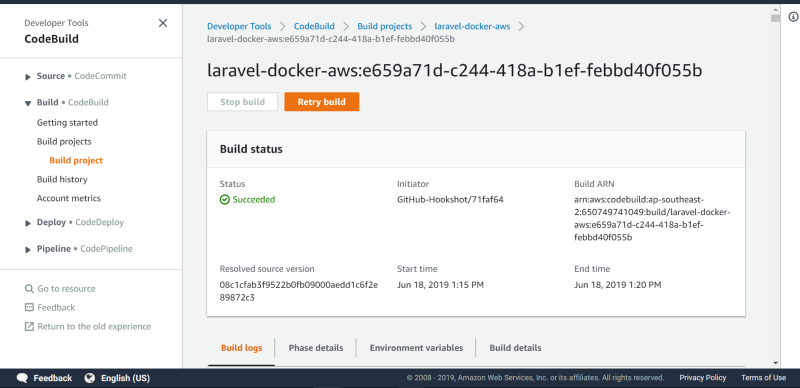
CodeBuild has now successfully built and pushed our docker image to the ECR repository.
Navigate to ECR dashboard to see the list of images in the laravel-docker-aws repository.
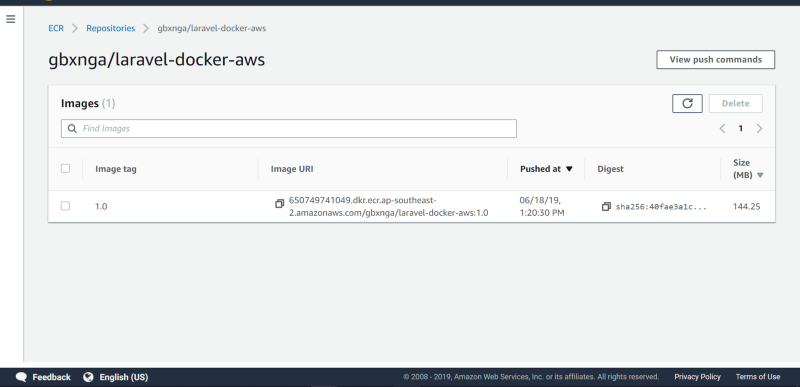
Copy out the Image URI. We will be needing it to setup ECS.
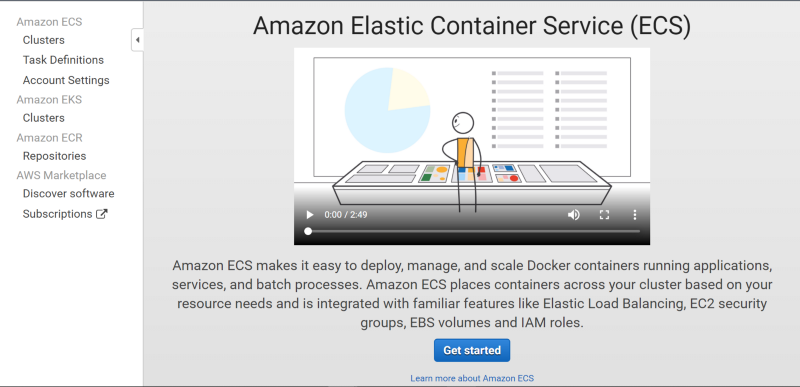
Setup AWS Elastic Container Service (ECS)
Now that we have created our docker image and pushed it to AWS ECR, we will make use of AWS ECS to run it.
Navigate to ECS dashboard on the AWS console.
Create Amazon ECS Cluster
Click on Clusters on the side menu.
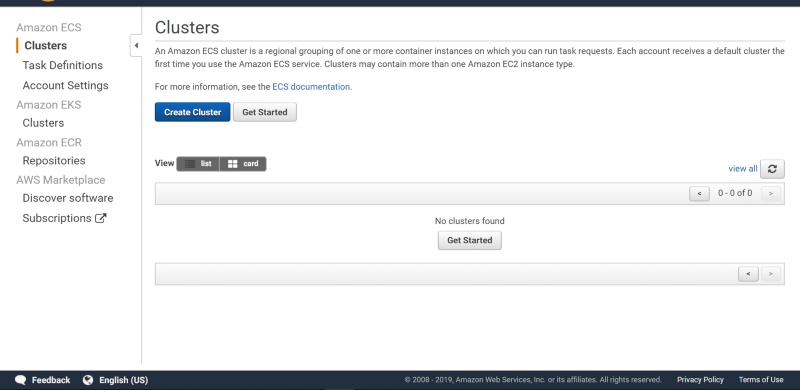
Click on the Create Cluster button
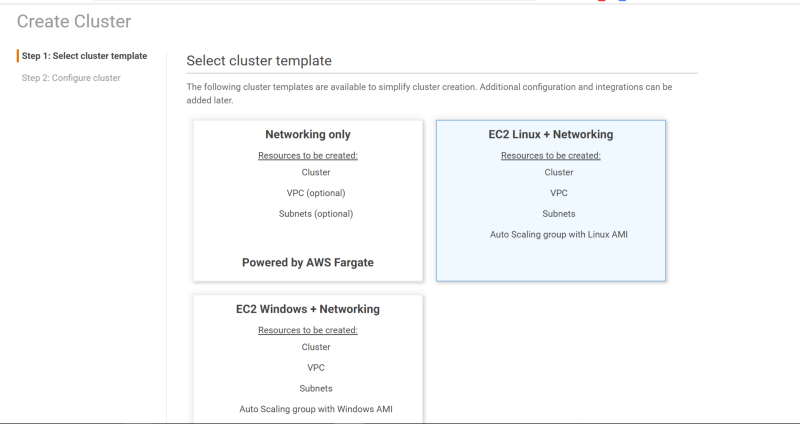
Select EC2 Linux + Networking, and proceed to the next step.
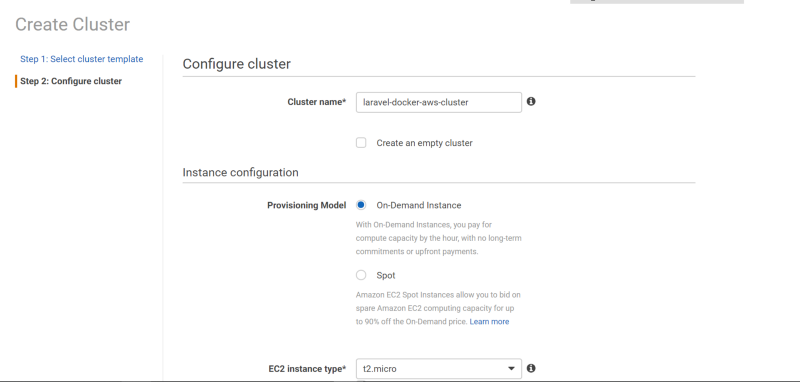
Give a name to the cluster. I have, in this case, named it laravel-docker-aws-cluster and select the t2.micro EC2 instance type.
Leave every other parameter as is in the Instance configuration section and the Networking section.
Make sure that a new role is to be created in the Container instance IAM role section if you haven’t already created the ecsInstanceRolerole.
Click the Create button at the bottom to initiate the creation process for the ECS Cluster.
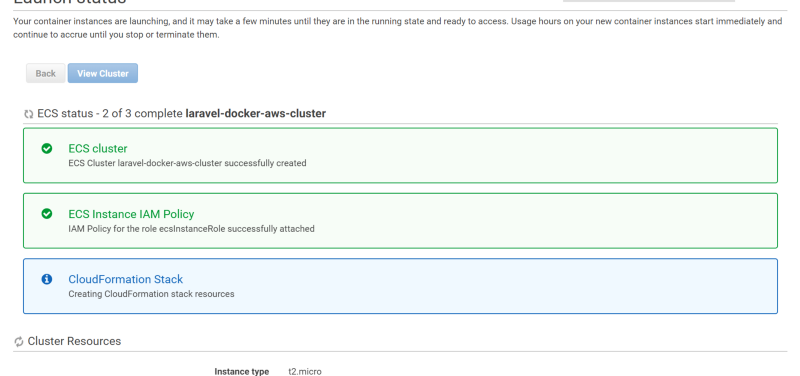
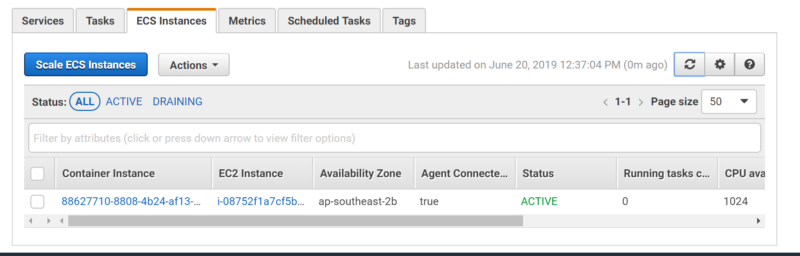
Once the Cluster has been successfully created, click on the View Cluster button at the top to view the created cluster.
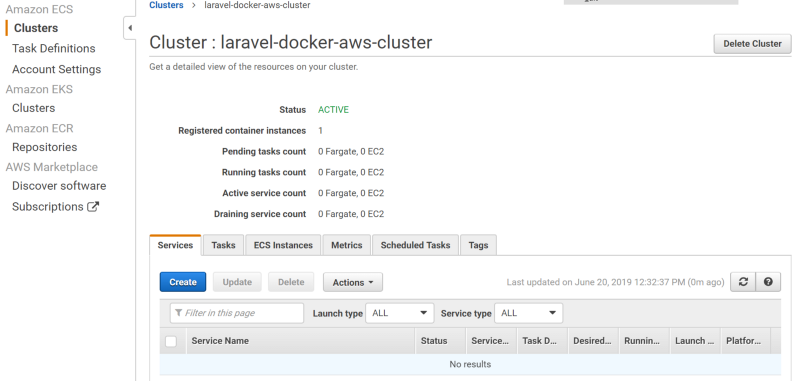
Clicking on the ECS Instances tab, you can see the t2.micro instance provisioned in the cluster.
Create AWS ECS Task Definition
“Task definitions specify the container information for your application, such as how many containers are part of your task, what resources they will use, how they are linked together, and which host ports they will use.”
Click on Task Definitions on the side menu, then click the Create new Task Definition button.
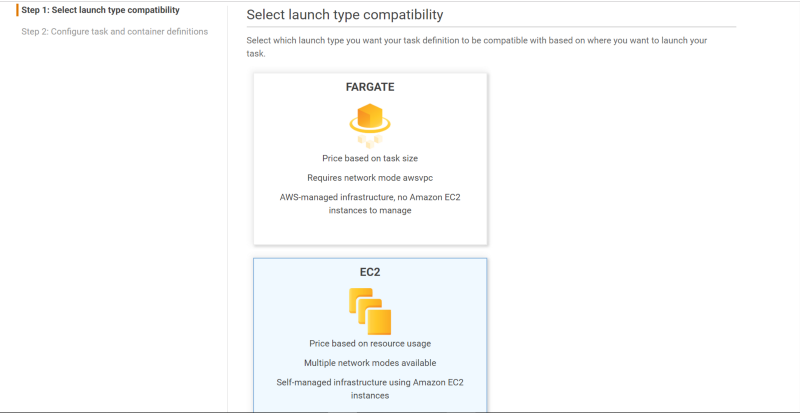
Select EC2 and proceed to the next step.
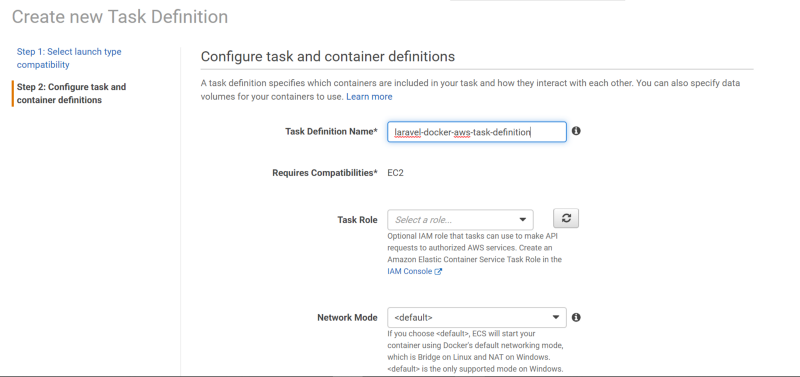
Give the task definition a name. Leave the Task role and Network Mode parameters as is.
Scroll down to Container Definitions and click Add Container.
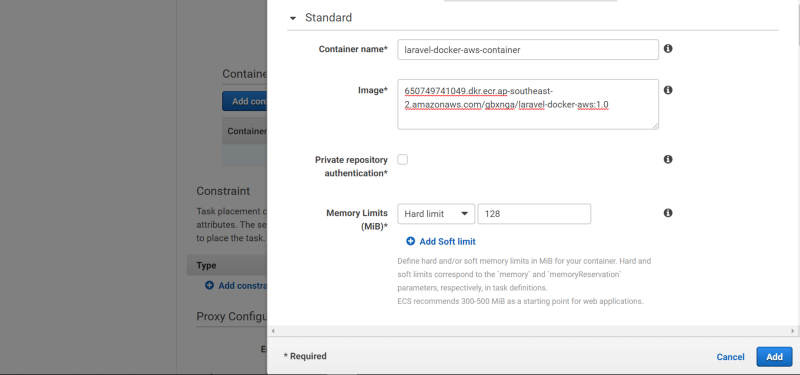
Specify a container name laravel-docker-aws-container . Also specify image repository URI.
Make sure you specify the image tag(1.0 or the new tag if you chose to use another).
Specify a Memory limit of 128MiB
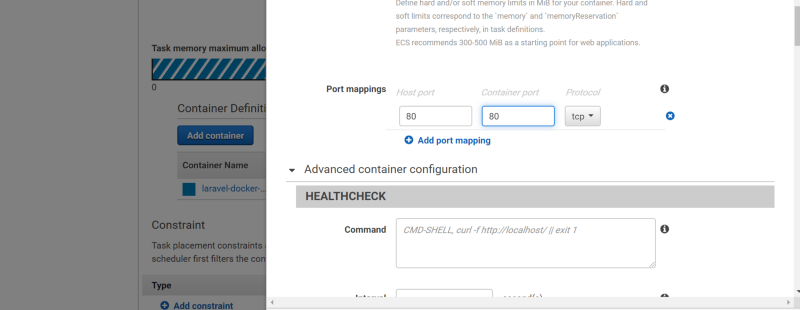
Scroll down to Port Mappings and specify the Host Port as 80 and Container Port as 80. This means that port 80 on the EC2 instance will be mapped to port 80 on the Laravel docker container.
Leave every other thing as is, scroll down and click Add.
Once you have added the container, scroll down and click on Create to create the task definition.
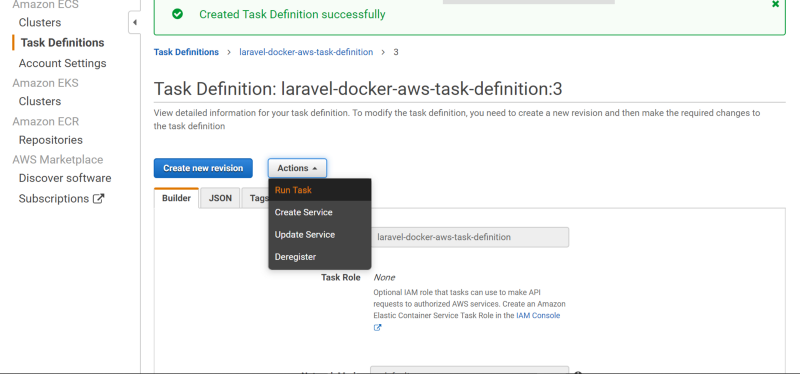
Now that the task definition has been created, we need to run the task.
Click on Actions and select Run Task.
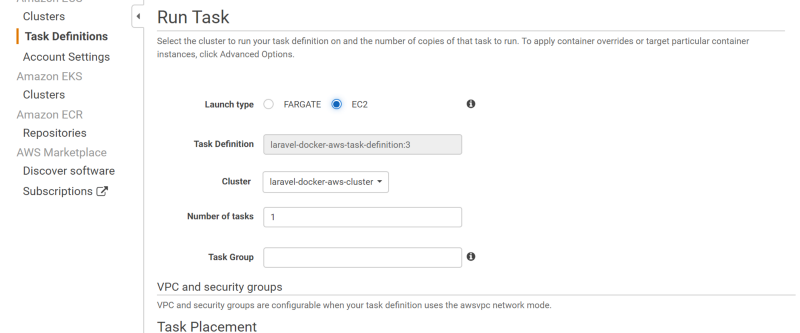
Select EC2, leave other parameters as is and click Run Task.
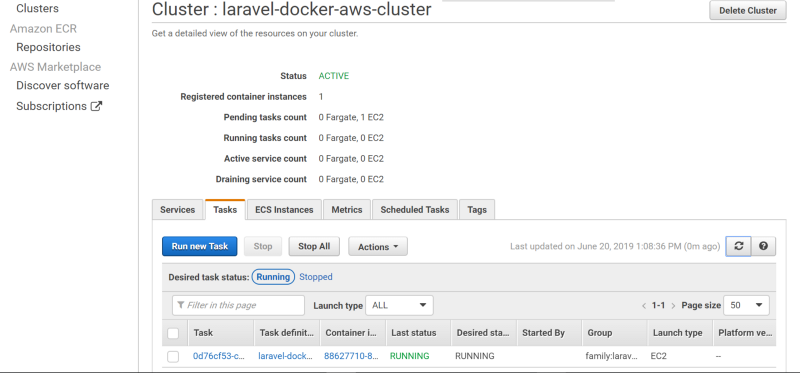
The task is now running on the laravel-docker-aws-cluster that contains the t2.micro instance.
Navigate to EC2 dashboard on AWS console.
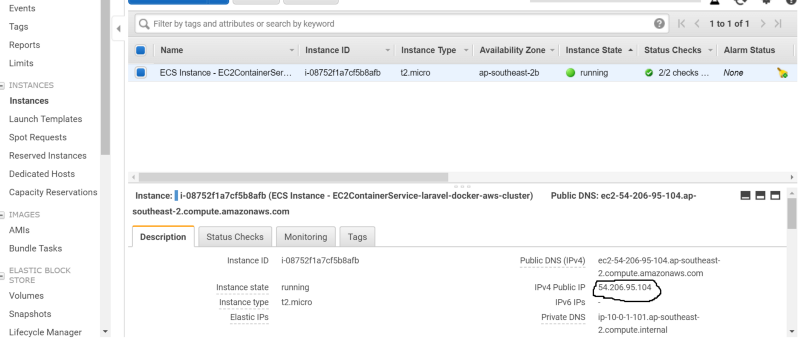
Copy the IP of the EC2 instance and paste it in your browser.

Our Laravel docker container is now running.
That’s it. You’ve successfully deployed and run a docker image on EC2 with AWS ECS.
Conclusion
In this article, we setup docker for a Laravel application. We also implemented CodeBuild to build the docker image, pushing it to Elastic Container Registry. Finally, we setup Elastic Container Service to run the image on Amazon EC2.