
- Published on
Deploy a Laravel App to Amazon EKS in 5 minutes
- Authors

- Name
- Gbenga Oni
- @gbxnga
Learn Hand-On AWS Cloud EngineeringHERE
In this article, we will setup a Kubernetes Cluster on Amazon‘s Managed Kubernetes Service — Amazon EKS. We will also package a Laravel Web Application as a docker image and deploy it to Amazon EKS.
Requirements
1. Docker

2. Docker Hub Account

3. An AWS Account

4. Laravel
Setup Laravel
Let’s setup a fresh Laravel Application. We will build a docker image for it and then deploy the image to Dockerhub.
You can choose to skip this step if you already have your Laravel App and its docker image on Dockerhub.
Install Laravel
We create a fresh Laravel application using composer:
composer create-project --prefer-dist laravel/laravel laravel-aws-eks
Navigate to the Laravel App:
cd laravel-aws-eks
Create Laravel Dockerfile
We will create an Apache virtual host file (.docker/vhost.conf) for Laravel:
<VirtualHost *:80>
    DocumentRoot /srv/app/public

    <Directory "/srv/app/public">
        AllowOverride all
        Require all granted
    </Directory>

    ErrorLog ${APACHE_LOG_DIR}/error.log
    CustomLog ${APACHE_LOG_DIR}/access.log combined
</VirtualHost>
FROM php:7.2-apache-stretch

LABEL maintainer="Gbenga Oni B. <onigbenga@yahoo.ca>" \
      version="1.0"

RUN apt-get update && apt-get install -y \
    build-essential \
    mysql-client \
    libpng-dev \
    libjpeg62-turbo-dev \
    libfreetype6-dev \
    locales \
    zip \
    jpegoptim optipng pngquant gifsicle \
    vim \
    unzip \
    git \
    curl \
    dos2unix \
    supervisor

RUN docker-php-ext-install mbstring pdo pdo_mysql \
    && a2enmod rewrite negotiation \
    && docker-php-ext-install opcache


COPY --chown=www-data:www-data . /srv/app
COPY .docker/vhost.conf /etc/apache2/sites-available/000-default.conf

WORKDIR /srv/app
Build Laravel Image
docker build . -t YOUR DOCKER HUB USERNAME/laravel-aws-eks
Push Laravel Image to Docker Hub
docker push YOUR DOCKER HUB USERNAME/laravel-aws-eks
This is the image we will deploy and run on the Kubernetes cluster.
Setup Amazon EKS
Install AWS CLI
These are the binaries needed to create and manage an EKS Cluster. It will help create a client security token needed for API communication with the cluster.
If you already have pip installed on your PC, run the command to install or upgrade AWS CLI.
pip install awscli — upgrade — user
If you do not have pip installed, follow the official guide to install AWS CLI.
Configure AWS CLI Credentials
aws configure
You will be prompted to provide your Access Key ID, Secret Access Key, and Default Region.
Install EKS CLI
EKS CLI (eksctl) is a command line utility for creating and managing Kubernetes clusters on Amazon EKS.
For MacOS:
We will use Hombrew to install eksctl. If you do not already have Homebrew installed, run the following command:
/usr/bin/ruby -e “$(curl -fsSL [https://raw.githubusercontent.com/Homebrew/install/master/install](https://raw.githubusercontent.com/Homebrew/install/master/install))"
Now that you have installed Homebrew, lets install Weaveworks Homebrew Tap:
brew tap weaveworks/tap
Then we install eksctl:
brew install weaveworks/tap/eksctl
Check that eksctl was successfully installed:
eksctl version
For Windows
Make sure you have Chocolatey installed.
Install eksctl:
chocolatey install -y eksctl aws-iam-authenticator
Check that eksctl was successfully installed:
eksctl version
Install Kubernetes Command Line Tool
The Kubernetes command-line tool, kubectl, allows you to run commands against Kubernetes clusters.
Using Homebrew:
brew install kubectl
kubectl version
If you do not have homebrew on your PC, you can follow Kubernetes kubectl installation guidelines peculiar to yours.
Create Amazon EKS Cluster
Now that we have all prerequisite binaries and libraries installed, let’s go ahead and create an Amazon EKS Cluster.
To create an EKS Cluster with eksctl, run the following command:
eksctl create cluster --name=laravel-kube-cluster --nodes=2 --node-type=t2.micro
This command will create an EKS Cluster named laravel-kube-cluster, with 2 t2.micro nodes.
It may take some minutes to fully provision the cluster. So grab some coffee while at it.
Once the EKS Cluster has been successfully created, run the following command to get a list of nodes in the cluster :
kubectl get nodes

Now that our nodes are up and running, let’s create a Deployment for our Laravel App.
apiVersion: apps/v1
kind: Deployment
metadata:
  name: laravel
  labels:
    app: laravel
spec:
  replicas: 1
  selector:
    matchLabels:
      app: laravel
  template:
    metadata:
      labels:
        app: laravel
    spec:
      containers:
      - name: laravel-app
        image: gbxnga/laravel-aws-eks
        ports:
        - containerPort: 80
        env:
        - name: DB_HOST
          value: localhost
        - name: DB_DATABASE
          value: laravel_aws_eks
        - name: DB_USERNAME
          value: app
        - name: DB_PASSWORD
          value: password
      - name: mysql
        image: mysql:5
        env:
        - name: MYSQL_DATABASE
          value: laravel_aws_eks
        - name: MYSQL_USER
          value: app
        - name: MYSQL_PASSWORD
          value: password
        - name: MYSQL_ROOT_PASSWORD
          value: password
The deployment file specifies a Kubernetes Controller of Kind ‘Deployment’.
“You describe a desired state in a Deployment, and the Deployment Controller changes the actual state to the desired state at a controlled rate.”
The Deployment creates a ReplicaSet that spins up a single Pod (indicated in the replicas field) containing our Laravel App and a MySQL Database.
Lets Run the kubectl command to create the deployment:
kubectl apply -f laravel-mysql-kubernetes.yaml
Run kubectl command to get Pods in the Cluster:
kubectl get pods

You will see a list of pods in the cluster. Here the Pod has a status of ContainerCreating, meaning the kubelet is creating the containers using the container runtime.

The Pod status should change to Running after some seconds. This means the containers have been successfully deployed and started.
Creating a Kubernetes Service
Now that the containers are up and running, we need to access them externally. This is where the kubernetes Service comes in; It exposes an application running on a set of Pods as a network service.
We will create a specification file to describe the service:
apiVersion: v1
kind: Service
metadata:
  name: laravel-service
spec:
  selector:
    app: laravel
  ports:
  - protocol: TCP
    port: 80
    targetPort: 80
  type: LoadBalancer
This specification file describes a service named laravel-service. This service will receive traffic on port 80 and forward it to port 80(targetPort) of any pod with label app=laravel.
Run the command to deploy the service:
kubectl apply -f laravel-service.yaml
The Laravel Service is now created. Run the command to get a list of services:
kubectl get services

Copy the link on the external IP of laravel-service and paste it in your browser tab:
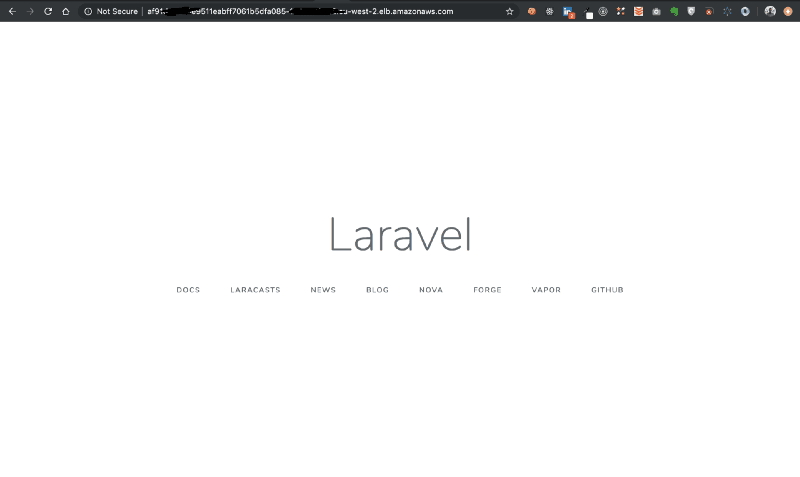
We have now successfully deployed the Laravel app made it accessible through the laravel-service created.
Update Laravel App in Kubernetes
A need to update the Laravel App, as with every other application, will always arise and it’s important to be able to make these changes on the fly.
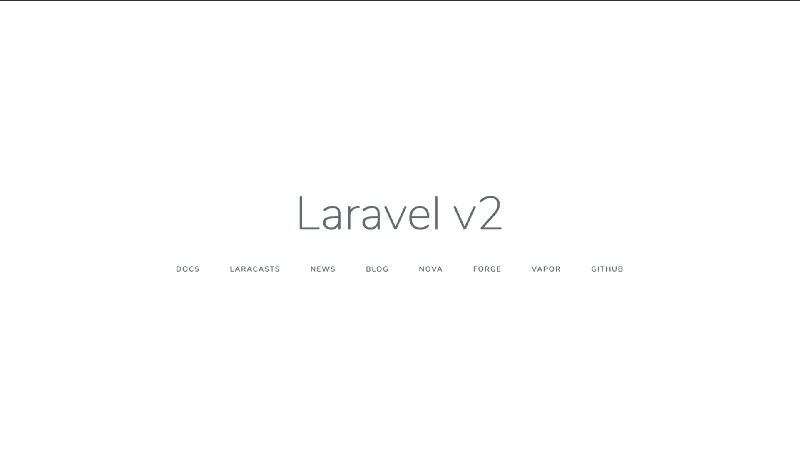
Let’s go back to the Laravel app and change the content on the welcome screen from ‘Laravel’ to ‘Laravel v2’. Then we will build a new image of this update, tag it YOUR_DOCKER_USER_NAME/laravel-aws-eks:v2 and push it to Dockerhub.
docker build . -t gbxnga/laravel-aws-eks:v2
Push the updated image:
docker push gbxnga/laravel-aws-eks:v2
Update the specification file:

Once the specification file is updated, run the command to update the Deployment:
kubectl apply -f laravel-service.yaml

A new Pod will now be created with the updated specification.
Return to the external Link of the laravel-service and refresh:
Clean Up
To delete the EKS cluster:
eksctl delete cluster --name laravel-kube-cluster
Conclusion
You have successfully completed this tutorial. You can now:
1. Setup AWS CLI

2. Create an Amazon EKS Cluster

3. Deploy a Laravel App container on EKS Cluster

4. Update a Laravel App Deployment on EKS Cluster
You can find the source code here: gbxnga/laravel-aws-eks