
- Published on
Jenkins Configuration as Code (JCasC) on Kubernetes
- Authors

- Name
- Gbenga Oni
- @gbxnga
Learn Hand-On AWS Cloud EngineeringHERE
Introduction
Jenkins Configuration as Code borrows a leaf from the Infrastructure as Code paradigm. It lets you define your Jenkins controller in declarative configuration files.
This is an improvement to the more manual, complex and less scalable ways of automating and persisting configuration in Jenkins like groovy scripts and XML configuration files.
In this article, we’ll set up a local Kubernetes Cluster with Minikube and we’d install Jenkins using Helm Charts. The Jenkins instance will be configured and modified using Jenkins Configuration as Code.
Setup Minikube
If you don’t already have a Kubernetes cluster running on your local envirnoment, you will need to install Minikube. Minikube is local Kubernetes, focusing on making it easy to learn and develop for Kubernetes.
Install Minikube on Linux
curl -LO https://storage.googleapis.com/minikube/releases/latest/minikube-linux-amd64
sudo install minikube-linux-amd64 /usr/local/bin/minikube
Install Minikube on Mac
curl -LO https://storage.googleapis.com/minikube/releases/latest/minikube-darwin-amd64
sudo install minikube-darwin-amd64 /usr/local/bin/minikube
Now that you have minikube installed, make sure the Docker engine is running then start the cluster:
minikube start
Setup Helm
We’ll be using helm to install Jenkins on Kubernetes. Helm is the Package Manager for Kubernetes, that lets you deploy applications in a more efficient and repeatable manner.
Install Helm from Script
To install helm via command line, run the following:
curl -fsSL -o get_helm.sh https://raw.githubusercontent.com/helm/helm/main/scripts/get-helm-3
chmod 700 get_helm.sh
./get_helm.sh
helm version
Install Jenkins on Kubernetes
Now that Helm has been installed, we’ll use the latest Jenkins Helm Chart to install Jenkins on the Kubernetes Cluster we have set up using Minikube.
Add the Jenkins Repo to Helm:
helm repo add jenkins https://charts.jenkins.io
Create Custom Values for Helm Chart
touch values.yaml
Then edit the files and paste in the following:
controller:


  # When enabling LDAP or another non-Jenkins identity source, the built-in admin account will no longer exist.
  # If you disable the non-Jenkins identity store and instead use the Jenkins internal one,
  # you should revert controller.adminUser to your preferred admin user:
  adminUser: "admin"
  adminPassword: "admin"

  initContainerEnv:

  containerEnv:
    # Tell the plugin where to find its config.
    - name: CASC_JENKINS_CONFIG
      value: /var/jenkins_home/casc_configs/jenkins.yaml
    # `SECRETS` is used to override the `/run/secrets` path,
    # which is useful for setting credentials.
    # But it needs to be used in conjunction with Master.SecretsFilesSecret
    # - name: SECRETS
    #   value: /usr/share/jenkins/ref/secrets

  # List of plugins to be install during Jenkins controller start
  installPlugins:
    - kubernetes:1.30.1
    - workflow-aggregator:2.6
    - git:4.9.0
    - configuration-as-code:1.53
    - job-dsl:latest

  # Below is the implementation of Jenkins Configuration as Code.  Add a key under configScripts for each configuration area,
  # where each corresponds to a plugin or section of the UI.  Each key (prior to | character) is just a label, and can be any value.
  # Keys are only used to give the section a meaningful name.  The only restriction is they may only contain RFC 1123 \ DNS label
  # characters: lowercase letters, numbers, and hyphens.  The keys become the name of a configuration yaml file on the controller in
  # /var/jenkins_home/casc_configs (by default) and will be processed by the Configuration as Code Plugin.  The lines after each |
  # become the content of the configuration yaml file.  The first line after this is a JCasC root element, eg jenkins, credentials,

  JCasC:
    defaultConfig: true
    configScripts:
     welcome-message: |
       jenkins:
         systemMessage: Welcome to our CI\CD server.  This Jenkins is configured and managed 'as code'.


  sidecars:
    configAutoReload:
      enabled: true
      image: kiwigrid/k8s-sidecar:1.14.2
      imagePullPolicy: IfNotPresent
      resources: {}
        #   limits:
        #     cpu: 100m
        #     memory: 100Mi
        #   requests:
        #     cpu: 50m
        #     memory: 50Mi
      # How many connection-related errors to retry on
      reqRetryConnect: 10
      # env:
      #   - name: REQ_TIMEOUT
      #     value: "30"
      # SSH port value can be set to any unused TCP port.  The default, 1044, is a non-standard SSH port that has been chosen at random.
      # Is only used to reload jcasc config from the sidecar container running in the Jenkins controller pod.
      # This TCP port will not be open in the pod (unless you specifically configure this), so Jenkins will not be
      # accessible via SSH from outside of the pod.  Note if you use non-root pod privileges (runAsUser & fsGroup),
      # this must be > 1024:
      sshTcpPort: 1044
      # folder in the pod that should hold the collected dashboards:
      folder: "/var/jenkins_home/casc_configs"
      # If specified, the sidecar will search for JCasC config-maps inside this namespace.
      # Otherwise the namespace in which the sidecar is running will be used.
      # It's also possible to specify ALL to search in all namespaces:
      # searchNamespace:
controller.installPlugins values lists the plugins to be installed when Jenkins starts, some of which is the configuration-as-code and job-dsl plugins.
The configuration-as-code Plugin needs to be installed for the JCasC feature to run. Also, we’d be using the Jenkins Jobs DSL plugin, which allows jobs to be defined in a programmatic way.
The controller.JCasC values describe the Configuration as Code you want applied to the controller. Helm packs the file as a Kubernetes Secret with its contents is mounted as volume to a directory(/var/jenkins_home/casc_configs) in the Jenkins Pod.The JCasC file defines a system welcome message. This message will be displayed on the Jenkins homepage.
Install Jenkins with Helm
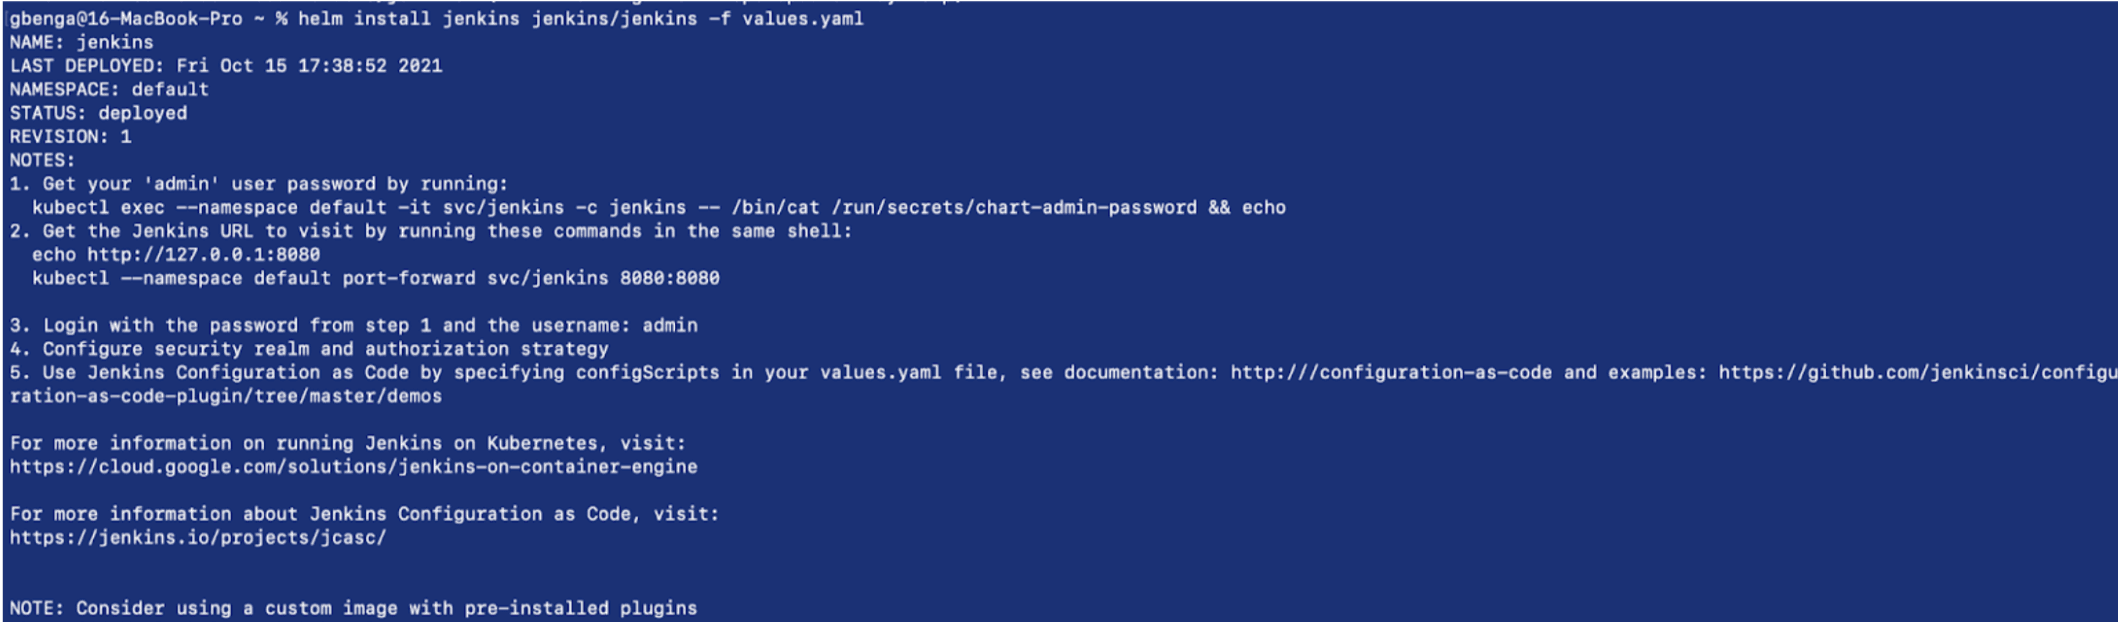
Let’s deploy Jenkins with the customs values we have declared in the values.yaml file:
helm install jenkins jenkins/jenkins -f values.yaml
To see a list of installed pods, run the Kubernetes get pods command:
kubectl get pods

The Jenkins Pod is now running on the Minkube Cluster. The Pod contains the 2 containers: The jenkins container and the config-reload container(the sidecar).
The Chart also installs Kubernetes Services that allow access to the pods.
kubectl get svc

To access Jenkins on your browser, you’ll need to instruct Minikube to expose the jenkins service
minkube service jenkins
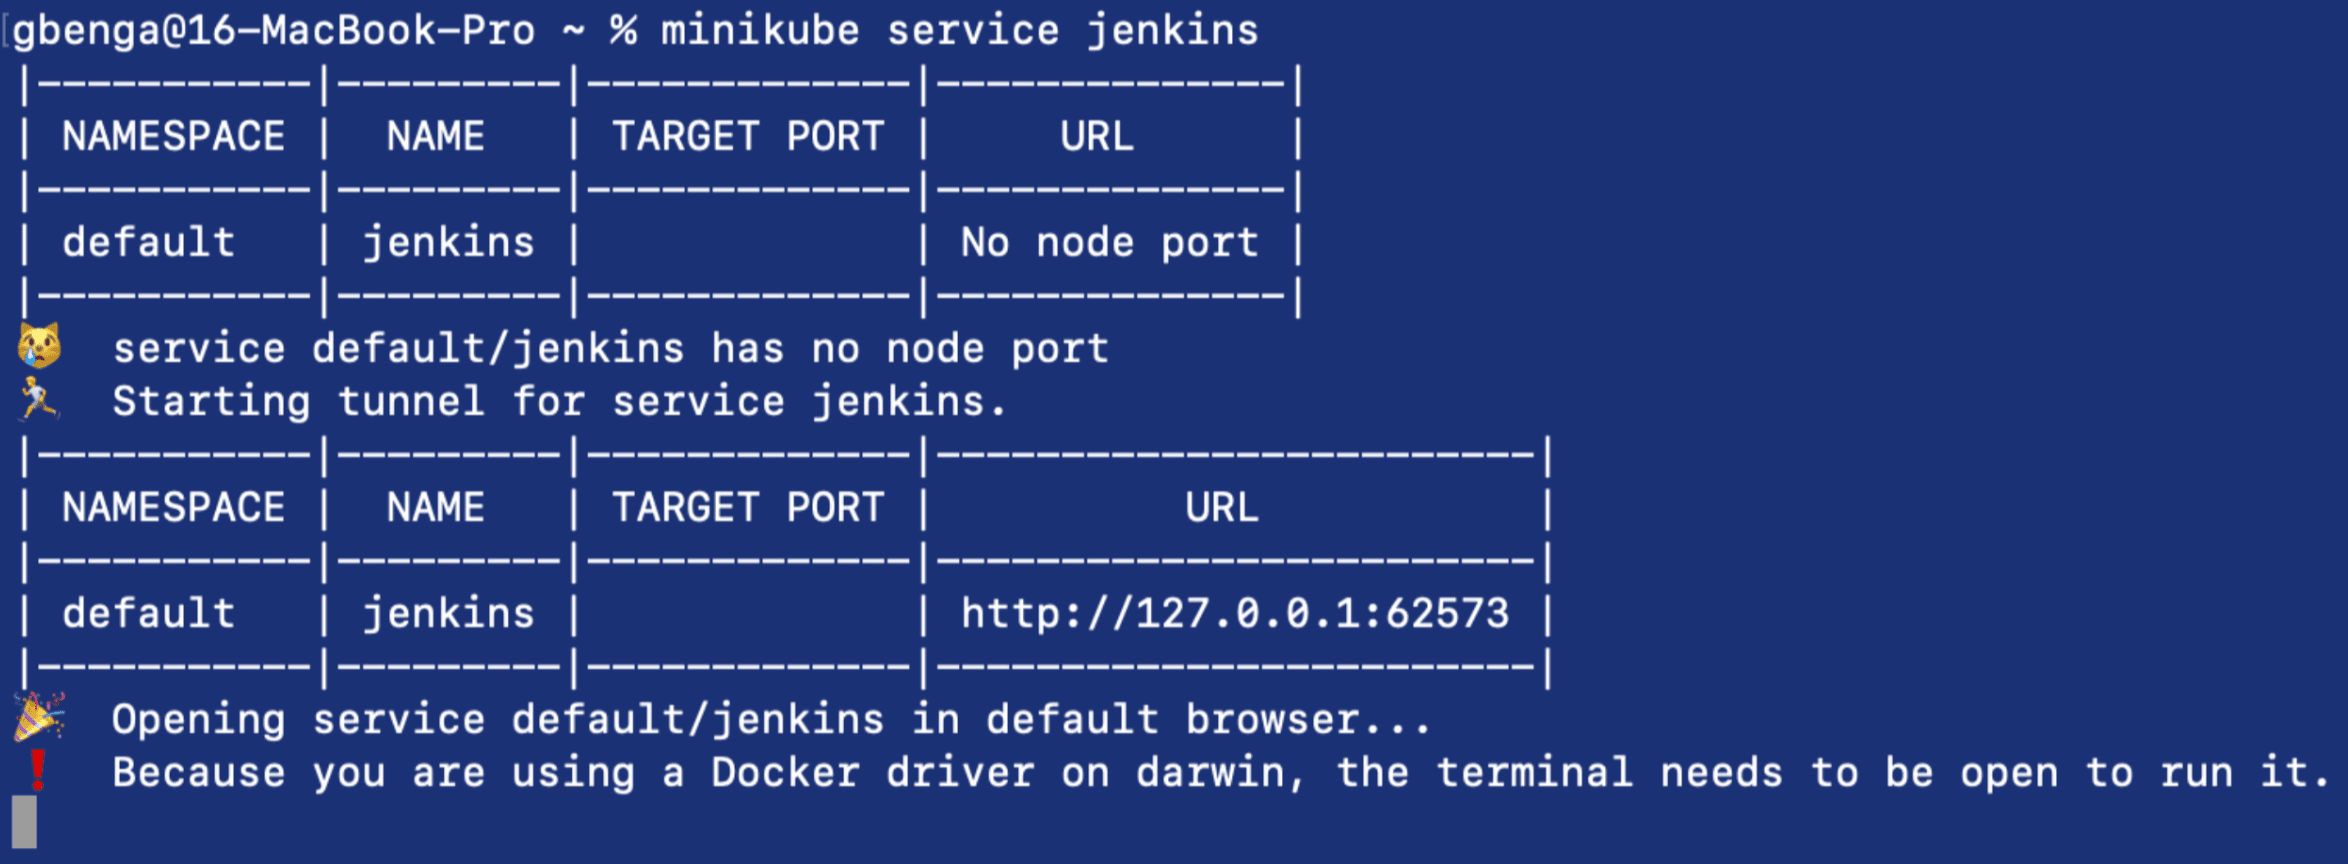
The command automatically opens the specified service in your browser.
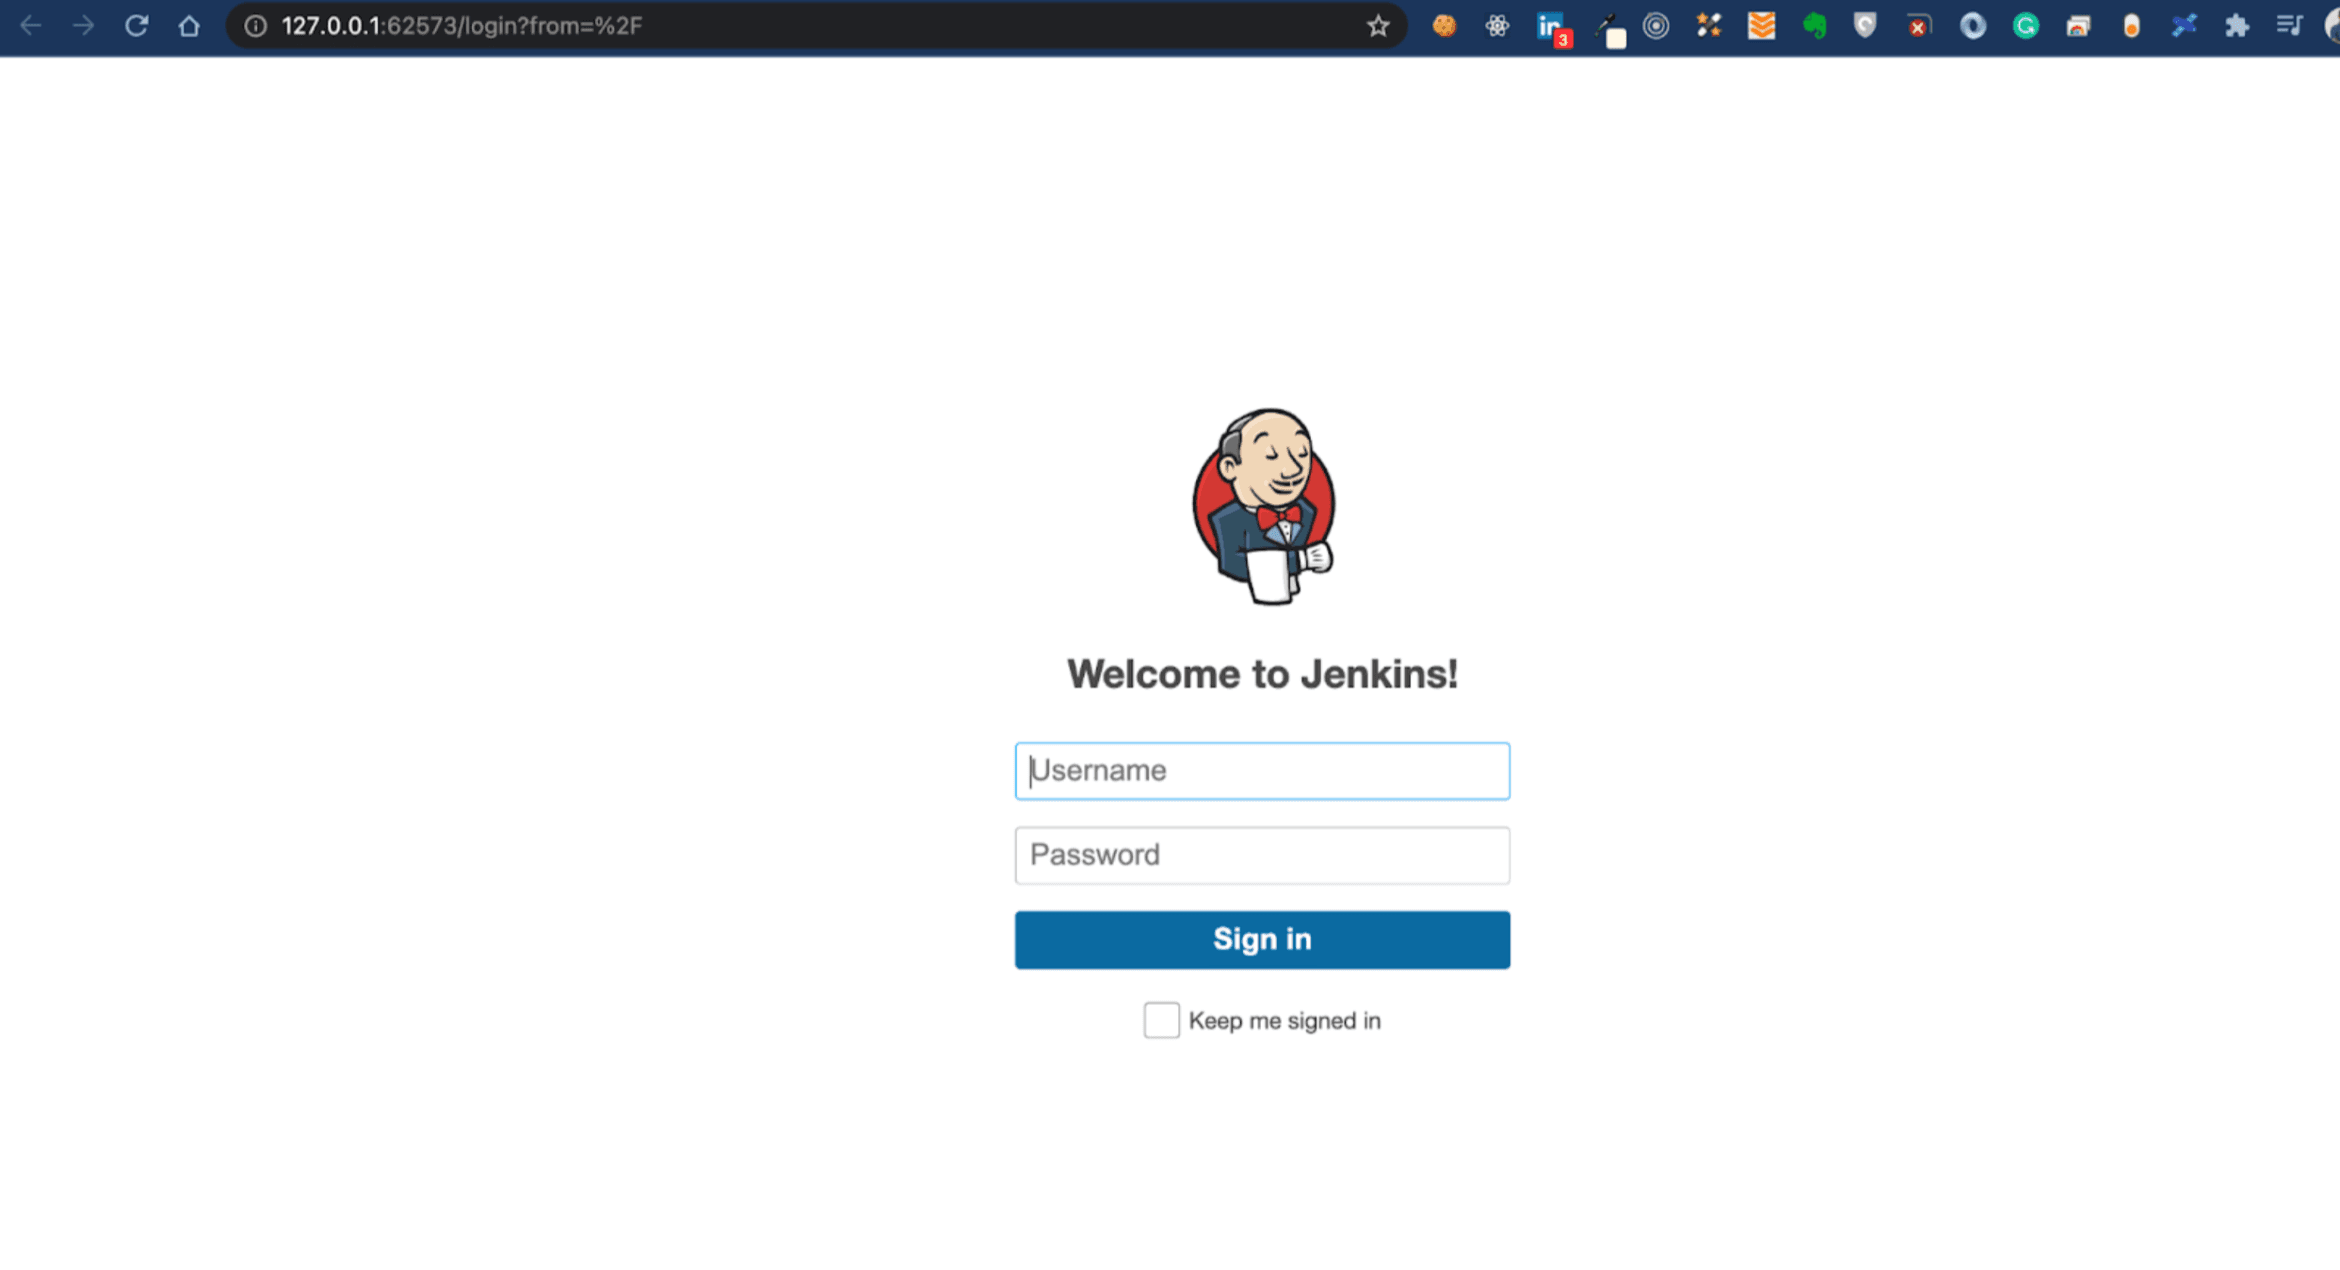
Login with the credentials as specified in the values.yaml file: Username: admin Password: admin
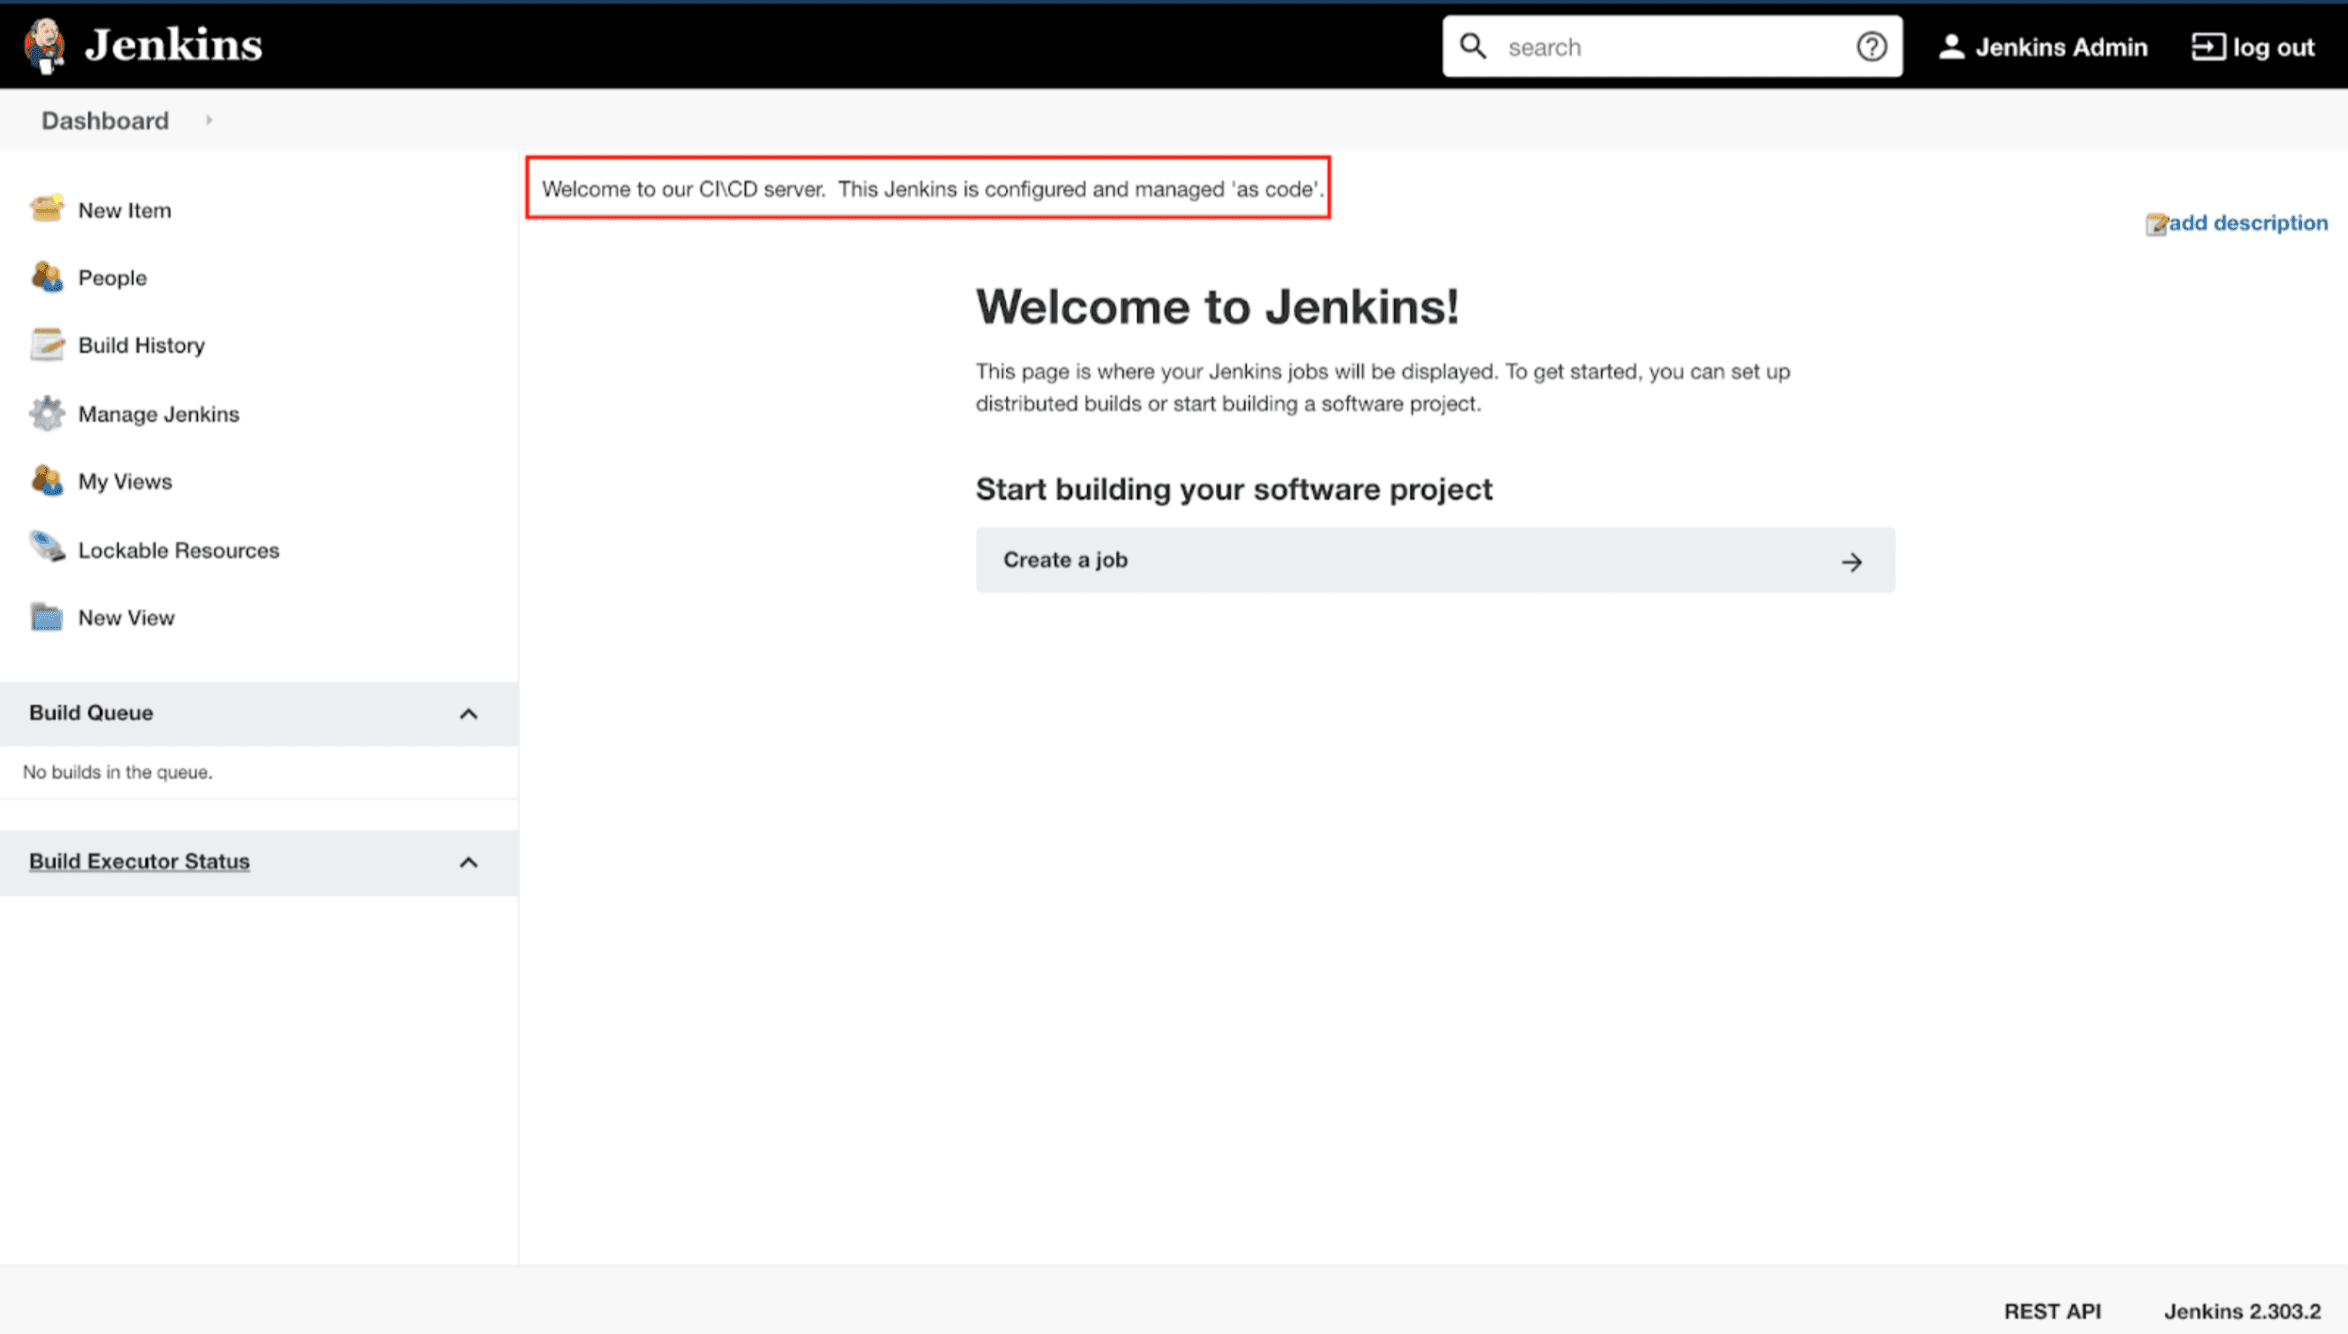
We’re now logged-in to the Jenkins Web UI. Highlighted is the System Message as defined in the JCasC in the Jenkins Chart values file.
Update Jenkins JCasC on automatically
We set sidecars.configAutoReload.enables = true in the values file. This means that when changes are made to the Configuration as Code file(via Helm), the updates will be applied and reloaded automatically and almost immediately, without a reboot of the jenkins instance.
Lets make a change to the System Message to see how this works:
Edit the previous values.yaml file:
  JCasC:
    defaultConfig: true
    configScripts:
     welcome-message: |
       jenkins:
         systemMessage: This is an updated System Message via JCasC.
Save the file and open the command line; We’ll update the Jenkins deployment via Helm using the updated values file:
helm upgrade jenkins jenkins/jenkins -f values.yaml
Once the upgrade is done, head over to Jenkins homepage on your browser tab and refresh.
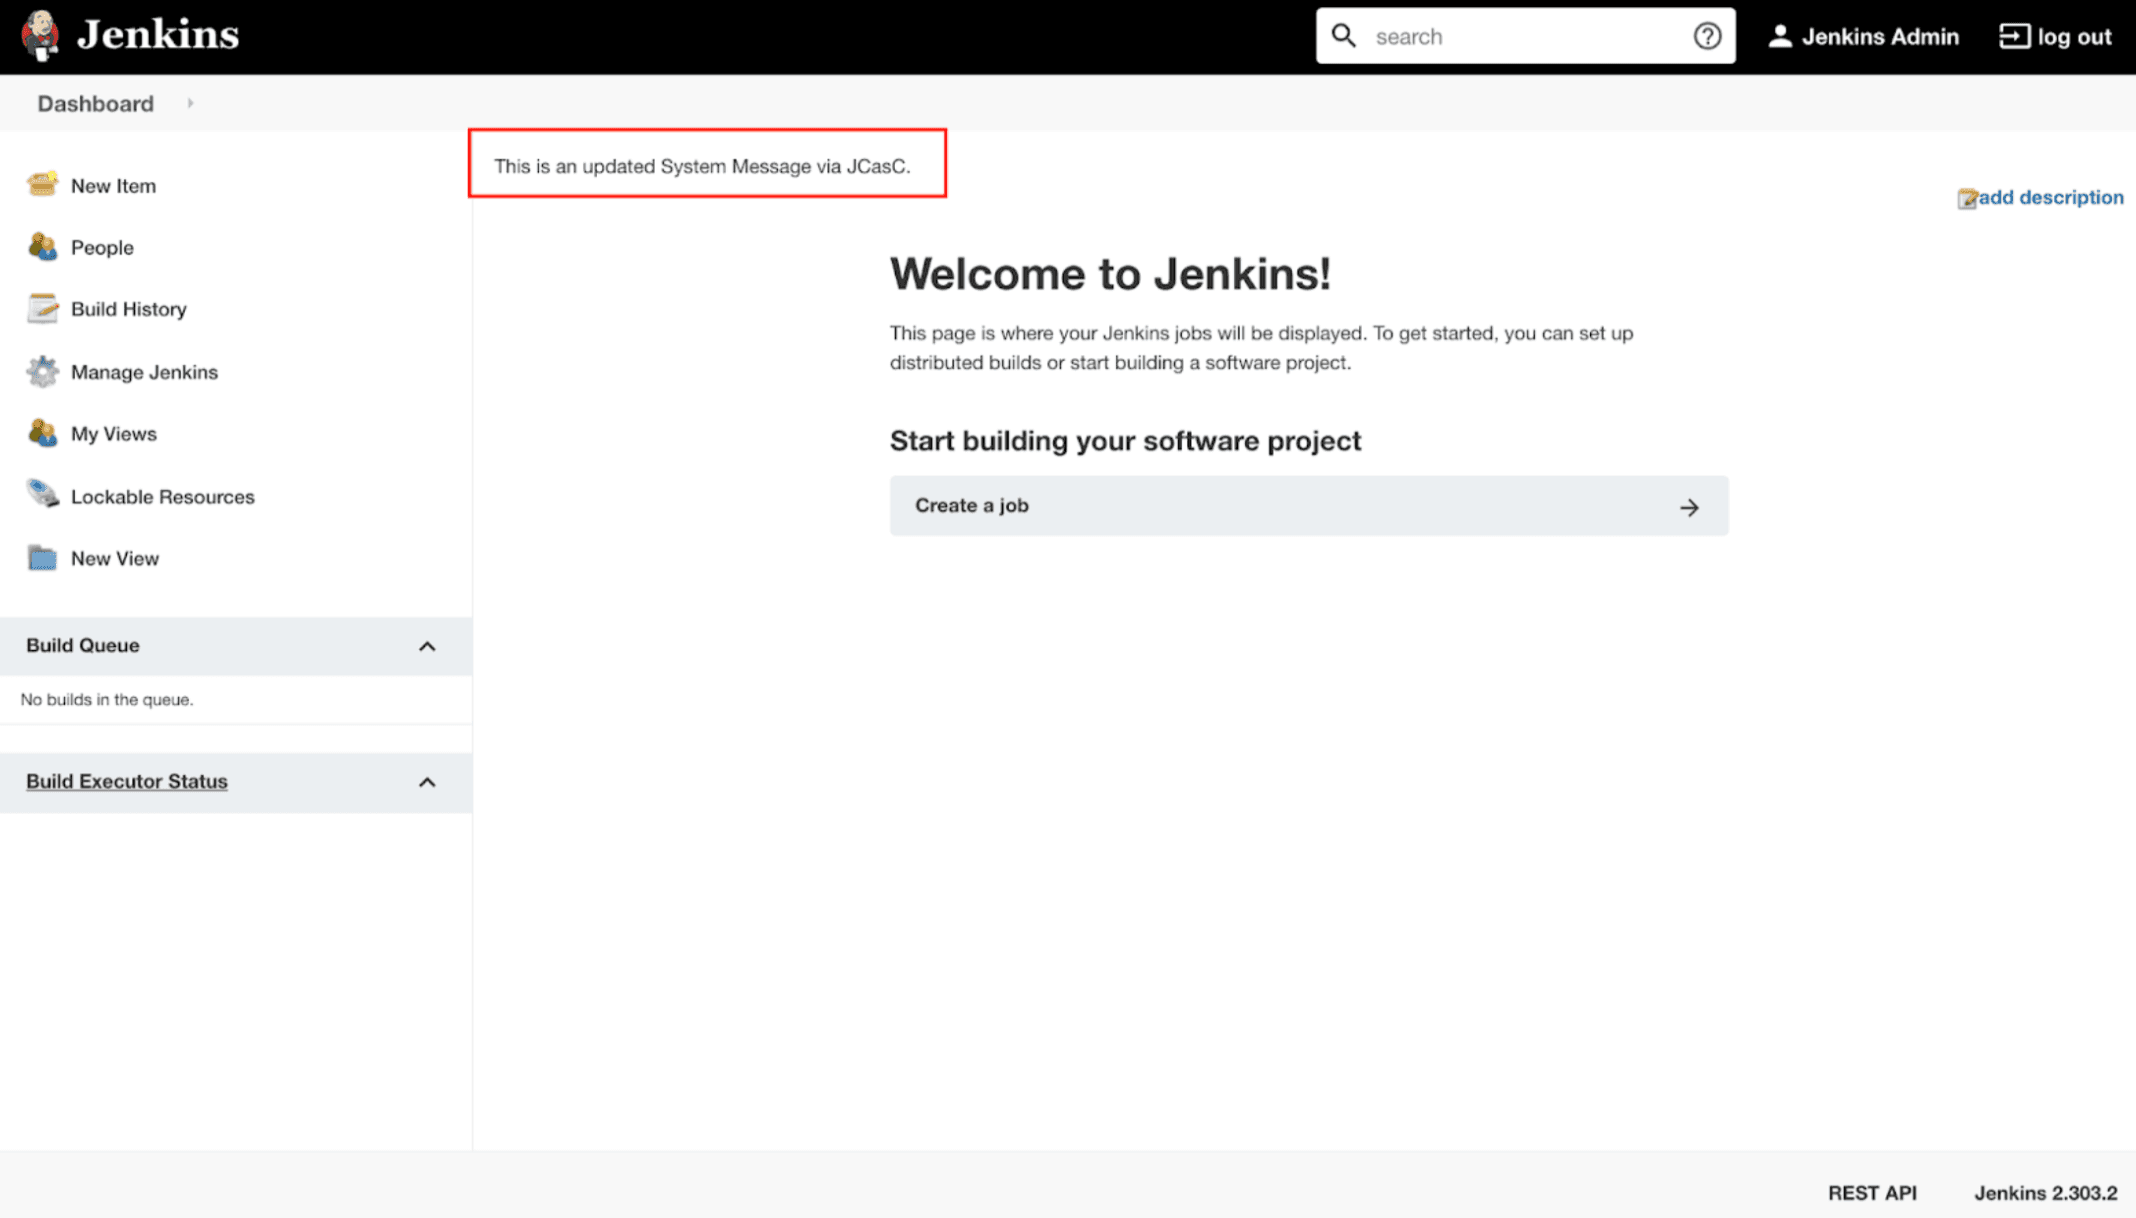
The Jenkins instance JCasC has been automatically applied. Enabling Auto-reload configures the sidecar to reapply config via the endpoint http://JENKINS_URL/reload-configuration-as-code when configScripts is updated.
Create Jenkins Pipeline with Jobs DSL
The Jobs DSL plugin allows the definition of Jobs on jenkins in a programmatic way. Jobs configuration can be composed as code, as opposed to clicking manually through the UI to achieve.
Update Helm Values file with Pipeline Job
Lets update the Jenkins chart values file and add a Pipeline Job called test-job through configuration as code:
  JCasC:
    defaultConfig: true
    configScripts:
     welcome-message: |
        jenkins:
          systemMessage: This is an update System Message via JCasC.
        jobs:
          - script: >
              pipelineJob('test-job') {
                definition {
                  cps {
                    script('''
                      pipeline {
                              agent any
                              stages {
                                  stage('Stage 1') {
                                      steps {
                                          echo 'logic'
                                      }
                                  }
                                  stage('Stage 2') {
                                      steps {
                                          echo 'logic'
                                      }
                                  }
                              }

                      }
                    '''.stripIndent())
                    sandbox()
                  }
                }
              }
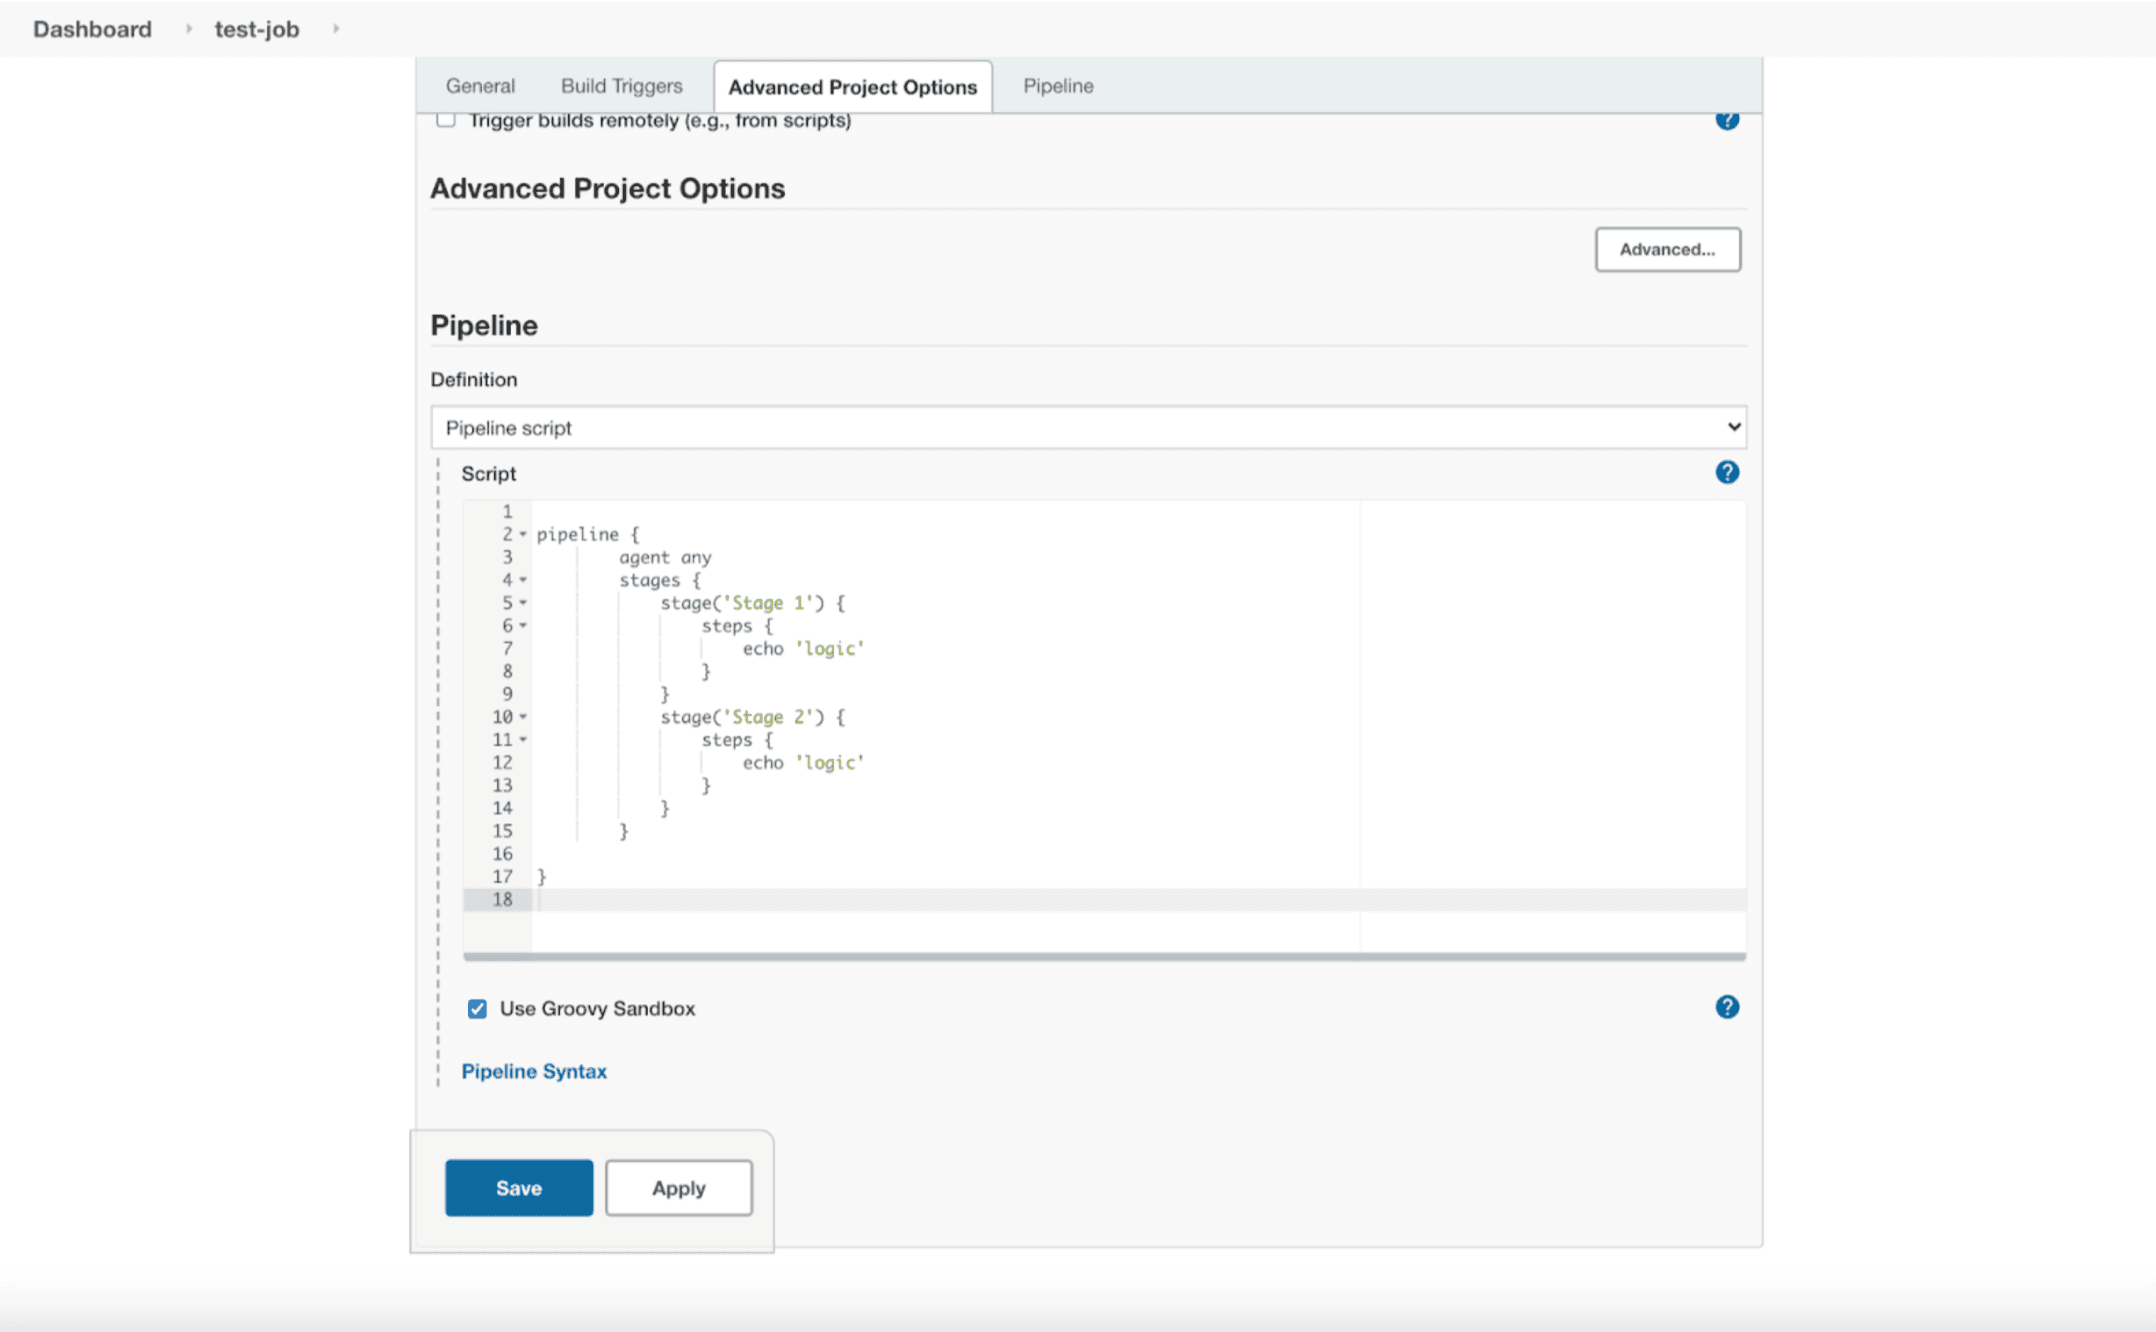
The Pipeline has two stages that echos a random word.
Save the values file and update Jenkins deployment with Helm:
helm upgrade jenkins jenkins/jenkins -f values.yaml
Now that Jenkins has been updated via Helm, the sidecar will now detect this update and automatically apply it.
Refresh the Jenkins Homepage on your browser:
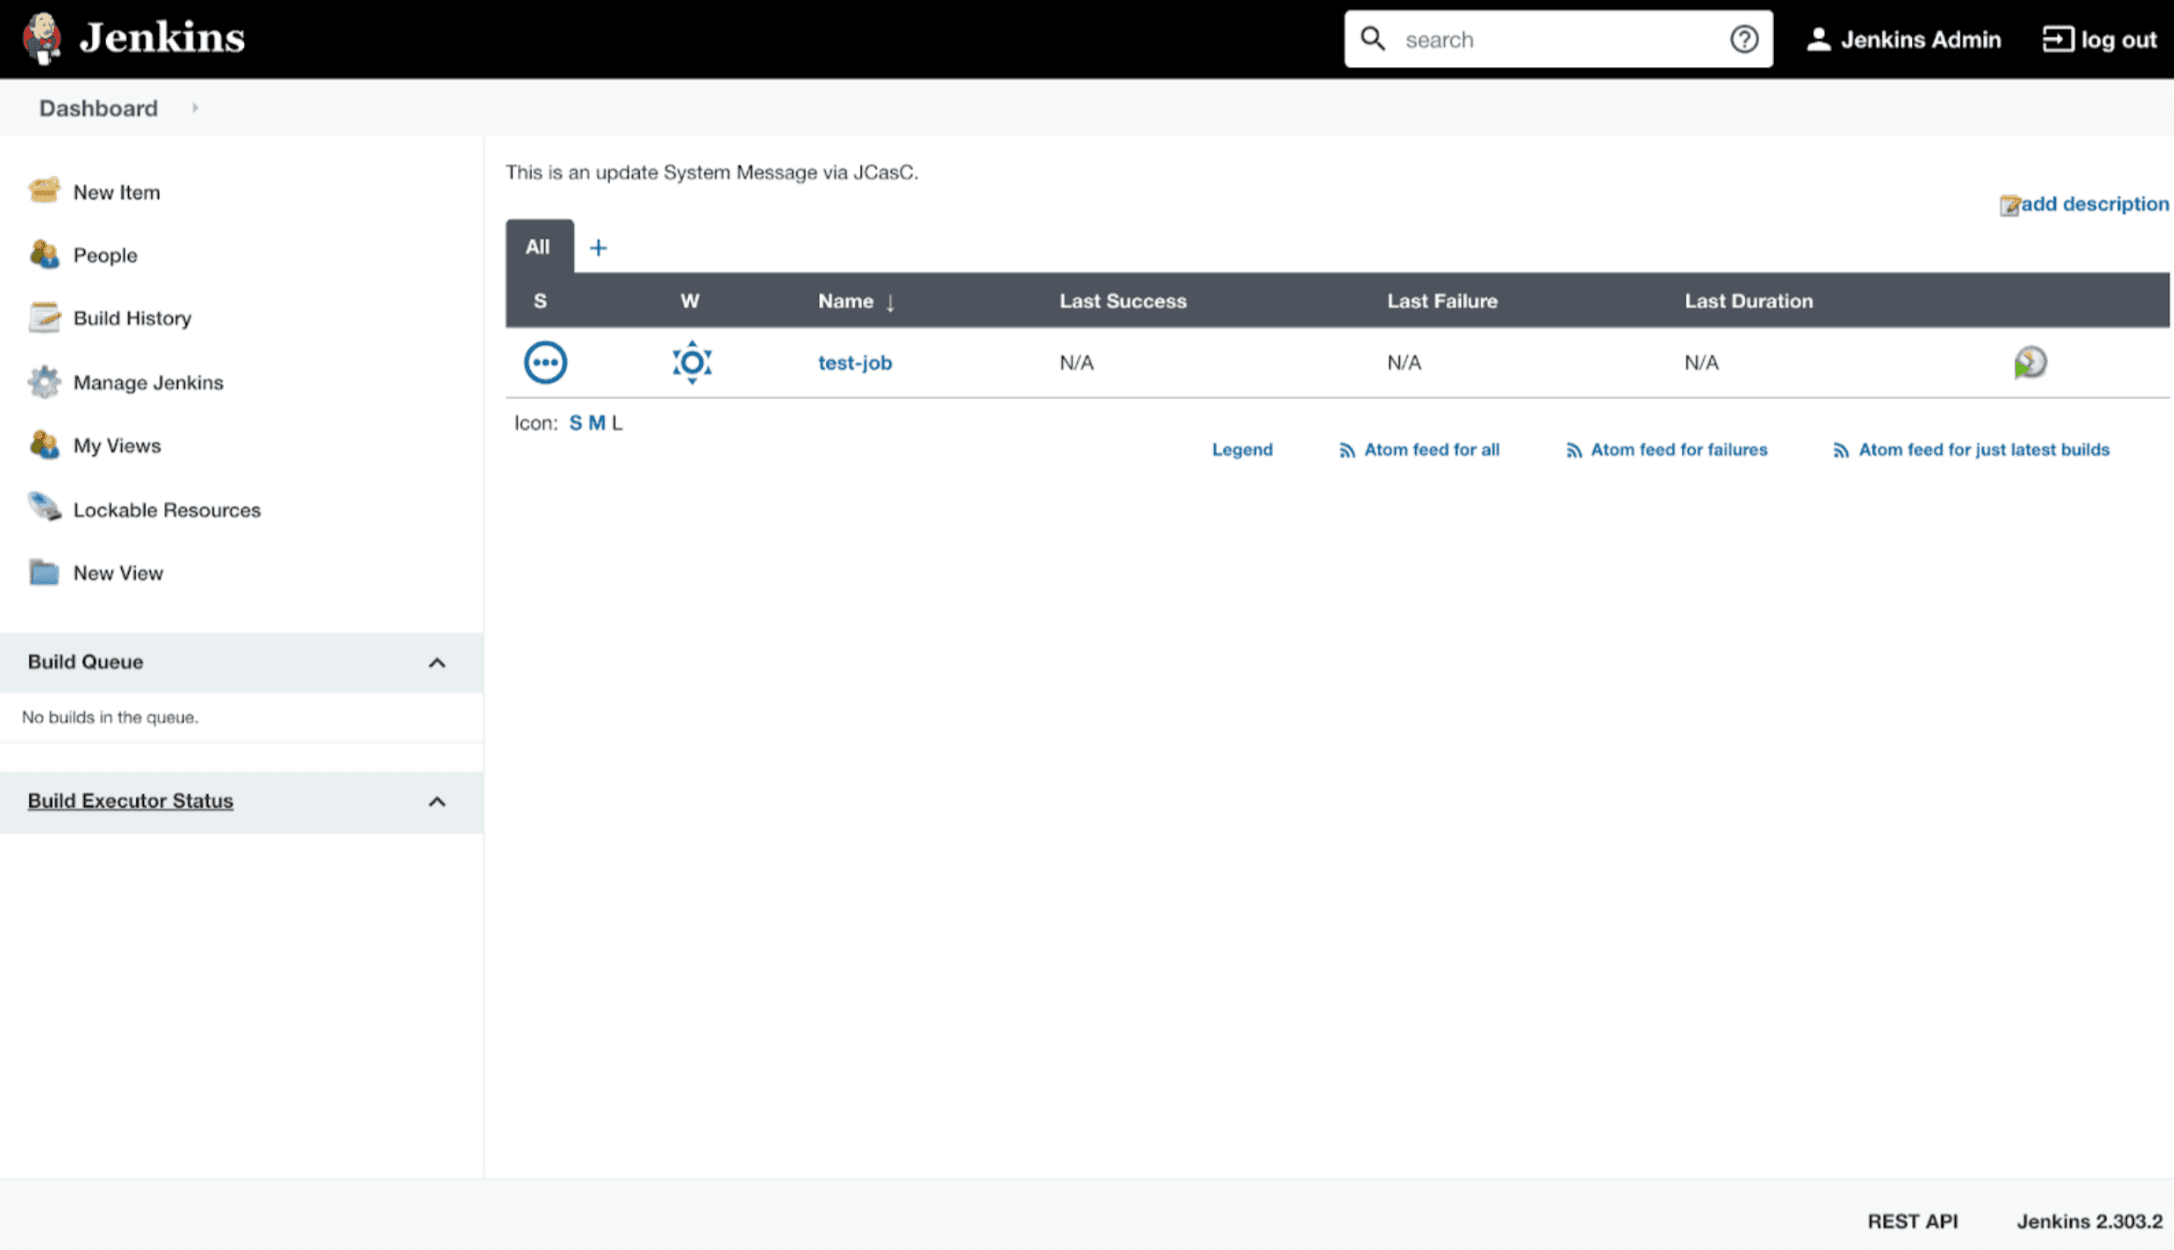
The new Pipeline Job (test-job) is now created.
Click on the Job to view it, then click Configure to see its configuration.
Run Jenkins Pipeline
To run the pipeline, navigate back the the pipeline page and click on Build Now
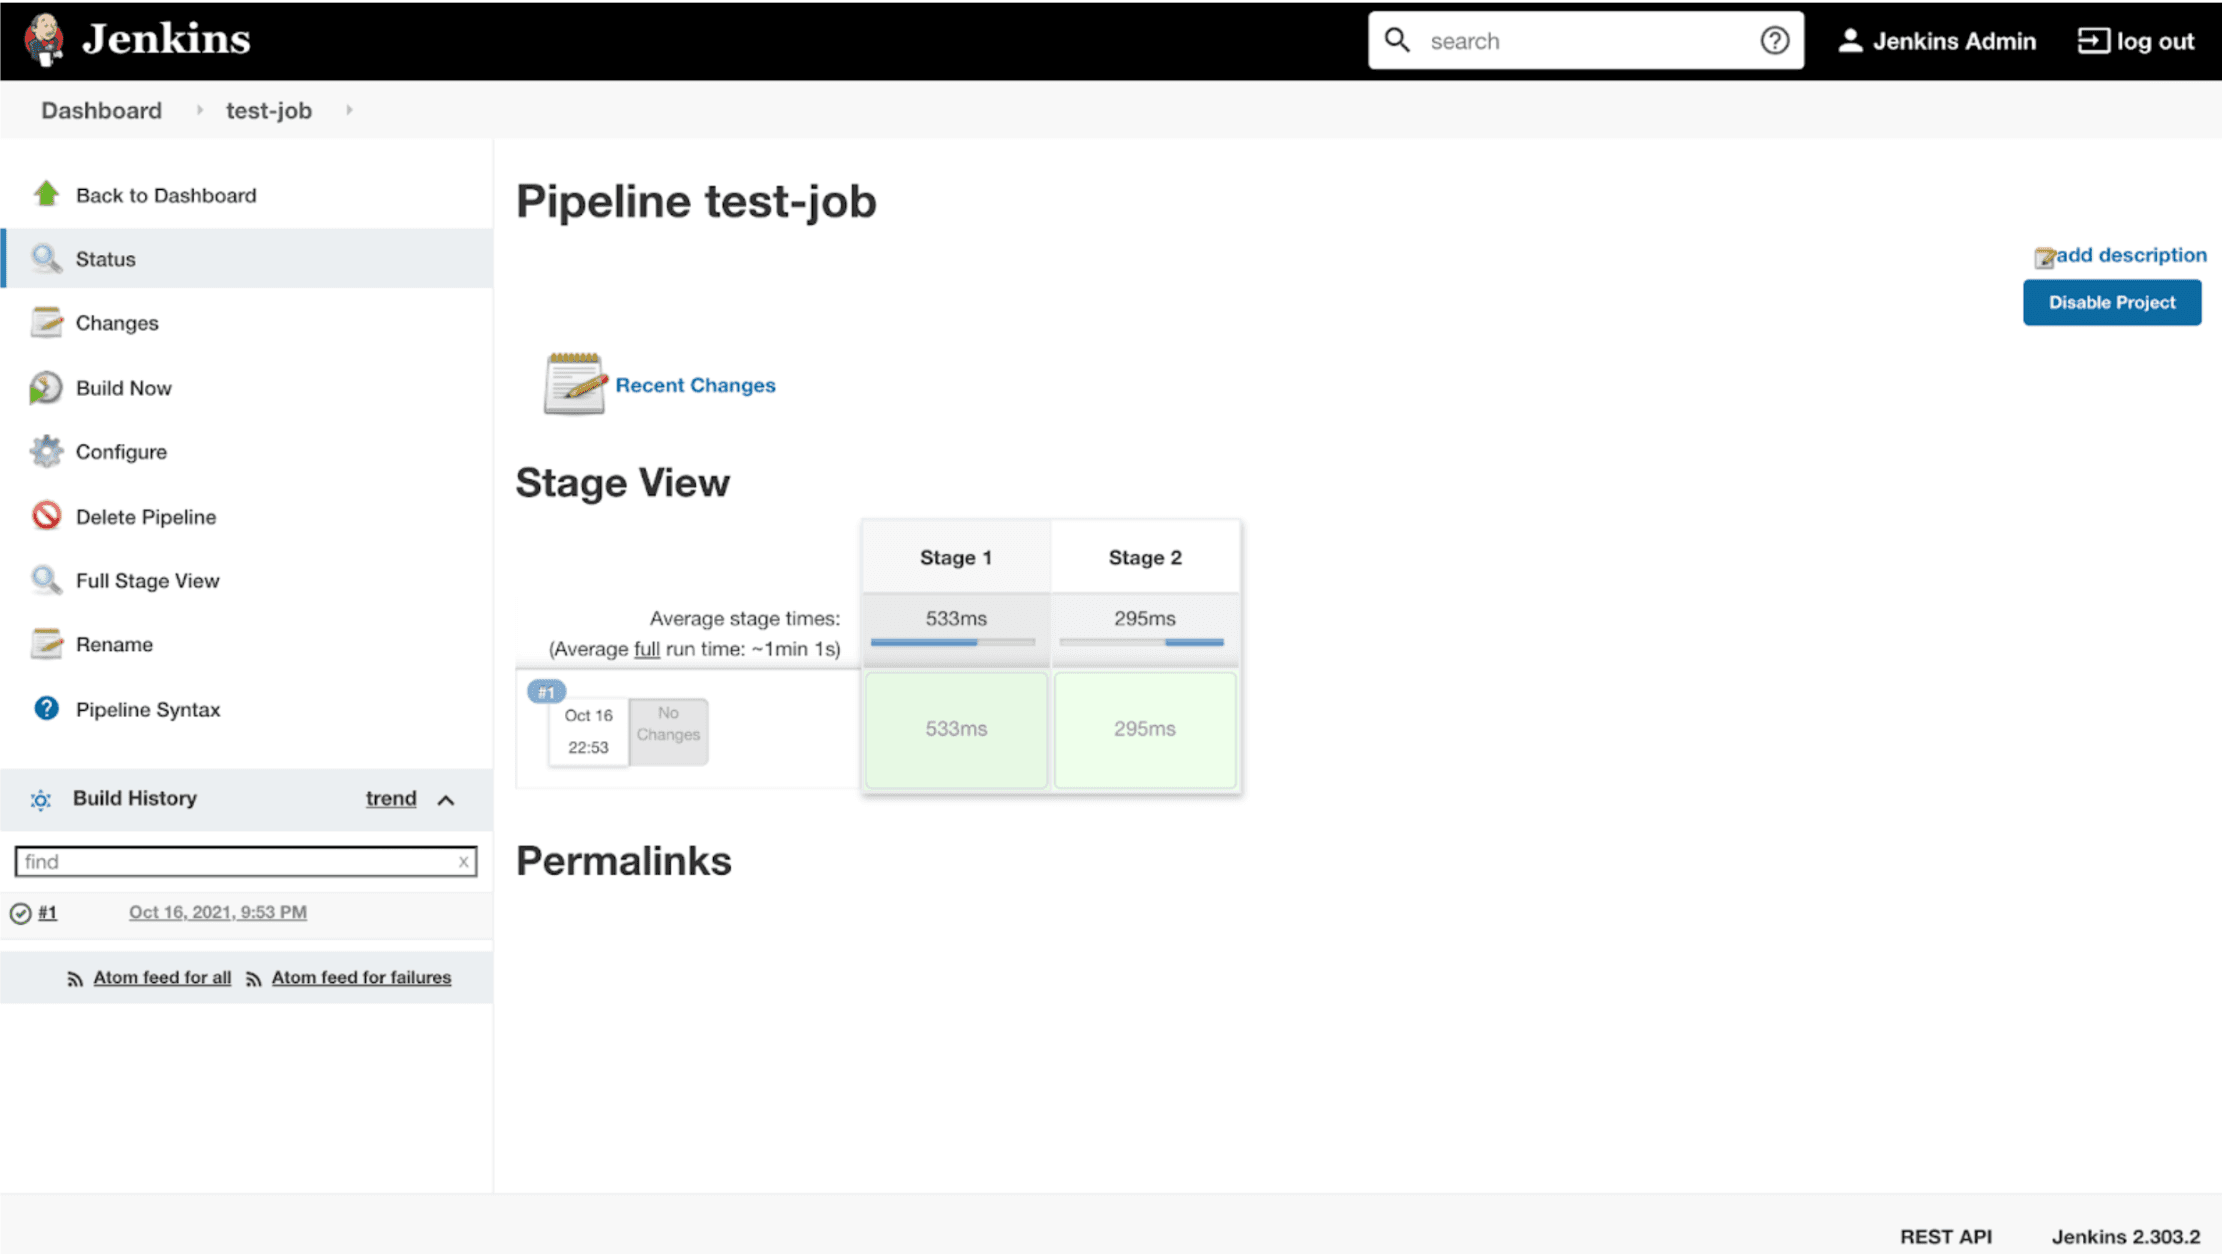
The build has successfully run.
Click on the Build and click Console Output to view the logs:
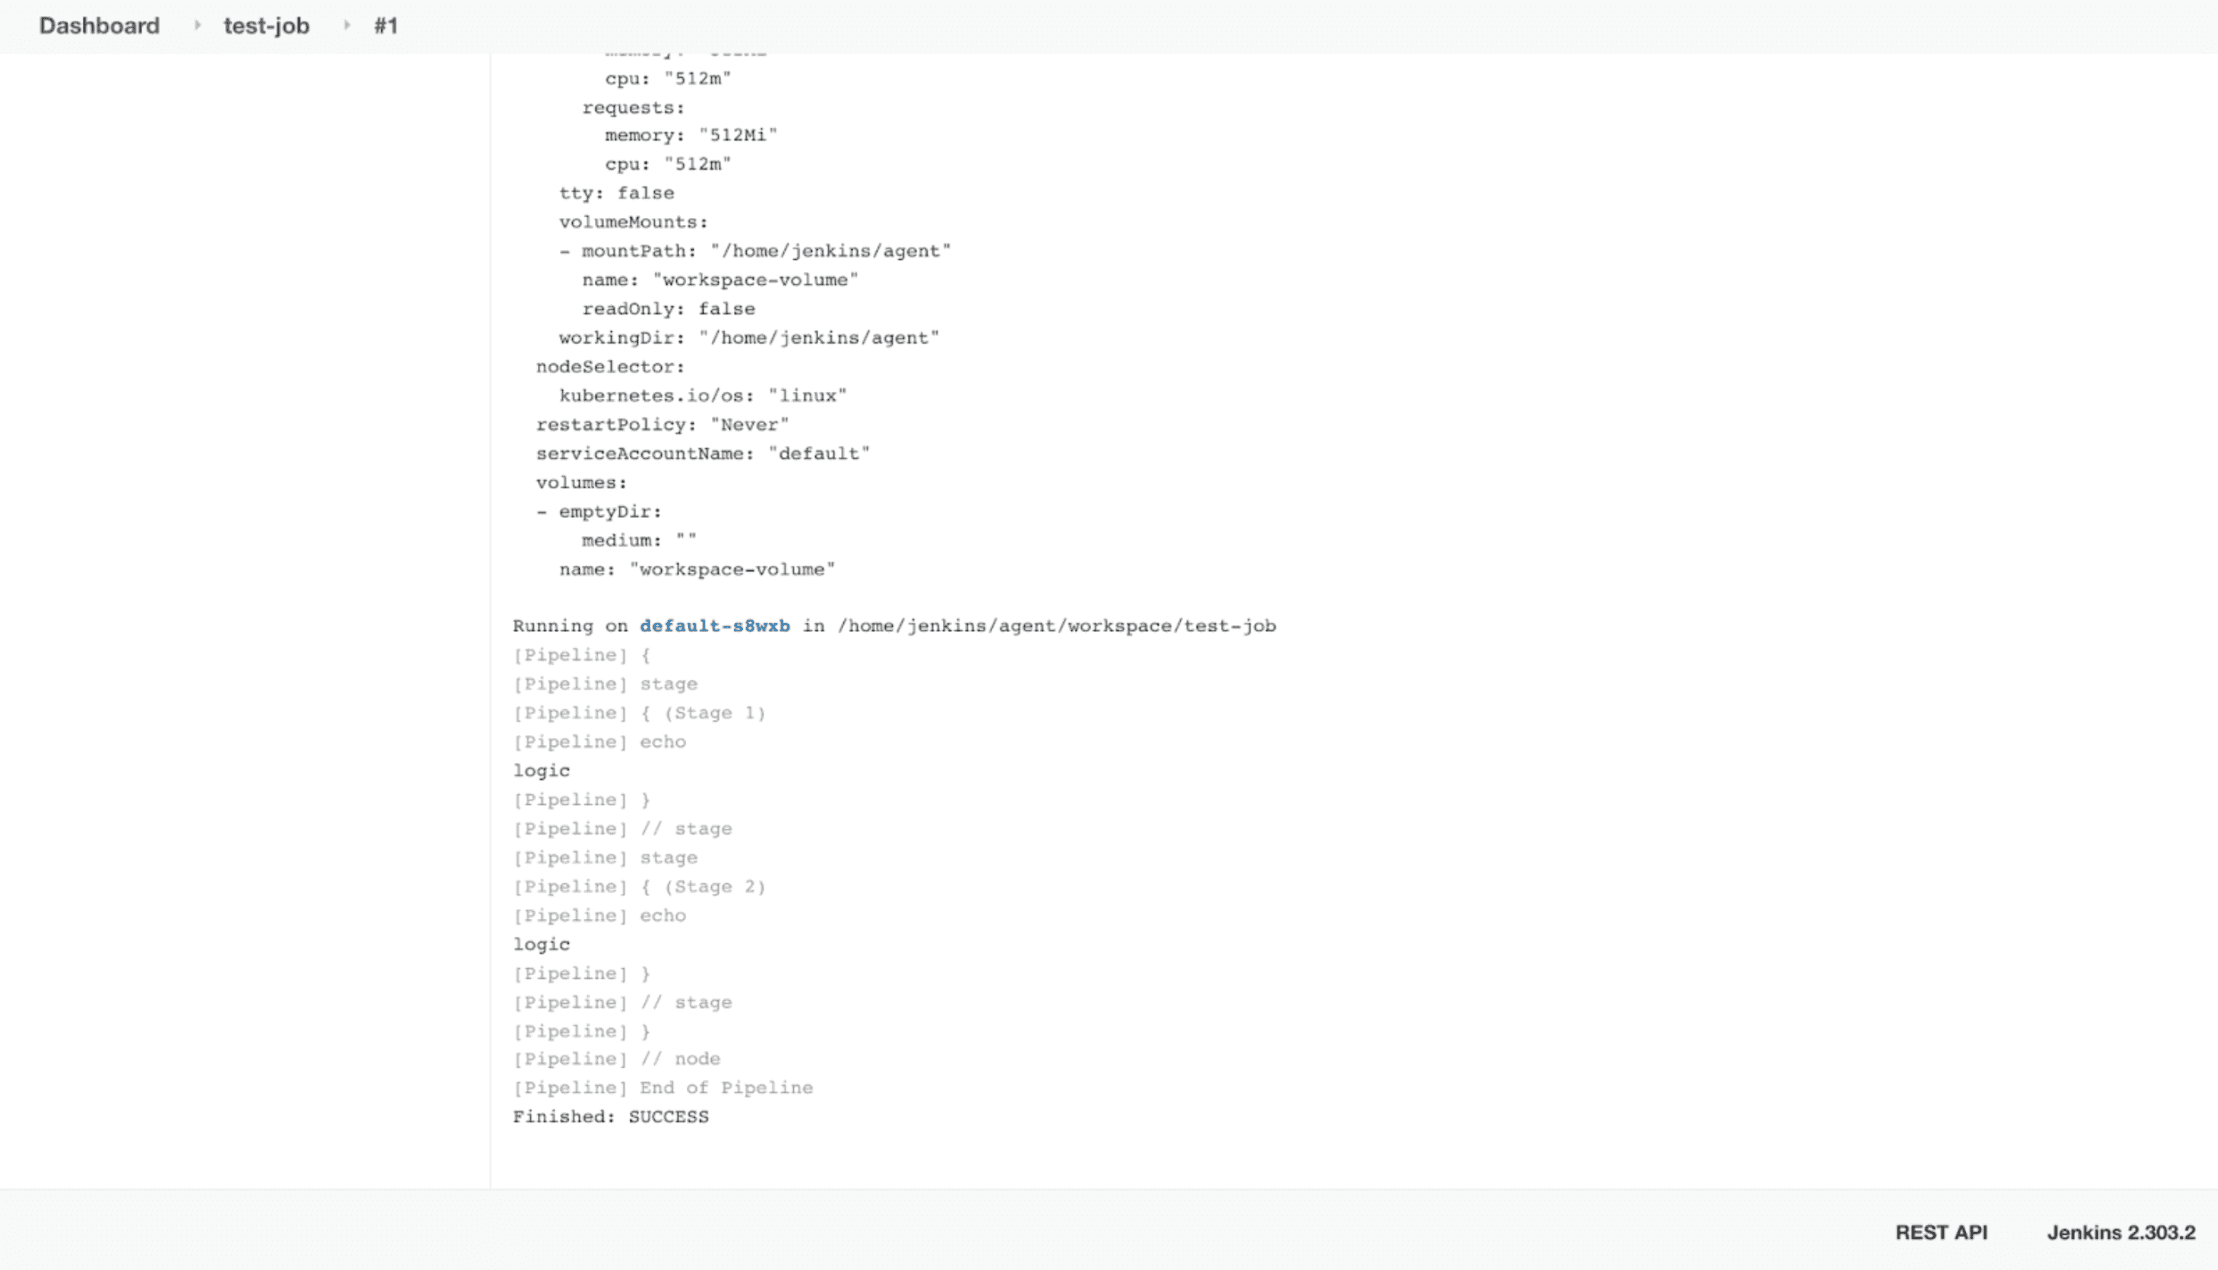
As defined, the scripts in both stages output the random strings ‘logic’.
Conclusion
In this article, we reviewed Jenkins Configuration as Code and its automation benefits. We deployed a Jenkins controller with Helm on a Kubernetes Cluster and used declarative(JCasC) files to configure, set up, and modify the Jenkins Controller.