
- Published on
Deploying and Scaling a Laravel App on AWS
- Authors

- Name
- Gbenga Oni
- @gbxnga
Learn Hand-On AWS Cloud EngineeringHERE

Introduction
In this article, we will deploy a Laravel web application on Amazon Web Services and we will scale it across several instances. These instances will share a single MySQL database that will be deployed on the Amazon Relational Database Service(RDS).
We will also simulate failures of random instances to assess the behavior of the system in the event of a real-world problem that may impede the availability of our Laravel web application. The system will be fault-tolerant and designed to fail with grace, performing regular health-checks on instances and spinning up new, healthier ones to replace failed ones.
Amazon EC2
Amazon Elastic Cloud Compute is a web service that provides resizable compute capacity in the cloud. Think of it as a personal computer, but in the cloud. With complete control of computing capacity, Amazon EC2 takes web-scale cloud computing to the next level for developers.
To get the ball rolling, you will need to create an AWS account, if you don’t already have one. The Free-Tier account will enable you to use and familiarize yourself with some of the AWS platforms, products, and services.
Once you have done that, head on to the EC2 dashboard.
Launching the instance
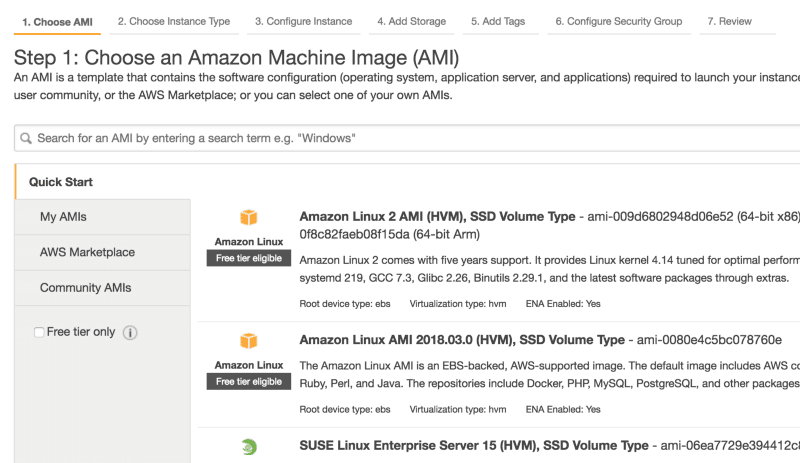
To launch an instance, click on the Launch Instance button. You will be taken to a launch instance wizard page that contains a list of Amazon Machine Image(AMI)s which provides important information required to launch an instance. You have to specify a source AMI when launching an instance.
Select the Amazon Linux AMI 2018.03.0 (HVM), SSD Volume Type which comes with preconfigured installations of PHP, Python, MySQL, Docker and other essential packages to get you up and running as soon as possible.
You will be taken to the next page where you will choose an instance type. Choose the t2.micro instance type which is Free-Tier compatible. The t2.micro instance type doesn’t provide the best nor most optimized compute capacity but will suffice for the purpose of this tutorial.
Skip through the 3rd, 4th and 5th steps without changing any of the default parameters as that’s outside of the scope of this tutorial. Head to the 6th step where we will configure a Security Group. Think of a Security Group as an imaginary firewall around an instance, filtering traffic into and out it.
Click on the Add Rule button and select HTTP, click on it again and select HTTPS. These will allow HTTP/HTTPS traffic in and out of the instance, making it accessible over the internet. The first rule, the SSH directive, will enable us SSH into the instance and make necessary updates, configurations, and installation.
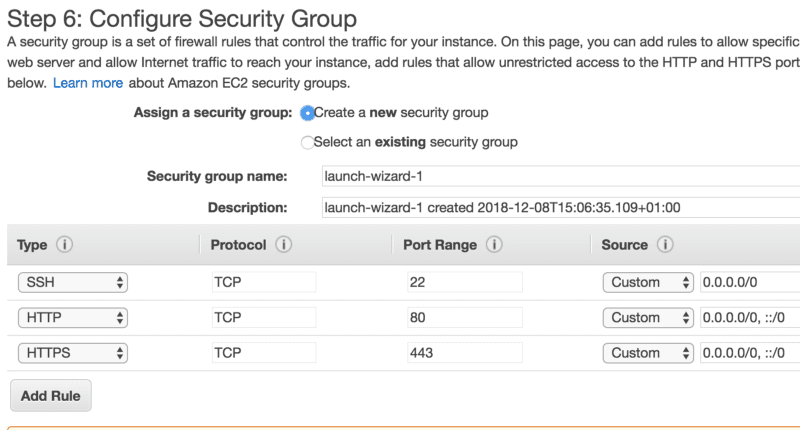
Once that’s done, click on the Review and Launch button.
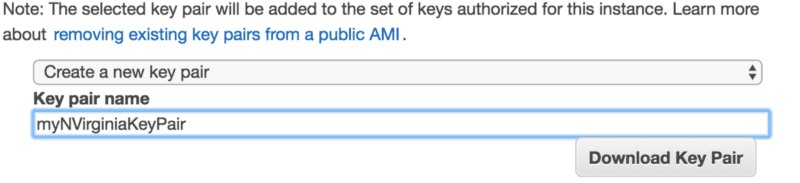
Now Launch the instance. You will be prompted to select or create a new key pair. Select “Create a new key pair” and name it myNVirginiaKeyPair. Once this is done, download the key pair(make sure you do). Will will be using the downloaded key pair to SSH into our instance shortly.
Click on Launch Instances and wait for the instance to launch then click the View Instances button on the bottom right.

Launching our Amazon RDS Database
Amazon RDS is a relational database service in AWS that enables you to launch fully-managed, relational databases such as MySQL, Oracle, Amazon Aurora (High performance and available MySQL), PostgreSQL, MariaDB and Microsoft SQL Server.
We will create a MySQL database in RDS before installing Laravel on our EC2 instance. This will give us the needed database endpoints to configure the Laravel web app with.
Navigate to the RDS Page and click on the Create Database button

Select the MySQL engine and click Next. Select the Dev/Test use case which keeps us within the RDS Free Usage Tier.
The next section is where we will specify the Database details. Select the t2.micro DB instance type, then scroll down to the Settings row at the bottom.
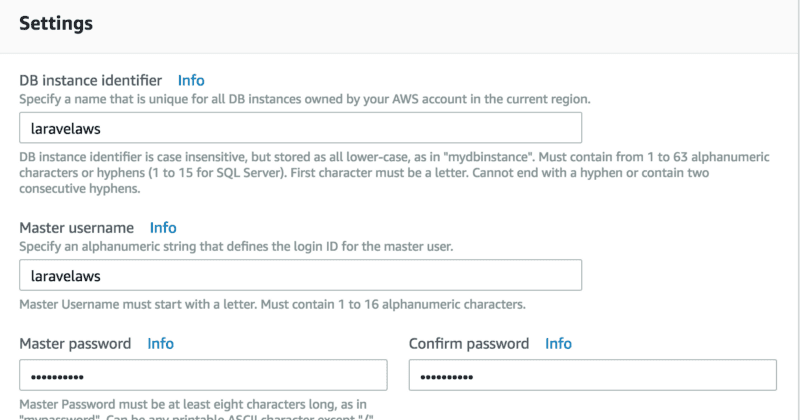
Set the DB instance identifier, the Master username, the Master Password and the Confirm Password to laravelaws. You can use any value within the defined constraints but we will stick to laravelaws for the sake of simplicity.
Click on the Next button and you will be taken to the 4th section where we will configure advanced settings.
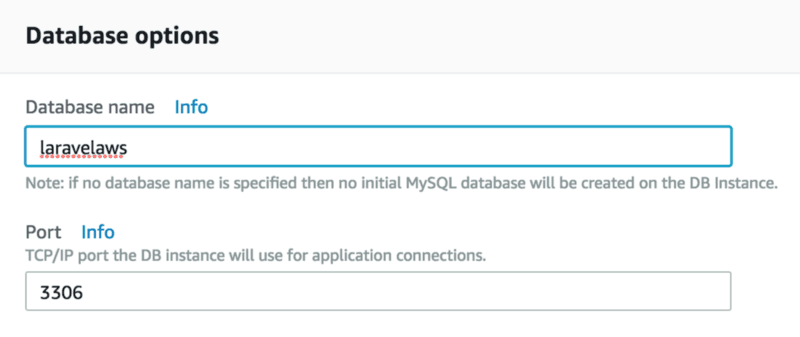
Scroll down to the Database options row where we will set the Database name to laravelaws also. Leave every other parameter as is and click the Create database button at the bottom. Now RDS will begin the instantiation of our MySQL database. This may take a few minutes. We will come back to get the generated endpoint with which we will connect the Laravel Web App to our MySQL database, through the internet.
Remember: Amazon RDS is a fully-managed service, thus SSH access to our MySQL database is prohibited. Amazon RDS takes care of OS patching, upgrading, automated backups and other database administrative processes for you.
The last thing we need to do is create a Security Group that will allow traffic through port 3306 to our MySQL database.
Navigate to Security Groups under Network & Security on the EC2 dashboard and click the Create Security Group button
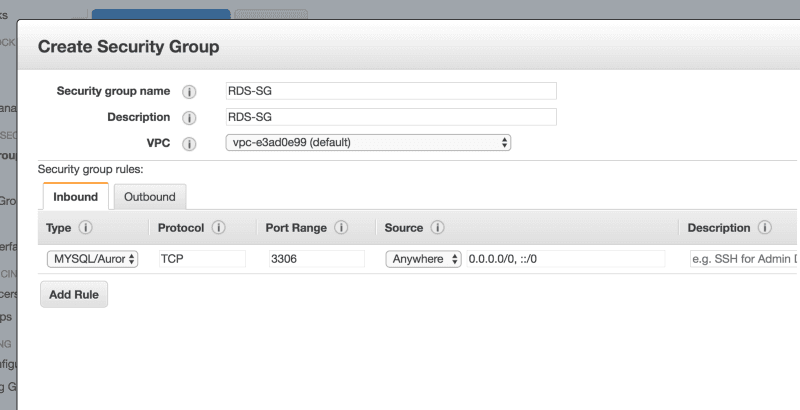
We will name the Security Group RDS-SG. Then add a MYSQL/Aurora rule that opens port 3306 access. Select Anywhere as source, then click Create.
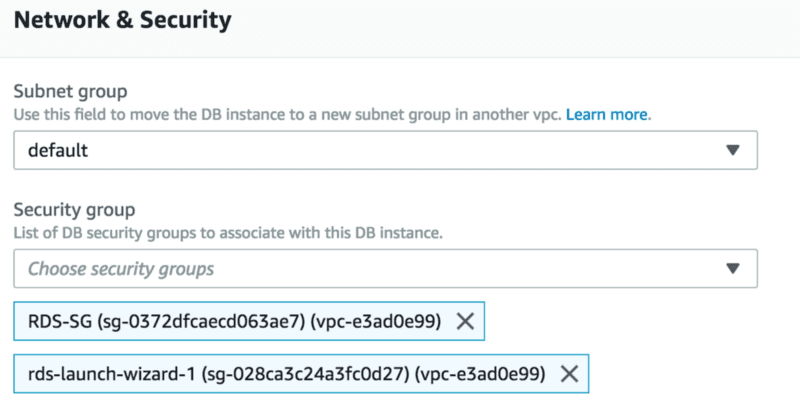
Once this is done, head back to the Amazon RDS dashboard, select the laravelaws database and click on Modify button.
On the third row — Network & Security — click on Security Group, then add the newly created RDS-SG security group. Click Continue and then Modify DB Instance.
We can now connect to our MySQL DB instance via port 3306 with our endpoint and other DB credentials.
Connecting to the EC2 Instance via SSH
Now that the instance is started and running, we need to grab the public IP address of the instance to enable us establish an ssh connection to it, together with the key pair we downloaded earlier.
Note: If you are using a windows PC follow this guide on Connecting to Your Linux Instance from Windows Using PuTTY.
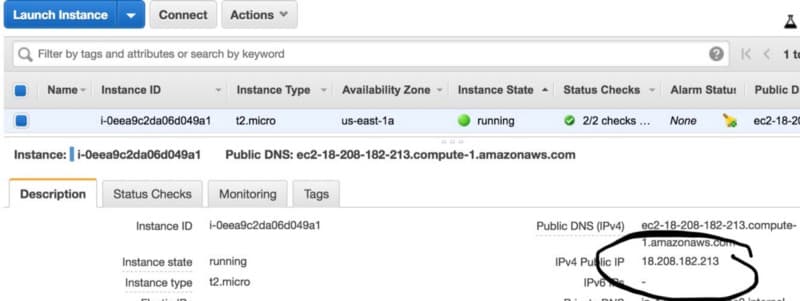
Grad the Public IP address and navigate to the downloads folder the key pair is located. Now run the command:
ssh ec2-user@your_public_IP -i myNVirginiaKeyPair.pem
Make sure you are running this command in the folder that contains the myNVirginiaKeyPair.pem we downloaded earlier.
If all goes well, you should be prompted with the question Are you sure you want to continue connecting (yes/no)? , type yes and hit enter.
If you get any unprotected private key file warning, run the command
chmod 400 myNVirginiaKeyPair.pem
this will protect the myNVirginiaKeyPair.pem file against accidental overwriting. Now attempt the ssh connection again.
Yaay!! we have successfully established ssh connection with our EC2 instance. We can now install needed packages via the console.
Installing Apache
Lets assume the role of a root user then upgrade system software to the latest version.
sudo su
yum update -y
Lets install Apache 2.2 and PHP 7.2 and a new version of mod_ssl
yum install httpd24 -y

yum install php72 php72-mysqlnd php72-imap php72-pecl-memcache php72-pecl-apcu php72-gd php72-mbstring -y

yum install mod24\_ssl -y
Now let’s start Apache: run the command
service httpd start
You should get an OK response.
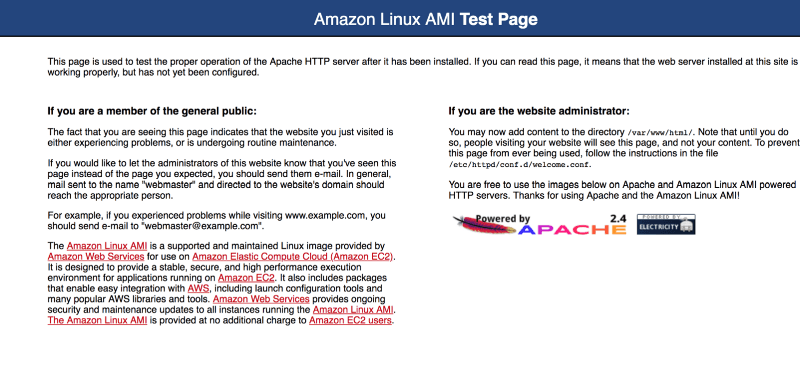
Go to your browser of choice and paste the Public IP address of the EC2 instance. You should see a test page like below.
Now that Apache server is running, we can proceed to install our Laravel Web App, but first, we need to make sure that in the event our instance is restarted, for whatever reason, that Apache will be automatically started as soon as the instance comes on. That way we wouldn’t have to ssh into the instance then starting it on the console each time. We will do this by running:
chkconfig —add httpd

chkconfig httpd on
Installing Laravel
We will install Laravel from its official Github repository. But first we need to install git on our instance.
yum install git -y
Navigate to the Apache public folder:
cd /var/www/html
We will now clone Laravel from the git repository:
git clone https://github.com/laravel/laravel.git
Now that we’ve cloned a fresh Laravel project, we need to reconfigure our Apache server to point to the Laravel directory. we will do this by copying the code below to the bottom of the /etc/httpd/conf/httpd.conf file:
nano `/etc/httpd/conf/httpd.conf`
Alias / /var/www/html/laravel/public/
<Directory "/var/www/html/laravel/public">
        AllowOverride All
        Order allow,deny
        allow from all
</Directory>
Edit the .htaccess file:
nano /var/www/html/laravel/public/.htaccess
Then add RewriteBase / just below RewriteEngine On
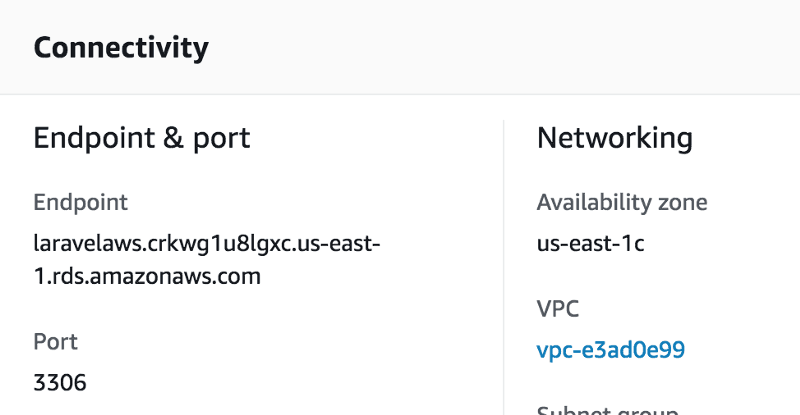
We will create a .env file and specify the MySQL database endpoint generated by RDS earlier and other credentials.
Navigate to the RDS dashboard on the AWS console and click on the laravelaws DB instance. Scroll down to Connectivity to see the Endpoint generated for the MySQL database.
NB: For those that may want to connect to the endpoint displayed below, this DB instance will be delete immediately after this tutorial.
Run the command(This copies the content of the .env.example file into a new file called .env):
cd /var/www/html/laravel
mv .env.example .env
nano .env
Paste in the code below. Make sure you substitute the DB_HOST parameter value for your generated MySQL endpoint(No http(s)://. Paste as is).
APP_NAME=Laravel
APP_ENV=local
APP_KEY=
APP_DEBUG=true
APP_URL=http://localhost

LOG_CHANNEL=stack

DB_CONNECTION=mysql
DB_HOST=<RDS ENDPOINT>
DB_PORT=3306
DB_DATABASE=laravelaws
DB_USERNAME=laravelaws
DB_PASSWORD=laravelaws

BROADCAST_DRIVER=log
CACHE_DRIVER=file
QUEUE_CONNECTION=sync
SESSION_DRIVER=database
SESSION_LIFETIME=120
Once done, press ^X, then enter y to the prompted question and hit enter.
Now we need to give Apache write access to the storage folder, else Laravel will throw a write permission error.
sudo chmod -R 777 /var/www/html/laravel/storage
Let’s restart Apache to ensure immediate effect, and then return to the laravel folder:
service httpd restart
cd /var/www/html/laravel
To install composer(make sure you’re in the laravel directory):
yum install wget -y
wget https://getcomposer.org/composer.phar
Confirm installation by running:
php composer.phar
Now that we have composer installed, we will now install all needed Laravel packages specified in the composer.json file:
php composer.phar install
Generate Application key:
php artisan key:generate
Create Authentication scaffold:
php artisan make:auth
User session will be stored on the database instead of the file on the Ec2 instance. This is because, when we eventually scale our Laravel Web App, the Load Balancer will balance traffic request across all instances. So if my session file was stored on instance 1 and my next request is directed to instance 5, instance 5 will not have access to my session file on instance 1, thus it will ask that i re-authenticate myself. To avoid this, we will manage user sessions on the database, since all instances are connected and have access to it. Alternatively, we can make use of Amazon Elastic Cache that offers fully managed Redis and Memcache.
Create a sessions table migration:
php artisan session:table
Now let’s run Laravel migrations:
php artisan migrate
Paste the Public IP of your instance in your browser. You should see the Laravel welcome screen:
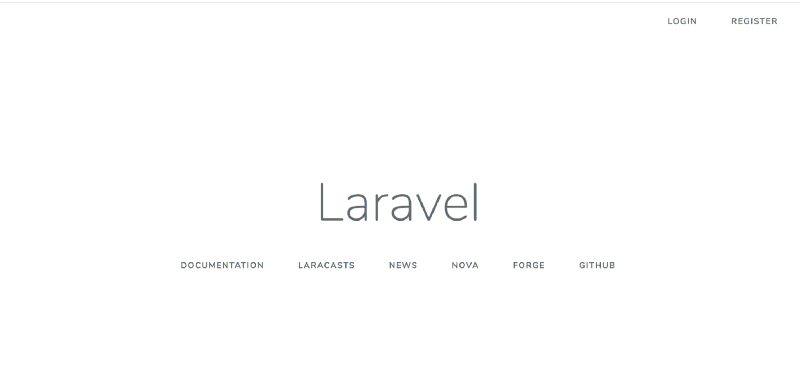
We have now successfully installed and configured Laravel on our Amazon Ec2 instance. We have also linked it to our MySQL database. You can make login and registration attempts to test the app.
Conclusion
In this article, we launched an EC2 instance and installed several packages and an Apache server on it, through an established SSH connection. Furthermore, we created a MySQL database instance on Amazon RDS and also installed a fresh Laravel application on the EC2 instance. This web application was eventually assessable on the web browser.
Here is the concluding part of this article, where we proceed to scale our Laravel Web application to enable it to handle high user traffic while maintaining availability:
Deploying and Scaling a Laravel Web App on AWS - Part 2
Also, if you are looking to deploy your dockerized Laravel application to Amazon Elastic Container Service, here’s an article that demonstrates that:
Deploy a Docker-ized Laravel Application to AWS ECS with CodeBuild
Also if you are looking to deploy your Laravel Application on Kubernetes, here’s how: