- Published on
Kubernetes CI/CD with Helm and Jenkins
- Authors

- Name
- Gbenga Oni
- @gbxnga
Learn Hand-On AWS Cloud EngineeringHERE
Introduction
In this tutorial, we will set up a continuous delivery and continuous deployment pipeline for an application running on Kubernetes, using Helm and Jenkins.
Helm is a package manager for Kubernetes. It helps you install and upgrade applications on Kubernetes. Helm uses what we call Charts to define, create, track upgrade on an application. The Charts are also sharable and reusable across any Kubernetes Cluster. Helm is a Cloud Native Computing Foundation project.
Jenkins is an open-source automation server that helps to build, test and deploy software. Jenkins is also a Cloud Native Computing Foundation project.
Learn how to setup Kubernetes CI/CD with Github Actions and Helm HERE
Requirements
1. A Kubernetes Cluster with RBAC enabled

2. Kubectl command line

3. Node and NPM

4. A Docker Hub account
Set up NodeJS Project with Express Generator
Let’s set up the application we’ll be deploying. You can skip this step if you already have a dockerized application sitting in a Github repository.
Express generator helps us to quickly bootstrap a NodeJS project.
Install Express Generator globally:
npm install -g express-generator
Set up Express project:
express --view=hbs node-k8s-cicd
This will create an express app named node-k8s-cicd in the current directory, in a folder named node-k8s-cicd.
Navigate to the node-k8s-cicd directory and install npm dependencies:
cd `node-k8s-cicd &&` npm install
Create a Dockerfile
Create a Dockerfile in the root folder:
touch Dockerfile
FROM node:10

WORKDIR /srv/app

COPY . /srv/app

RUN npm install
RUN npm install -g jest

EXPOSE 3000
EXPOSE 80

CMD ["npm", "start"]
Copy and paste the above into the Dockerfile in the project root folder.
Create Jenkinsfile
Let's create a dummy Jenkinsfile that defines a pipeline with three stages. The pipeline does nothing other than echoing texts at each stage. This will ensure the pipeline doesn't fail at first build as it needs a Jenkinsfile to run against. We will go ahead to modify this file later in the article.
touch Jenkinsfile
pipeline {
    agent any
    stages {
        stage('Build') {
            steps {
                sh "echo 'building..'"
            }
        }
        stage('Test'){
            steps {
                sh "echo 'Testing...'"
            }
        }
        stage('Deploy') {
            steps {
                sh "echo 'Deploying...'"
            }
        }
    }
}
Set up a git repository
we need to set up a Github repository for the app. A repository is the first phase (Source) in a CI/CD Pipeline.
git init

git add .

git commit -m "first commit"

git remote add origin YOUR_REPO_URL

git push origin master
Install Helm
First, verify that kubectl is well connected. If there are no errors, then you’re connected to the cluster.
kubectl cluster-info
For Mac users, you can install Helm using Homebrew(Note that we are installing version 2 of Helm):
brew install kubernetes-helm@2
Install Tiller
Tiller runs in the Kubernetes Cluster and receives commands from Helm while communicating those commands directly to the Kubernetes API.
We create a ServiceAccount named helm-tiller in the kube-system namespace, then we give it the role of the cluster-admin. This is like an admin/super-user role that gives it access to resources across all namespaces in the cluster.
This can be created through the YAML definition file:
apiVersion: v1
kind: ServiceAccount
metadata:
  name: helm-tiller
  namespace: kube-system
---
apiVersion: rbac.authorization.k8s.io/v1beta1
kind: ClusterRoleBinding
metadata:
  name: helm-tiller
roleRef:
  apiGroup: rbac.authorization.k8s.io
  kind: ClusterRole
  name: cluster-admin
subjects:
  - kind: ServiceAccount
    name: helm-tiller
    namespace: kube-system
kubectl create -f helm-tiller.yaml
If you prefer the command line way of doing this:
kubectl -n kube-system create serviceaccount helm-tiller

kubectl create clusterrolebinding helm-tiller --clusterrole cluster-admin --serviceaccount=kube-system:helm-tiller
Initialize Helm
Initialize the Helm command-line tool:
helm init --service-account helm-tiller
This will initialize Helm and also set up Tiller on the cluster.

You can list the pods in the kube-system namespace to verify that Tiller is running:
kubectl get pods --namespace kube-system
Install Jenkins on Kubernetes with Helm
Search at Helm Hub
helm search jenkins

helm install --name jenkins-ci --set master.adminPassword=mypassword,master.serviceType=LoadBalancer stable/jenkins
The --set tag sets the admin password asmypassword. This will be used to login to Jenkins on first access. It also sets the serviceType to LoadBalancer; this means a load balancer will be provisioned to enable us to access Jenkins externally, usually through a DNS name. Read more about the Chart and the various configuration options you can set for your release here.
kubectl get pods

kubectl get services

Copy out the load balancer link and paste it in your browser tab. Don’t forget to add the 8080 port.
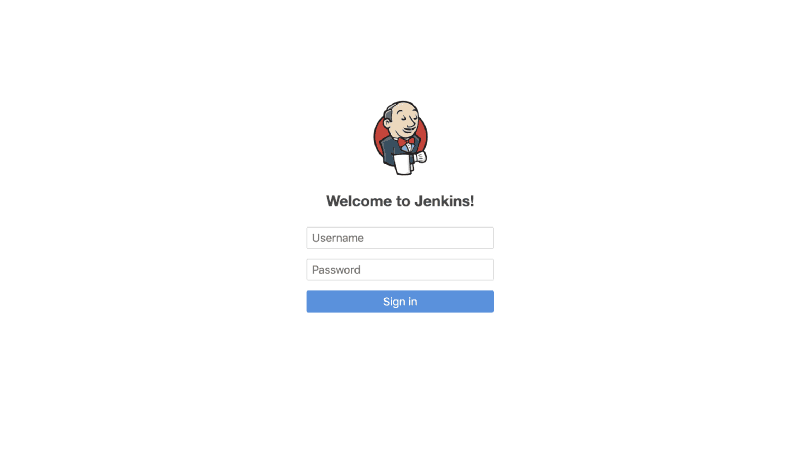
Now that Jenkins is running, we can now login using the credentials initially provided. User admin as the username, mypassword as the password.
Install BlueOcean CI on Jenkins
Navigate to Manage Jenkins on the menu, then go to Manage Plugins. Click on the “Available” tab. Search for blue ocean on the filter search bar.
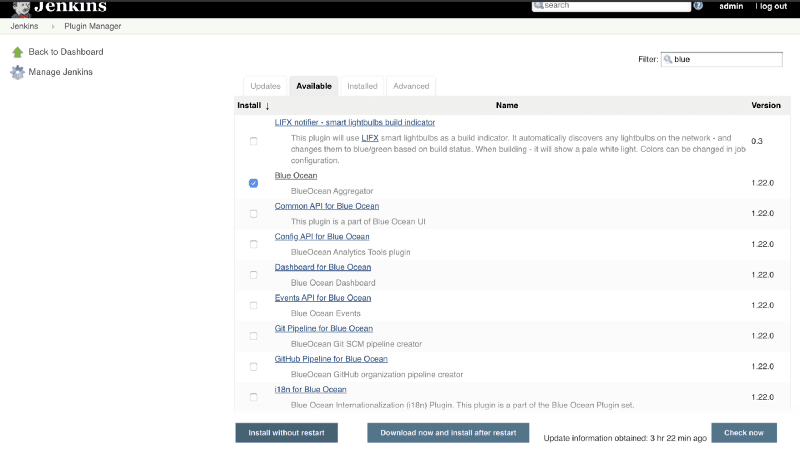
Check the Blue Ocean plugin and click install. When the installation is complete, go back to the homepage. You should find the Open Blue Ocean link on the menu.
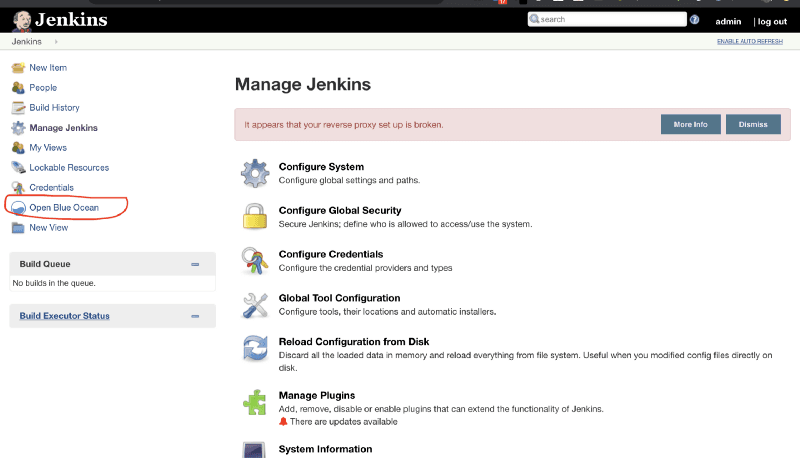
Click on Open Blue Ocean link:
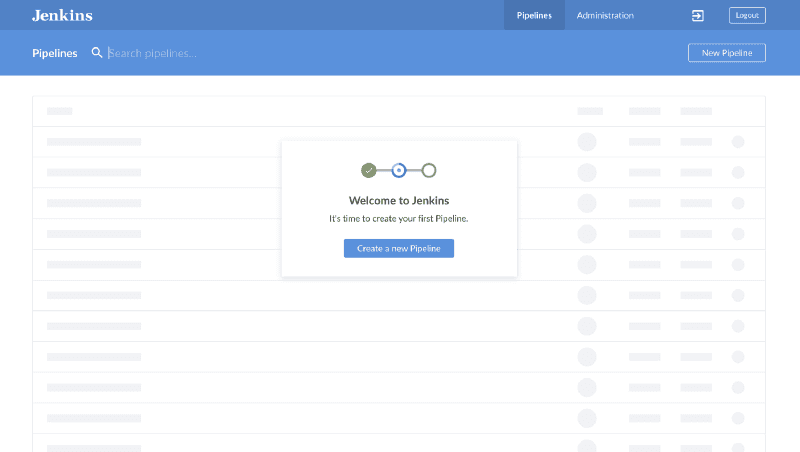
Create a Jenkins Pipeline
Click on the Create Pipeline button. Select Github as source code store:
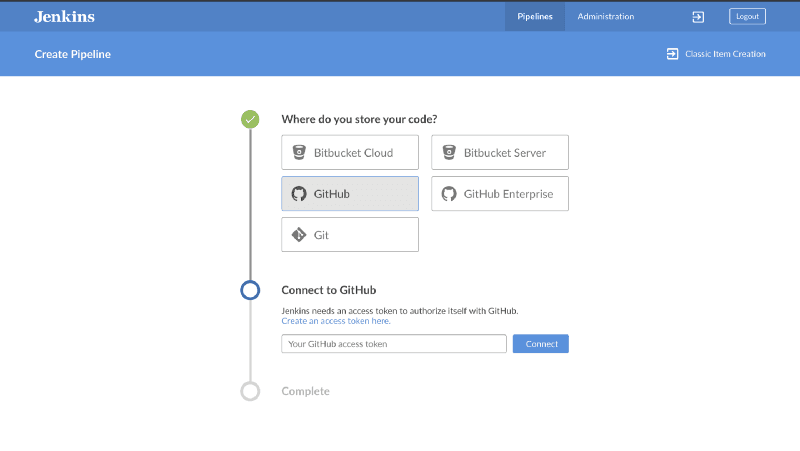
You will be asked to provide an access token to your Github account. Click on the “Create an access token here” link that takes you to Github, provide your password and proceed to create the token.
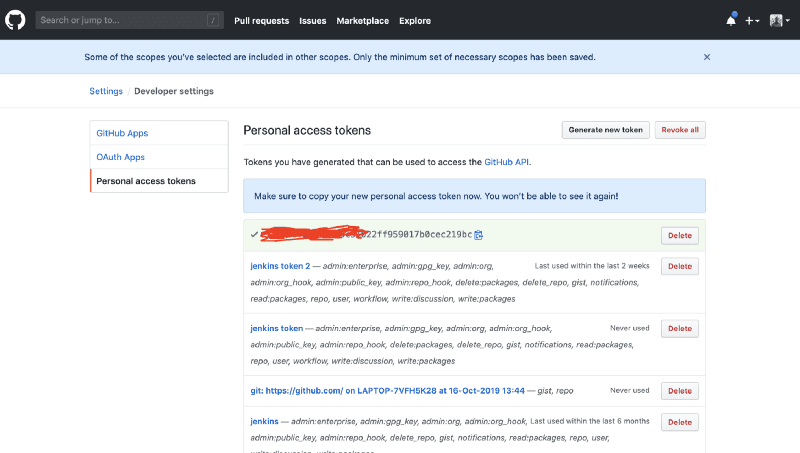
Copy the access token that was created and return to Jenkins. Paste it in the form and proceed.
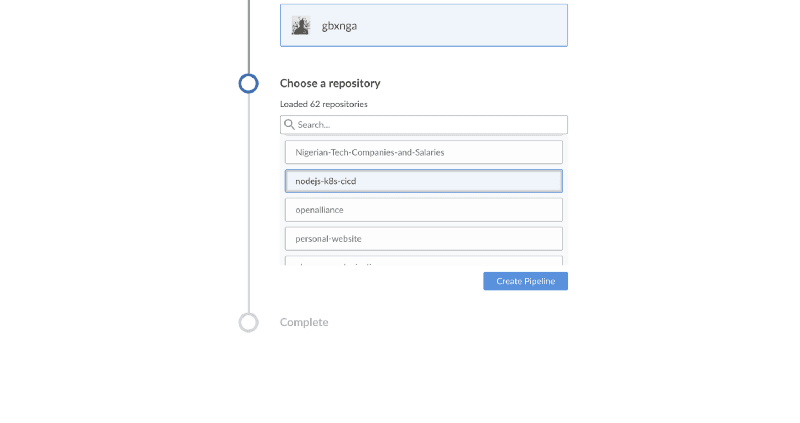
Select your Github account/organization, choose the repository you created earlier, or another if your publishing your existing application. Then click Create Pipeline.
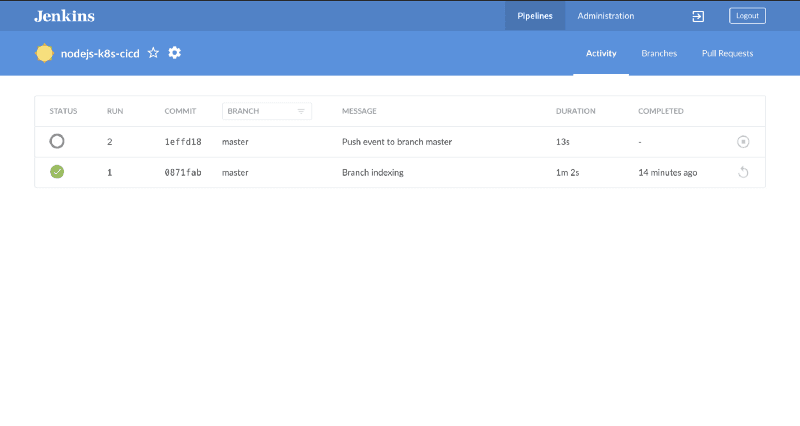
The Pipeline will now be created. Wait for some seconds and it takes you to a page showing a list of pipelines on Jenkins. Click on the newly created pipeline and you’d be taken to a more detailed page.
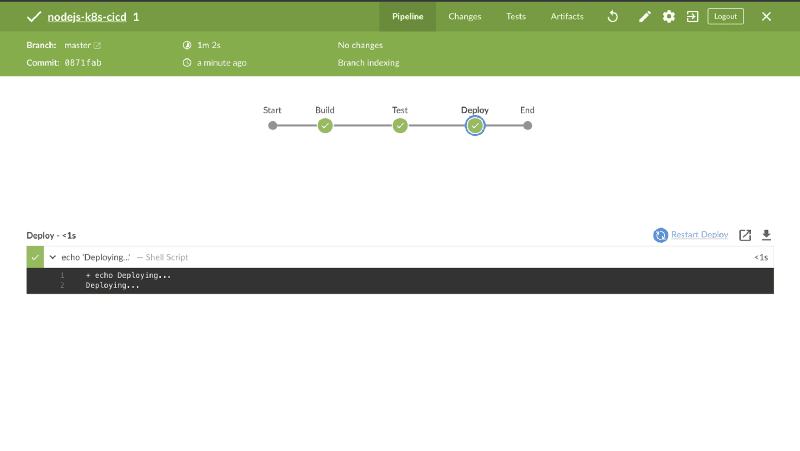
The pipeline has now successfully run.
Add Github Webhook
Now that the pipeline has been successfully created, we need Jenkins to be able to run a new job as soon as updates are made to the Github repository.
To implement this, create a Webhook to notify Jenkins each time an update is pushed to the repository.
Navigate to your Repository on Github. Click Settings then Add Webhook.
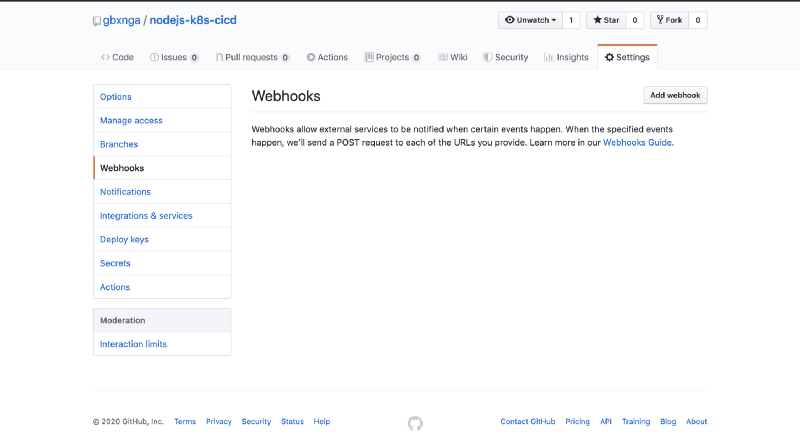
You will be presented with a form. In the Payload URL add:
YOUR_LOAD_BALANCER_URL:8080/github-webhook/
Be sure to add the 8080 port and that your URL ends with a slash /. Select application/json as Content-Type. Once this is done, leave every other option as is the click the Add Webhook button at the bottom.
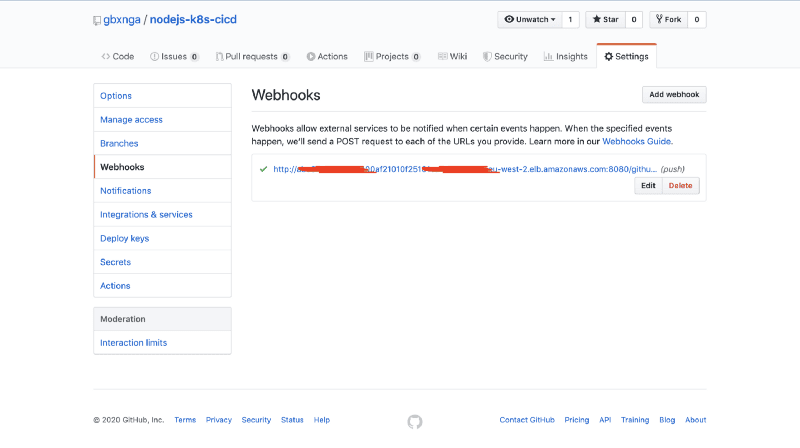
You can confirm Github successfully sent a ping to your Jenkins server by checking the Jenkins Pod logs:
kubectl logs $(kubectl get po | grep jenkins | awk '{print $1}')
2020-00-00 11:13:27.891+0000 \[id=13\] INFO o.j.p.g.w.s.PingGHEventSubscriber#onEvent: PING webhook received from repo <[https://github.com/gbxnga/nodejs-k8s-cicd](https://github.com/gbxnga/nodejs-k8s-cicd)\>!
Let's test the hook. Update the Jenkinsfile we created earlier; add an additional shell command to the Deploy stage. Once this is done, push the update to the Github repository.
stage('Deploy') {

   steps {

      sh "echo 'Deploying...'"

      sh "echo 'Deploying 2...'"

   }

}
Jenkins has now successfully picked up the changes to the repository due to PushEvent received through the webhook.
You can check the container logs to verify the PushEvent was received:
kubectl logs $(kubectl get po | grep jenkins | awk '{print $1}')
2020-00-00 11:20:07.676+0000 \[id=16\] INFO o.j.p.g.w.s.DefaultPushGHEventSubscriber#onEvent: Received PushEvent for [https://github.com/gbxnga/nodejs-k8s-cicd](https://github.com/gbxnga/nodejs-k8s-cicd) from 100.96.6.1 ⇒ [http://**xxxxXXXXXXxxX**4100af21010f25161ca-**XXXXXXXXX**.eu-west-2.elb.amazonaws.com:8080/github-webhook/](http://abc67355dbf1a4100af21010f25161ca-183261894.eu-west-2.elb.amazonaws.com:8080/github-webhook/)
Update Jenkinsfile
We will update the Jenkinsfile Build, Test, Push(Docker Hub) and Deploy the container to the Kubernetes Cluster.
Add PodTemplate
With the Jenkins Kubernetes Plugin, we have the ability to provision dynamic agents. The plugin enables the provision of a slave agent, a Pod whose template is defined in the Jenkinsfile.
The PodTemplate defines the label, service account and the containers to be provisioned in the Pod.
We will provision 3 containers in the Pod:
1. Docker Container: To build and push the docker image.
2. Kubectl Container: For access to the Kubernetes CLI
3. Helm Container: To access the Helm CLI
We will also mount the helm path on the host to the helm container.
podTemplate(label: 'mypod', serviceAccount: 'jenkins-ci', containers: [
    containerTemplate(
      name: 'docker',
      image: 'docker',
      command: 'cat',
      resourceRequestCpu: '100m',
      resourceLimitCpu: '300m',
      resourceRequestMemory: '300Mi',
      resourceLimitMemory: '500Mi',
      ttyEnabled: true
    ),
    containerTemplate(
      name: 'kubectl',
      image: 'amaceog/kubectl',
      resourceRequestCpu: '100m',
      resourceLimitCpu: '300m',
      resourceRequestMemory: '300Mi',
      resourceLimitMemory: '500Mi',
      ttyEnabled: true,
      command: 'cat'
    ),
    containerTemplate(
      name: 'helm',
      image: 'alpine/helm:2.14.0',
      resourceRequestCpu: '100m',
      resourceLimitCpu: '300m',
      resourceRequestMemory: '300Mi',
      resourceLimitMemory: '500Mi',
      ttyEnabled: true,
      command: 'cat'
    )
  ],

  volumes: [
    hostPathVolume(mountPath: '/var/run/docker.sock', hostPath: '/var/run/docker.sock'),
    hostPathVolume(mountPath: '/usr/local/bin/helm', hostPath: '/usr/local/bin/helm')
  ]
  ) {
    node('mypod') {
        stage('Get latest version of code') {
          checkout scm
        }
        stage('Check running containers') {
            container('docker') {
                sh 'hostname'
                sh 'hostname -i'
                sh 'docker ps'
                sh 'ls'
            }
            container('kubectl') {
                sh 'kubectl get pods -n default'
            }
            container('helm') {
                sh 'helm init --client-only --skip-refresh'
                sh 'helm repo update'
            }
        }
    }
}
Copy and paste the above in the Jenkinsfile.
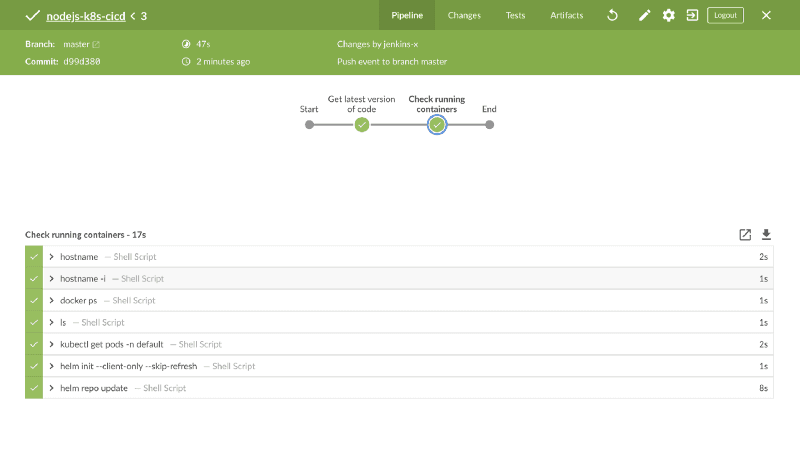
We have now updated the Jenkinsfile to:
1. Checkout the latest version of the code
2. Initialize and ensure that the 3 containers are ready for use
Add and commit the change to your repository then push to remote. Jenkins will pick up the change and run the job as defined.
Set up Docker Hub Credentials
We need to add Docker Hub credentials to Jenkins. This will enable us to push the built image to the Docker registry.
Navigate to Jenkins Homepage, Click on Credentials on the Menu. Click on Jenkins, then Global Credentials. Click on Add Credentials button on the Left Menu.
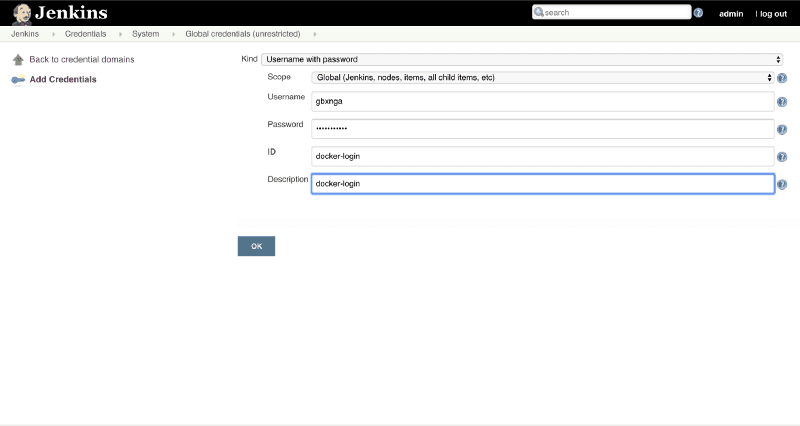
Make sure the ID name is docker-login as a reference will be made to it in the Jenkinsfile.
Click OK and save.
podTemplate(label: 'mypod', serviceAccount: 'jenkins-ci', containers: [
    containerTemplate(
      name: 'docker',
      image: 'docker',
      command: 'cat',
      resourceRequestCpu: '100m',
      resourceLimitCpu: '300m',
      resourceRequestMemory: '300Mi',
      resourceLimitMemory: '500Mi',
      ttyEnabled: true
    ),
    containerTemplate(
      name: 'kubectl',
      image: 'amaceog/kubectl',
      resourceRequestCpu: '100m',
      resourceLimitCpu: '300m',
      resourceRequestMemory: '300Mi',
      resourceLimitMemory: '500Mi',
      ttyEnabled: true,
      command: 'cat'
    ),
    containerTemplate(
      name: 'helm',
      image: 'alpine/helm:2.14.0',
      resourceRequestCpu: '100m',
      resourceLimitCpu: '300m',
      resourceRequestMemory: '300Mi',
      resourceLimitMemory: '500Mi',
      ttyEnabled: true,
      command: 'cat'
    )
  ],

  volumes: [
    hostPathVolume(mountPath: '/var/run/docker.sock', hostPath: '/var/run/docker.sock'),
    hostPathVolume(mountPath: '/usr/local/bin/helm', hostPath: '/usr/local/bin/helm')
  ]
  ) {
    node('mypod') {

        def REPOSITORY_URI = "gbxnga/foodapp-nodejs"

        stage('Get latest version of code') {
          checkout scm
        }
        stage('Check running containers') {
            container('docker') {
                sh 'hostname'
                sh 'hostname -i'
                sh 'docker ps'
                sh 'ls'
            }
            container('kubectl') {
                sh 'kubectl get pods -n default'
            }
            container('helm') {
                sh 'helm init --client-only --skip-refresh'
                sh 'helm repo update'
            }
        }

        stage('Build Image'){
            container('docker'){

              withCredentials([usernamePassword(credentialsId: 'docker-login', usernameVariable: 'USERNAME', passwordVariable: 'PASSWORD')]) {
                sh 'docker login --username="${USERNAME}" --password="${PASSWORD}"'
                sh "docker build -t ${REPOSITORY_URI}:${BUILD_NUMBER} ."
                sh 'docker image ls'
              }

            }
        }

        stage('Testing') {
            container('docker') {
              sh 'whoami'
              sh 'hostname -i'
              sh "docker run ${REPOSITORY_URI}:${BUILD_NUMBER} npm run test "
            }
        }

        stage('Push Image'){
            container('docker'){
              withCredentials([usernamePassword(credentialsId: 'docker-login', usernameVariable: 'USERNAME', passwordVariable: 'PASSWORD')]) {
                sh 'docker image ls'
                sh "docker push ${REPOSITORY_URI}:${BUILD_NUMBER}"
              }
            }
        }
    }
}
Update the Jenkinsfile as the above.
The withCredentials wrapper provides the docker-login credential username and password as variables that will be used to authenticate with the Docker registry.
Three additional stages have been added to the pipeline:
1. Build Image: Login to Docker Registry and build the Image
2. Testing: Run a Unit Test on the Application image
3. Push Image: Push the built docker image to Docker Registry
Save the Jenkinsfile and push the updated changes to the Github Repository:
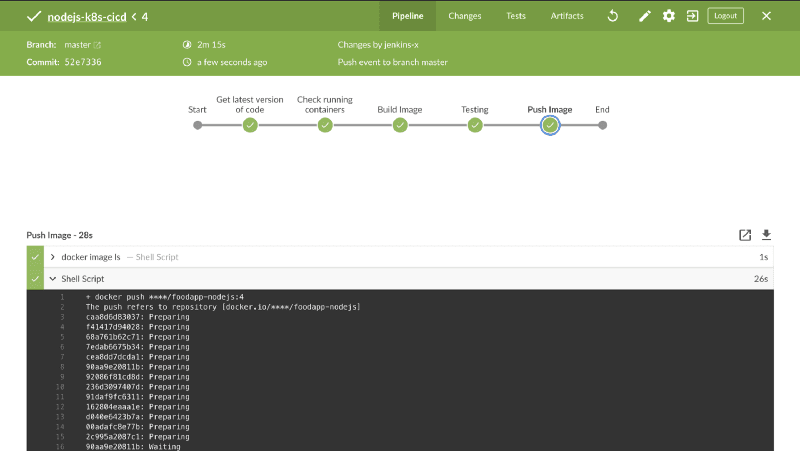
We have now successfully configured the Jenkins pipeline to Build, Test and Push the docker image.
Now we need to be able to Deploy this image to the Kubernetes Cluster. Helm will help achieve this.
Create a Helm Chart for the Application
We will create a new Helm Chart for the NodeJS Application.
Create a k8s folder in the root of the application.
cd k8s
helm create k8s/nodejs-k8s-cicd
The command creates a new chart with the name nodejs-k8s-cicd in the k8s folder. The folder structure should look something like this:
nodejs-k8s-cicd`/ ├── .helmignore # patterns to ignore when packaging Helm charts. ├── Chart.yaml # Information about your chart ├── values.yaml # The default values for your templates ├── charts/ # Charts that this chart depends on └── templates/ # The template files └── tests/ # The test files`
Edit the default values(values.yaml) for template:
replicaCount: 2

image:

   repository: gbxnga/nodejs-k8s-cicd

   tag: 7

   ....

.

.
service:

   type: LoadBalancer
Note: Make sure the tag for the image repository exists. Using tag
7as the build number for my last Jenkins buuld was7.
We have edited the default values to deploy 2 replicas of the application changed the image repository to gbxnga/nodejs-k8s-cicd (You can use your own image), with a 7 tag. The service type is also changed from ClusterIP to LoadBalancer, meaning a Load Balancer with an external URL will be deployed along with the application.
The Chart is now ready. Let's install it with helm on the terminal first.
helm install --name nodejs-app **k8s/nodejs-k8s-cicd**
The above command creates a helm release named nodejs-app using the helm chart located in the k8s/nodejs-k8s-cicd folder.
Let's get a list of applications on the cluster deployed with Helm:
helm list
Get a list of currently running pods:
kubectl get pods

Two replicas of the application has now been deployed by Helm.
Get a list of running services on the cluster:
kubectl get services
nodejs-app-nodejs-k8s-cicd LoadBalancer 100.70.193.174 **axxXXXxxxXXXX414c4a807937fe5755bcd-XXXXXXXXX.eu-west-2.elb.amazonaws.com** 80:32529/TCP 6m12s
Copy the Load Balancer external URL and paste it in your browser tab:
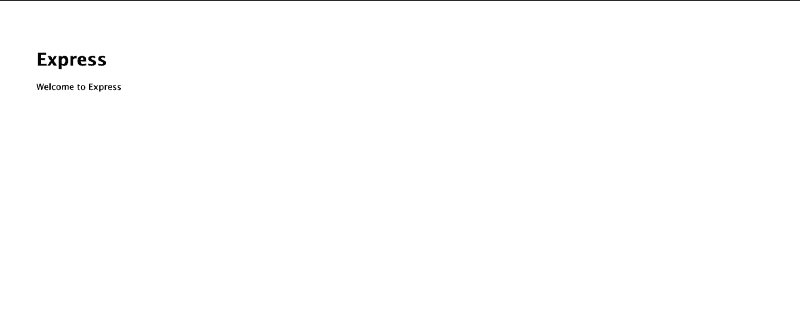
Now that the application has been installed with Helm, let's add the Deploy stage to our Jenkins pipeline.
podTemplate(label: 'mypod', serviceAccount: 'jenkins-ci', containers: [
containerTemplate(
name: 'docker',
image: 'docker',
command: 'cat',
resourceRequestCpu: '100m',
resourceLimitCpu: '300m',
resourceRequestMemory: '300Mi',
resourceLimitMemory: '500Mi',
ttyEnabled: true
),
containerTemplate(
name: 'kubectl',
image: 'amaceog/kubectl',
resourceRequestCpu: '100m',
resourceLimitCpu: '300m',
resourceRequestMemory: '300Mi',
resourceLimitMemory: '500Mi',
ttyEnabled: true,
command: 'cat'
),
containerTemplate(
name: 'helm',
image: 'alpine/helm:2.14.0',
resourceRequestCpu: '100m',
resourceLimitCpu: '300m',
resourceRequestMemory: '300Mi',
resourceLimitMemory: '500Mi',
ttyEnabled: true,
command: 'cat'
)
],
volumes: [
hostPathVolume(mountPath: '/var/run/docker.sock', hostPath: '/var/run/docker.sock'),
hostPathVolume(mountPath: '/usr/local/bin/helm', hostPath: '/usr/local/bin/helm')
]
) {
node('mypod') {
def REPOSITORY_URI = "gbxnga/nodejs-k8s-cicd"
def HELM_APP_NAME = "nodejs-app"
def HELM_CHART_DIRECTORY = "k8s/nodejs-k8s-cicd"
stage('Get latest version of code') {
checkout scm
}
stage('Check running containers') {
container('docker') {
sh 'hostname'
sh 'hostname -i'
sh 'docker ps'
sh 'ls'
}
container('kubectl') {
sh 'kubectl get pods -n default'
}
container('helm') {
sh 'helm init --client-only --skip-refresh'
sh 'helm repo update'
}
}
stage('Build Image'){
container('docker'){
withCredentials([usernamePassword(credentialsId: 'docker-login', usernameVariable: 'USERNAME', passwordVariable: 'PASSWORD')]) {
sh 'docker login --username="${USERNAME}" --password="${PASSWORD}"'
sh "docker build -t ${REPOSITORY_URI}:${BUILD_NUMBER} ."
sh 'docker image ls'
}
}
}
stage('Testing') {
container('docker') {
sh 'whoami'
sh 'hostname -i'
sh "docker run ${REPOSITORY_URI}:${BUILD_NUMBER} npm run test "
}
}
stage('Push Image'){
container('docker'){
withCredentials([usernamePassword(credentialsId: 'docker-login', usernameVariable: 'USERNAME', passwordVariable: 'PASSWORD')]) {
sh 'docker image ls'
sh "docker push ${REPOSITORY_URI}:${BUILD_NUMBER}"
}
}
}
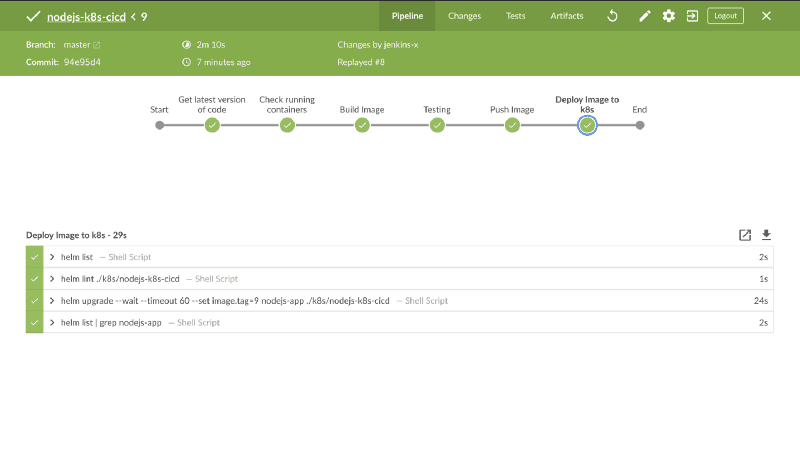
stage('Deploy Image to k8s'){
container('helm'){
sh 'helm list'
sh "helm lint ./${HELM_CHART_DIRECTORY}"
sh "helm upgrade --wait --timeout 60 --set image.tag=${BUILD_NUMBER} ${HELM_APP_NAME} ./${HELM_CHART_DIRECTORY}"
sh "helm list | grep ${HELM_APP_NAME}"
}
}
}
}
Jenkins file Update Breakdown
Lint Directive: This examines a chart for possible issues:
sh "helm lint ./${HELM\_CHART\_DIRECTORY}"
Directive to upgrade a Helm release. This directive sets the image tag to the latest build number essentially releasing the latest version of the application. The upgrade argument takes the release name and chart directory. It also waits for the deployment process to be completed; this is achieved through the --wait tag:
sh "helm upgrade --wait --timeout 60 --set image.tag=${BUILD\_NUMBER} ${HELM\_APP\_NAME} ./${HELM\_CHART\_DIRECTORY}"
Get a list of application release by Helm and filter out the nodejs-app record:
sh "helm list | grep ${HELM\_APP\_NAME}"
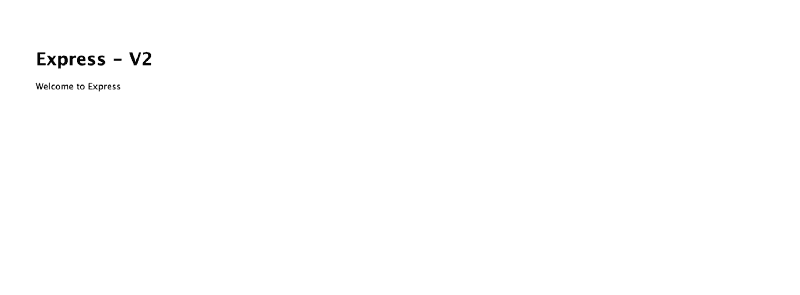
Before pushing the updated Jenkinsfile to the repository, let's edit the homepage of the application. For the NodeJS app, change the “Express” header to “Express — V2”, then push the update.
Note: If your Deployment stage fails with this error:
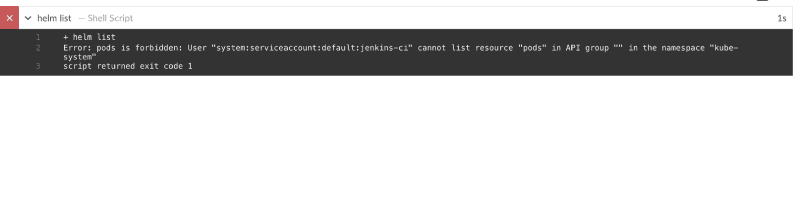
This is because the service account the Jenkins uses doesn't have some needed permissions.
Let's create a ClusterRole with the needed permission, then attach it to the jenkins-ci service account:
Create a jenkins subfolder in the k8s folder. In the jenkins folder, create a rbac.yaml file and paste the code below:
apiVersion: rbac.authorization.k8s.io/v1
kind: ClusterRoleBinding
metadata:
  name: jenkins-ci
roleRef:
  apiGroup: rbac.authorization.k8s.io
  kind: ClusterRole
  name: service-reader
subjects:
- kind: ServiceAccount
  name: jenkins-ci
  namespace: default

---

kind: ClusterRole
apiVersion: rbac.authorization.k8s.io/v1
metadata:
  namespace: kube-system
  name: service-reader
rules:
- apiGroups: [""] # "" indicates the core API group
  resources: ["services"]
  verbs: ["get", "watch", "list"]
- apiGroups: [""]
  resources: ["pods"]
  verbs: ["get", "watch", "list","create"]
- apiGroups: [""]
  resources: ["pods/portforward"]
  verbs: ["create"]
Run the kubectl command to create the resources:
kubectl apply -f k8s/jenkins
Once the resources have been created, go to the Jenkins pipeline and rerun the failed job.
Go back to the browser and refresh the external URL:
Conclusion
You have successfully completed this tutorial. You can now:
1. Install and Set up Helm with Tiller

2. Create Helm Templates

3. Deploy applications to Kubernetes with Helm
Next steps
Learn how to setup Kubernetes CI/CD with Github Actions and Helm HERE